
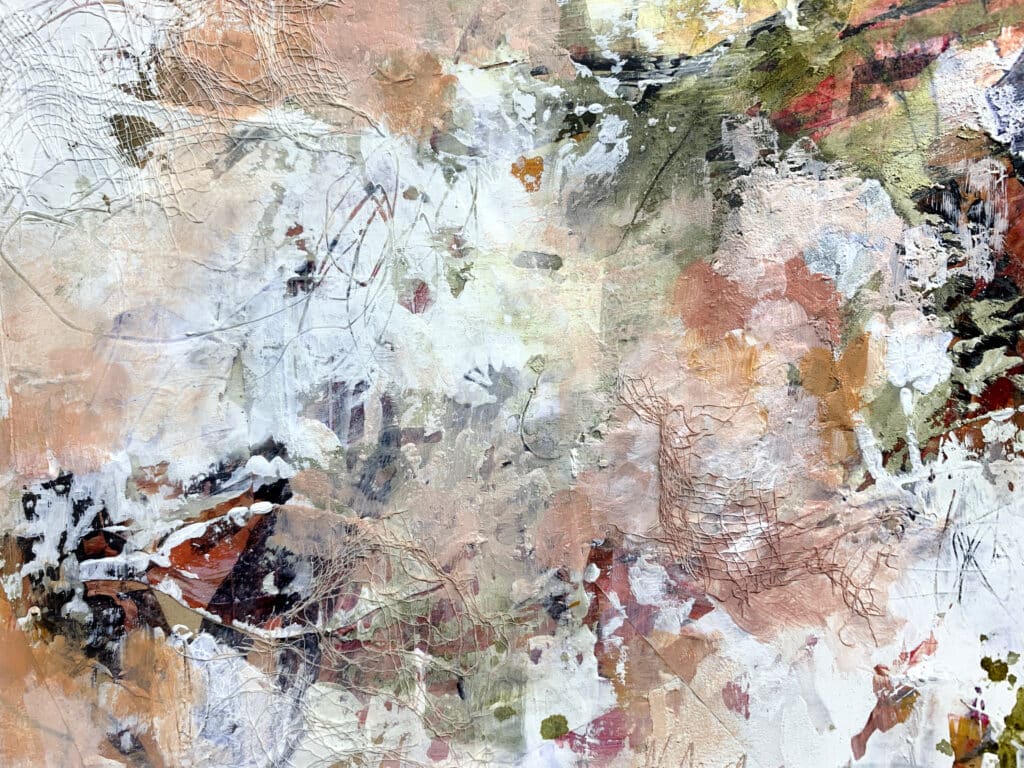
Abstract Mark Making Play – Textures is an exploration of surface, resistance, and depth. Rather than focusing on flow or movement, this practice invites you to slow down and engage with the physicality of materials—paper, paste, fabric, paint, and tools—layered one over another.
Texture here is not decorative. It carries memory.
Some marks are buried. Others push through. Each layer changes how the next one behaves.
This process is especially supportive when you feel disconnected from your work or stuck in purely visual decision-making. It brings you back into your hands, into the resistance of the surface, and into a slower, more embodied way of creating.
Think of this practice as a dialogue between you and the materials.
You make a move. The surface answers back.
Layer 1: Establishing the Foundation – Scribble & Journal
- Scribble with a Pencil
- Process: With your eyes closed, scribble freely across the surface, focusing on the feeling of your hand moving.
- Pointer: Let go of control and allow your energy to flow through the pencil. These marks are raw expressions of emotion.
- Blend with Gesso
- Process: Use a palette knife to spread gesso over parts of the scribbled lines, blending some areas and leaving others exposed.
- Pointer: Play with texture here, creating areas of softness and thickness. This sets up the groundwork for contrast later.
Layer 2: Adding Collage Elements
- Collage with Vintage Paper
- Process: Tear small pieces of neutral or vintage-colored paper, using gel medium to adhere them onto the surface.
- Pointer: Let the organic edges of the paper guide you. Place the pieces where they create interest without overthinking the layout.
Layer 3: Adding Boldness and Contrast
- Bold Strokes of Dark Paint
- Process: With a large flat brush, make bold, broad strokes using dark paint (like black or Payne’s grey).
- Pointer: Embrace the intensity of these marks. This is where contrast and strength come into play.
- Fine Details with a Small Brush
- Process: Switch to a smaller brush to create delicate lines and marks.
- Pointer: Feel the balance between strong and subtle—every emotion and mark has a place here.
Layer 4: Experiment with Acrylic Colors & Layers
- Layering with Acrylic Paint
- Process: Choose 2-3 colors and layer acrylic paint using both brushes and knives. Let some collage elements peek through.
- Pointer: This is the chaotic layer—don’t shy away from overlapping colors. Let the unexpected interactions guide you.
Layer 5: Building Texture with Paste
- Add Texture Paste
- Process: Scrape texture paste or thick gesso across the surface with a palette knife. Scratch into the wet paste to reveal earlier layers.
- Pointer: Build up the surface here, creating dimension. Some previous marks will be covered, but new textures emerge.
Layer 6: Experimenting with Tools
- Add Marks with Stencils & Tools
- Process: Experiment with stencils, ghost prints, and different tools. Scribble more with a pencil, blending into the textured areas.
- Pointer: Each tool has its own voice—layer them together to build complexity and intrigue.
Layer 7: Adding Lightness with White
- Cover with White Paint
- Process: Spread white paint over areas that feel too heavy or chaotic using a palette knife or wedge.
- Pointer: White brings clarity and space. Let it edit the chaos while allowing the previous layers to peek through.
Layer 8: Pops of Color
- Add Contrasting Color
- Process: Use a smaller brush to add pops of contrasting color across the surface.
- Pointer: This final color should breathe life into the quieter areas. Use it sparingly for the most impact.
Layer 9: Fabric Collage
- Integrate Fabric Elements
- Process: Adhere pieces of gauze, cheesecloth, or netting to the surface using matte gel medium. Once dry, lightly paint over or around the fabric.
- Pointer: The fabric adds tactile interest—let it break the flatness and create a new layer of depth.
Conclusion
As the final layers settle, the work becomes less about adding and more about listening.
White paint introduces pauses—spaces where the surface can breathe again. Pops of colour gently activate quieter areas without overpowering them. Fabric elements interrupt flatness, creating shadows, edges, and tactile shifts that invite closer looking.
By the end of this process, the painting holds a history you can feel. Some layers remain visible, others exist only as texture beneath the surface. Nothing is wasted—even what disappears contributes to the depth of the whole.
This practice reminds us that abstract painting is not only seen, but sensed.
It lives in weight, roughness, softness, and resistance.
In what’s built up.
And in what’s allowed to fall away.
Texture asks for patience.
For presence.
And for trust in the slow accumulation of marks.


