
In art, there’s a certain freedom that comes with releasing control and allowing the process to unfold naturally. Today, I want to share a technique that’s all about embracing unpredictability and letting your materials take the lead. Using gesso and color variations, you’ll create a textured, organic background that emerges on its own, without the need for precise control. This background can become a piece of collage paper, a standalone artwork, or the foundation for a new painting. Let’s dive into this liberating process.
Step 1: Embrace Imperfection with Gesso
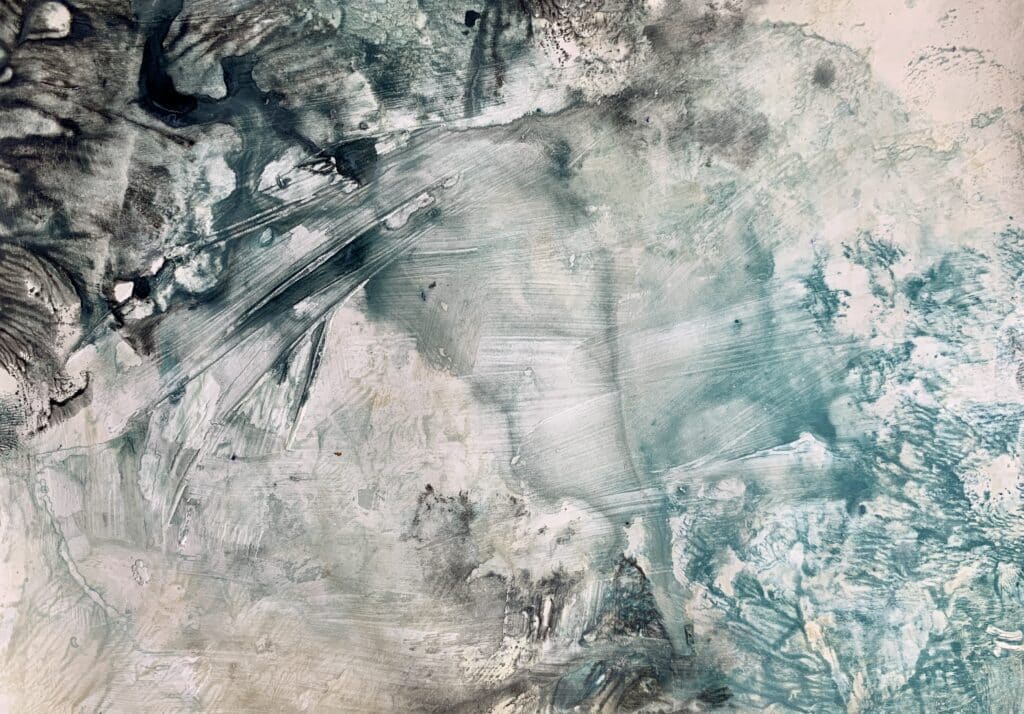
The first step is to apply gesso using a rough, old brush. This isn’t about smooth, uniform coverage—quite the opposite. You want the brush marks to be visible, creating texture and interest. Move your brush in random directions, not worrying about precision. The key here is to let go of any need for perfection. The more marks you create, the more textured and unique your background will be. Once you’re satisfied, let the gesso dry completely.
- Emotional Insight: Embrace the imperfect nature of this step. The random, textured brush marks represent a letting go of control and a celebration of spontaneity. Each mark is a step toward releasing expectations.
Step 2: Create a Soft, Abstract Base
With your gesso dry, it’s time to introduce color—but in a way that continues the theme of letting go. Choose a color that resonates with you, and mix it with white and beige to create a soft, light tone. Spread this mixture onto a palette paper with a brush, making intentional brush marks and ensuring it’s slightly watery. Then, press the palette paper onto your gessoed surface. Let the color spread and flow naturally across the textured background, allowing it to settle where it wants. This step is about embracing the organic movement of the paint, letting it create its own abstract patterns.
- Emotional Insight: This step is about letting the color flow freely, embracing the abstract patterns that emerge. It’s a practice in surrendering control and allowing the art to develop naturally. This act of surrendering to the process can be a powerful reminder that sometimes, the best outcomes happen when we simply let things be.
Step 3: Add Depth with Darker Tones
Now, introduce depth by darkening your chosen color with black. Keep some of the original light tone as well. Apply this darker mixture to another palette paper, making intentional brush marks. Once your palette paper is ready, stamp it over the previous layer. As you do, consider the composition, but don’t overthink it—let the darker tones flow naturally, creating contrast and depth. The unpredictable interaction between the dark and light colors will result in a background that’s rich in texture and complexity.
- Emotional Insight: This step continues the practice of letting go, allowing the darker tones to find their place on the page. The contrast between light and dark symbolizes the balance between control and freedom in both art and life.
Step 4: Enhance with Water
Finally, spray some water over your layered background and let the colors flow and blend further. This last step allows you to adjust the final texture and movement to your liking, creating a unique background that evolves organically.
- Emotional Insight: The addition of water symbolizes a final touch of fluidity and adaptability, allowing you to make subtle changes while still embracing the overall spontaneity of the process.
By following these steps, you’ll create a background that is not only visually captivating but also deeply connected to the process of letting go and embracing unpredictability. Each layer and mark adds a new dimension to your artwork, reflecting the natural flow and depth of your creative journey.
Whether you use this background as a collage paper, a standalone piece, or a foundation for further work, it will embody the essence of spontaneity and freedom. So, let go, enjoy the process, and watch your creation come to life.

