Who knew an ordinary cake box could become a beautifully textured handmade art journal?
In this project, I’m sharing how I transformed simple packaging into a unique cover using three layers of collage, earthy textures, and a few final embellishments. I’ll also give you a peek at the pages I’ve prepared for the inside — soft, translucent, and full of organic character.
I’ve put together a free resource library designed just for you, packed with everything you need to fuel your creativity. It’s my way of giving back to the mixed media community with resources to inspire your next project. Click here to join.
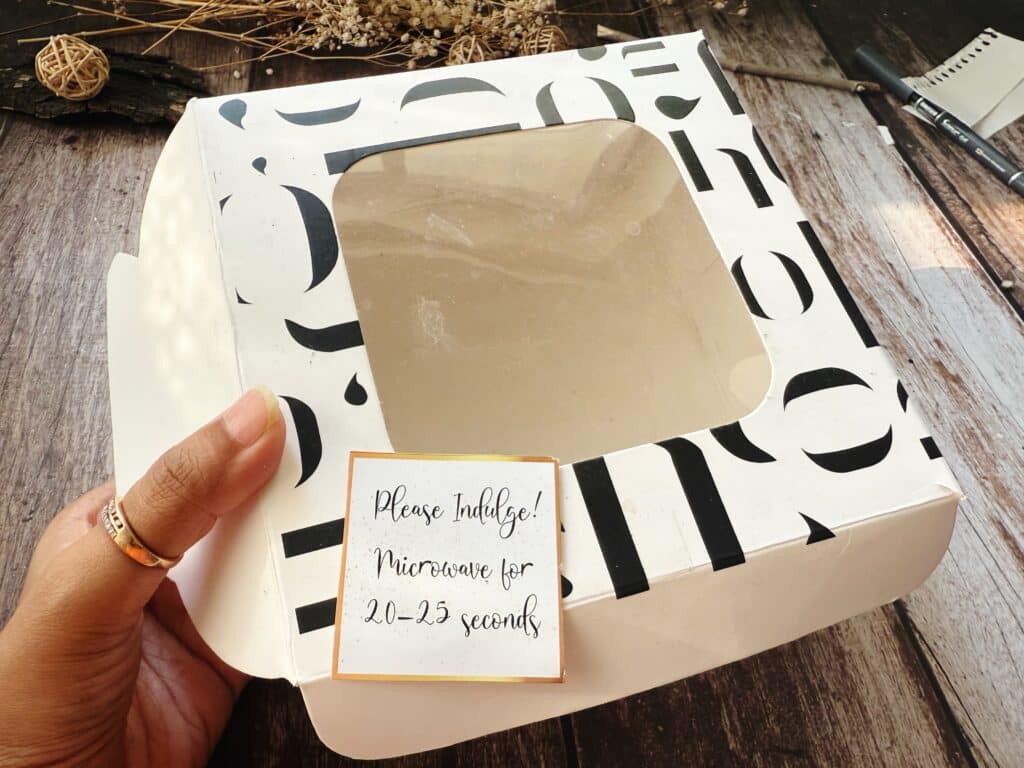
1. The Humble Beginning – A Cake Box
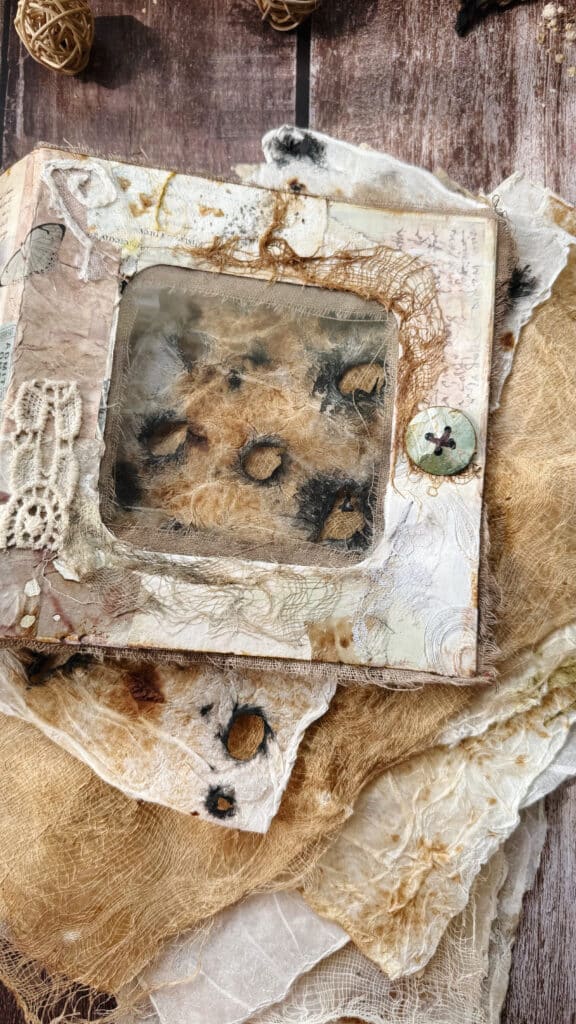
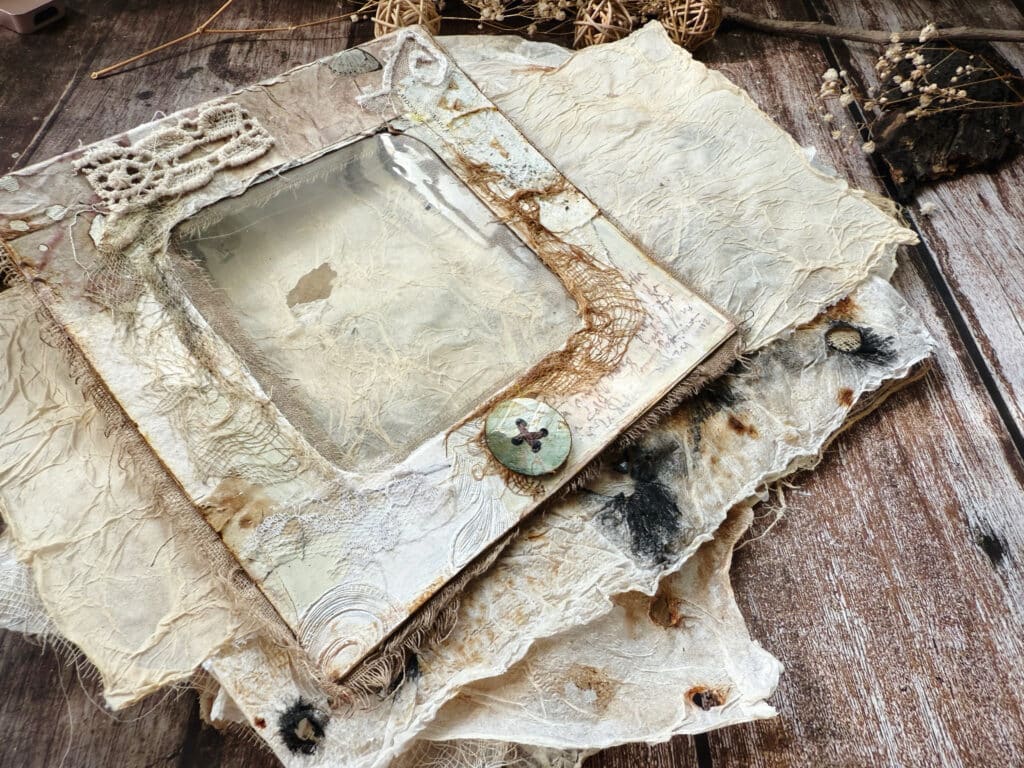
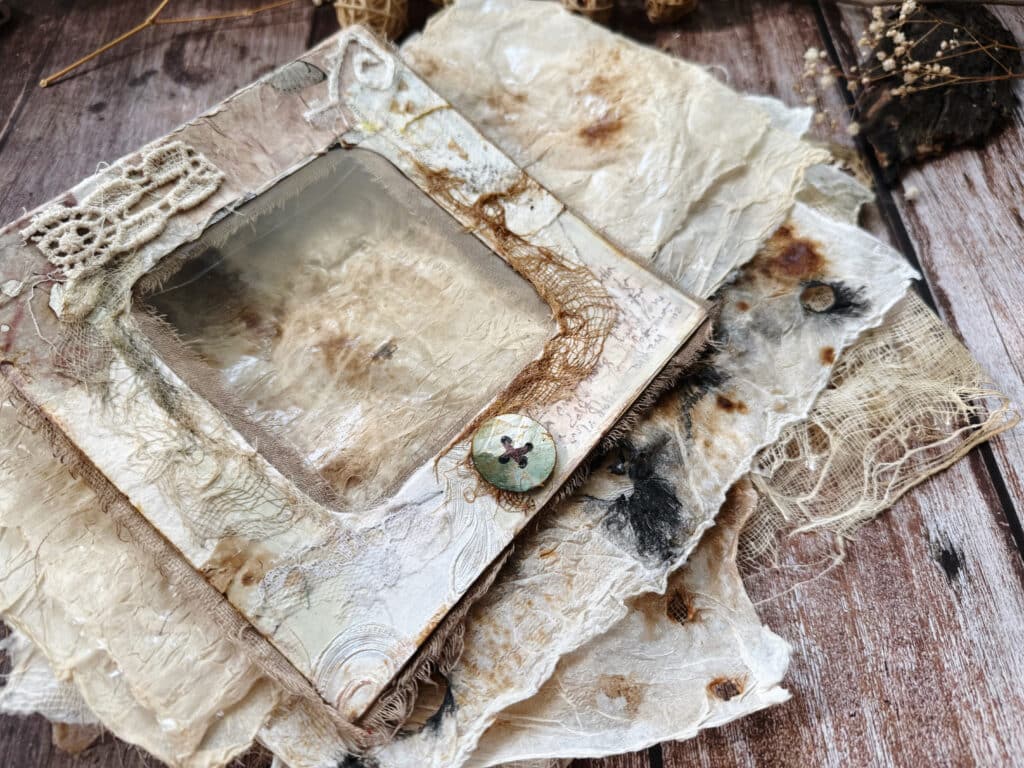
It all started with anempty cake boxI almost tossed away. Instead, I saw potential in its sturdy base and rectangular window — perfect for anart journal cover with a peek-through element.
I trimmed and cleaned the box.
The window would become the central feature, giving the journal a unique focal point.
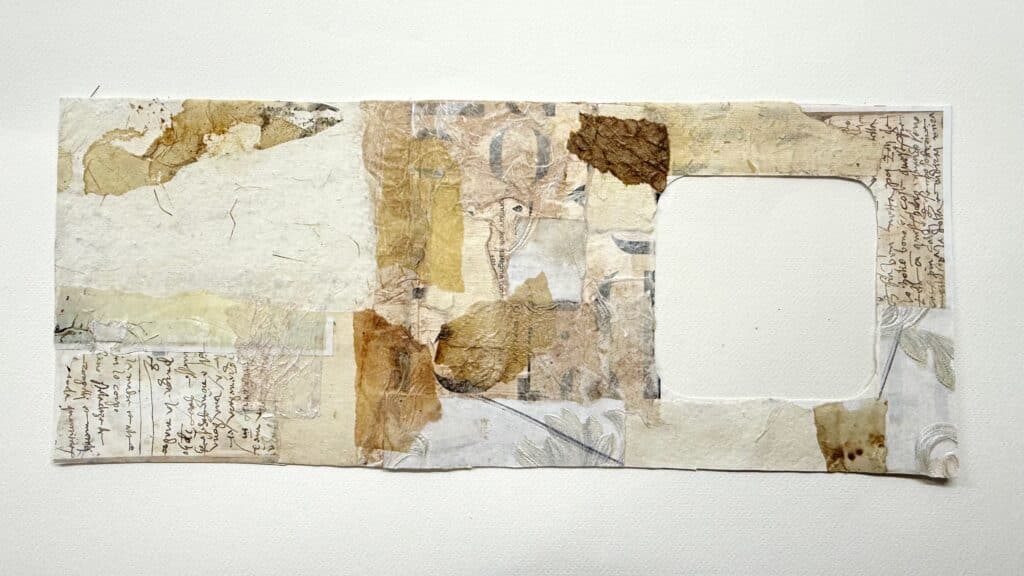
Layer One – Base Collage
The first layer sets the tone and texture.
I covered the entire surface withtorn pieces of paper— including old book pages and eco-dyed scraps.
I made sure theedges were unevento keep the rustic look.
This step gives the cover itsfoundation of textureand hides the original print of the box.
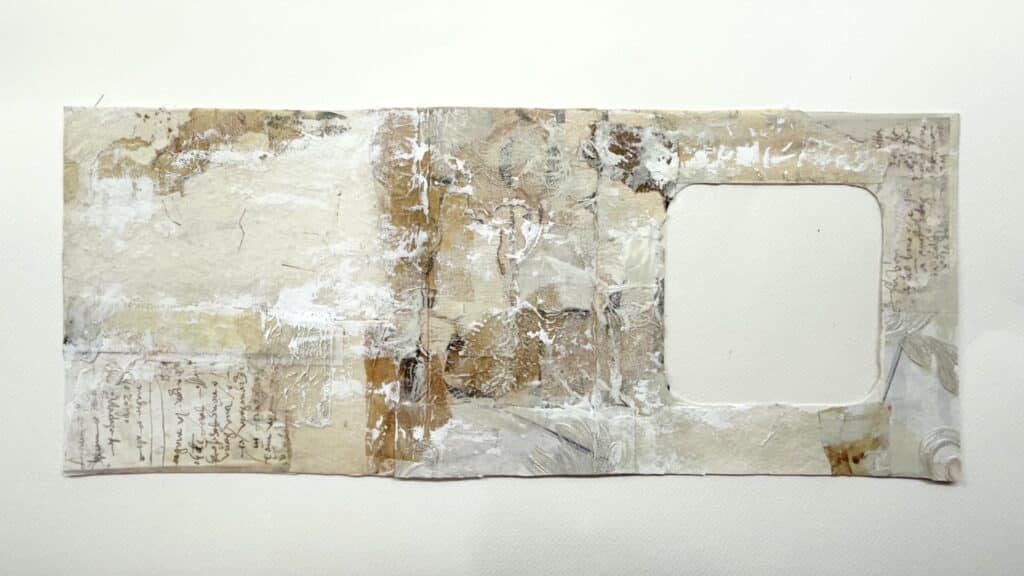
Layer Two – Paint for a Unified Look
Next, I usedmuted washes of paintto bring all the elements together.
The paint softened the contrast between different papers.
It gave the whole surface acohesive, aged effect.
This step was like creating a soft filter that ties everything into one visual story.
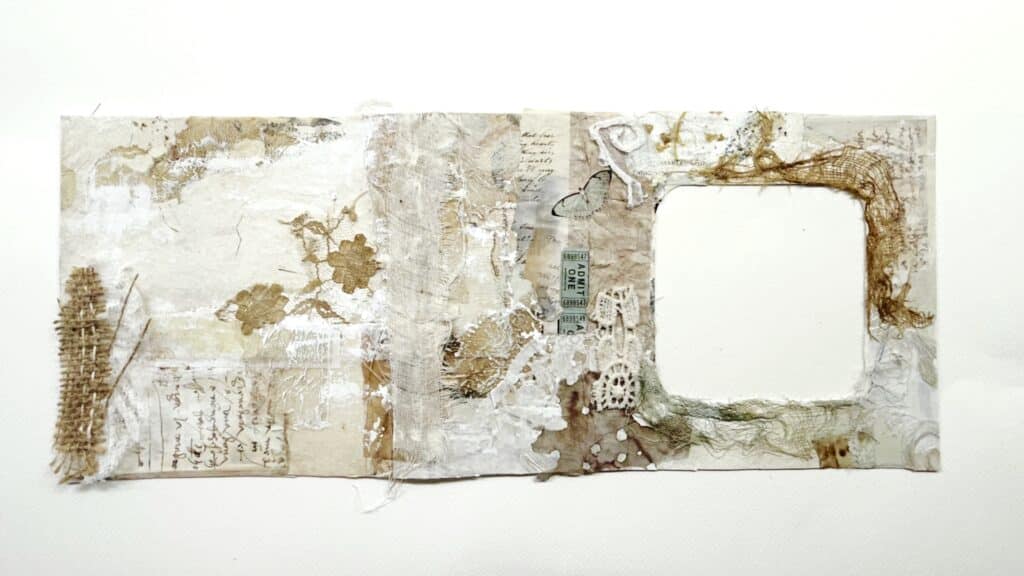
Layer Three – Fabric & Lace Accents
The final collage layer added depth and softness:
Lace trimfor delicate texture.
Cheesecloth and muslinaround the window for a grungy, organic feel.
Astatement buttonwith a little thread loop for charm and function.
This stage is where the piece really took on itsvintage, tactile personality.
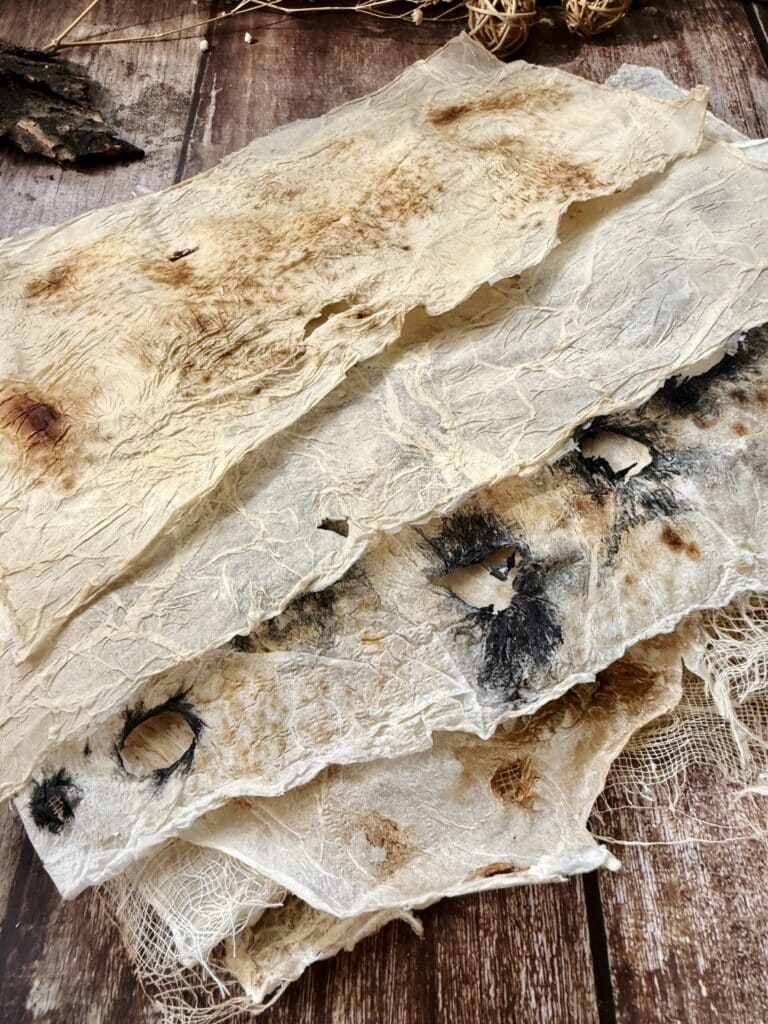
Preparing the Inside Pages
For the inside, I createdtextured translucent papersfrom tissue paper:
Layered tissue with glue for strength.
Addedstains, inks, and burned edgesfor an aged effect.
Incorporatedholes and embedded fibersfor extra character.
These pages will be perfect formixed media work, sketching, or journaling.
What’s Next
The cover is ready, and the pages are prepped — next comesbinding it all together. I plan to arrange the pages so thattextures alternatefor variety, and to use a binding style that lets the journallay flat when opened.
Once the journal is complete, I’ll be sharing another blog post with thefinished pieceso you can see how it all came together.
Final Thoughts
Turning a cake box into acustom art journalwas not only budget-friendly but also incredibly satisfying. Every layer tells a story, and the tactile experience of the cover and pages makes this journala piece of art in itself.
If you’ve got packaging lying around, don’t throw it away — it might just be the start of your next creative adventure.