Creating a handmade love book is a beautiful way to express love—whether as a Valentine’s Day gift for someone special or as a self-love affirmation for yourself.
In this tutorial, I’ll guide you step by step through the process of transforming an A3 sheet of paper into a heartfelt zine journal, using collage, paint, mark-making, and fabric embellishments.
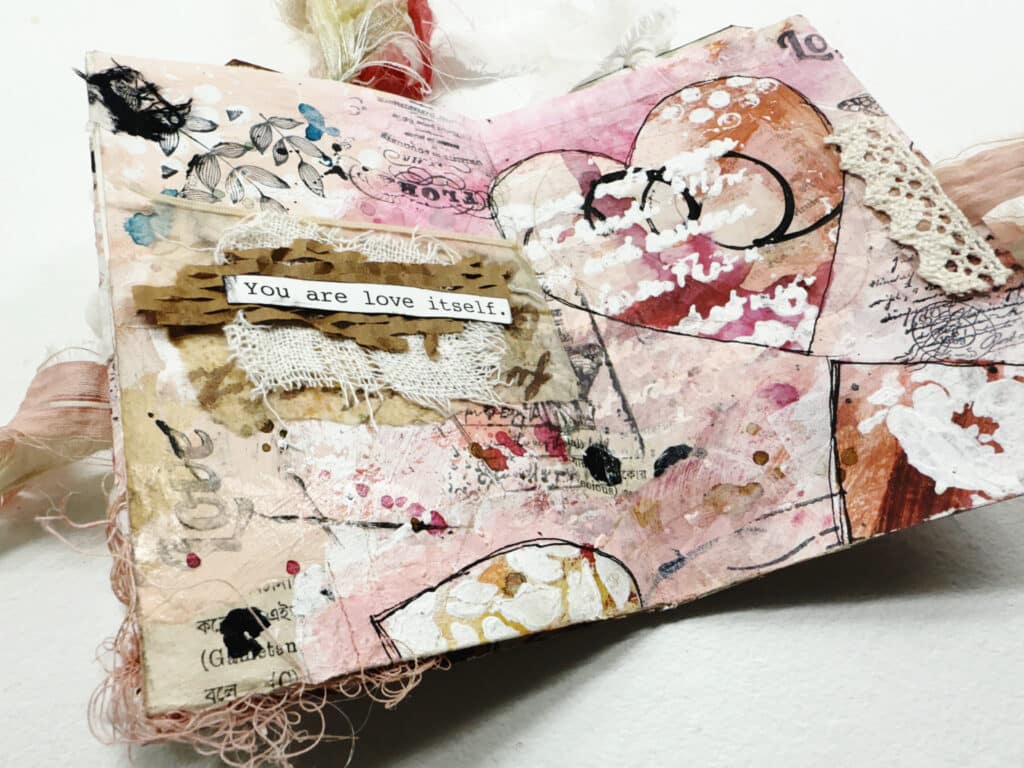
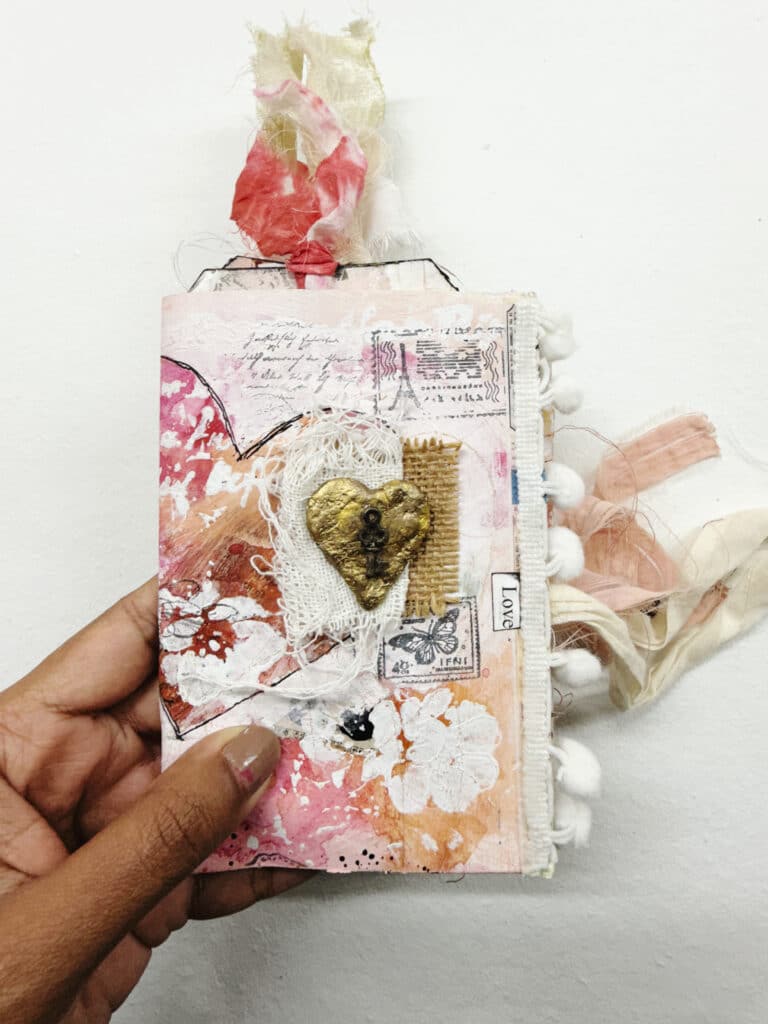
This project is layered with meaning and texture, featuring hidden pockets with handmade tags, stitched fabric scraps, and expressive love quotes. The cover design includes a handcrafted golden heart for a finishing touch.
Follow along and create your own love book—a keepsake filled with creativity and devotion.
Video:
Want to see the entire process in action? Watch my step-by-step tutorial here:
MATERIALS YOU NEED
A3 sketchbook paper
Collage materials (magazine pages, book pages, music sheets, vintage papers, etc.)
I’ve put together a free resource library designed just for you, packed with everything you need to fuel your creativity. It’s my way of giving back to the mixed media community with resources to inspire your next project. Click here to join.
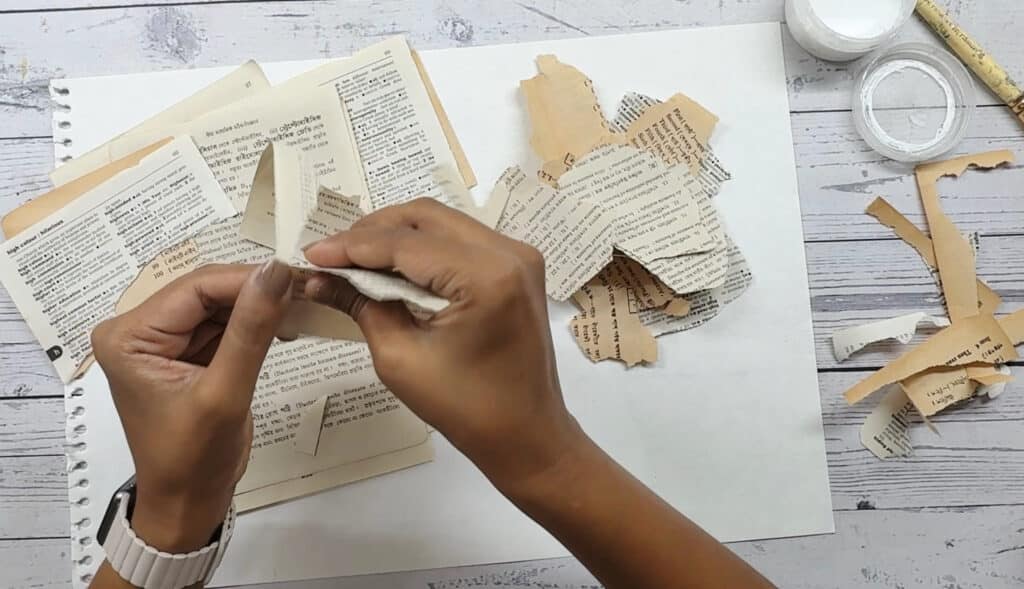
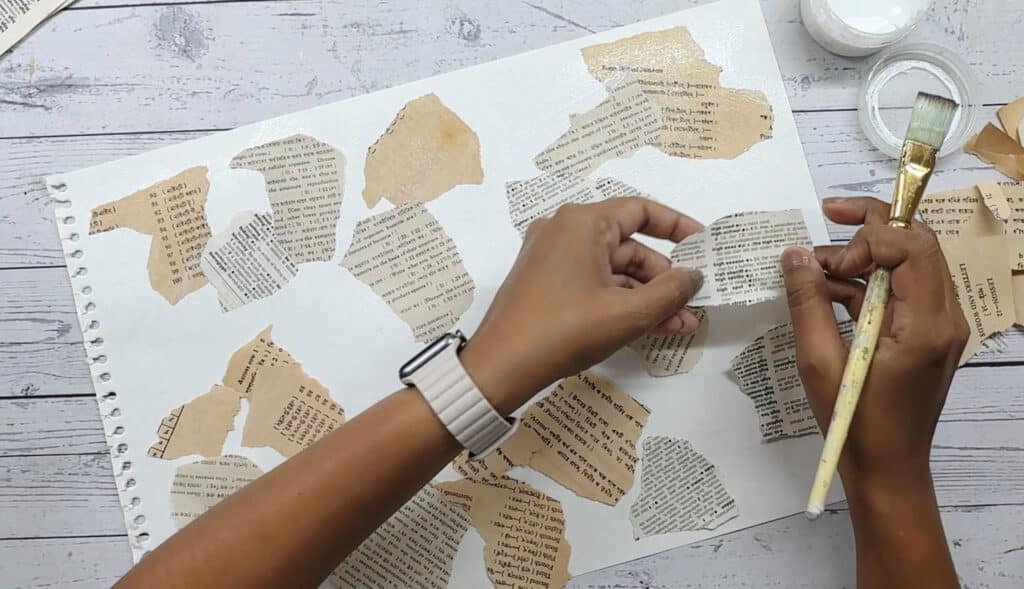
Step 1: Start with Collage
Begin with an A3 sketchbook paper as your base. Use collage materials like old book pages, music sheets, patterned paper, and vintage scraps to build the foundation of your journal. Arrange the pieces intuitively and glue them down securely. The collage will add depth and texture to your artwork.
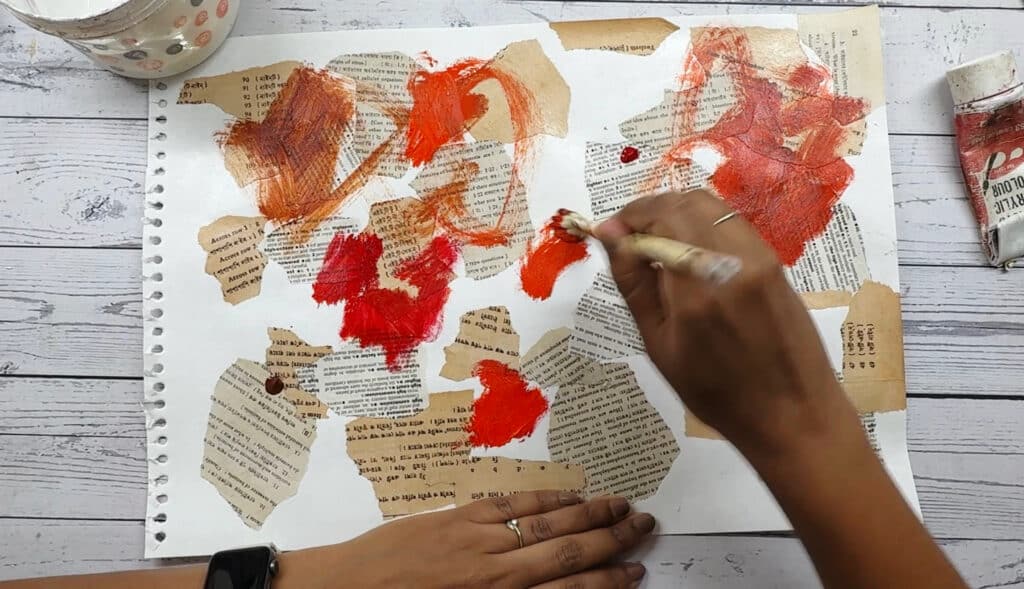
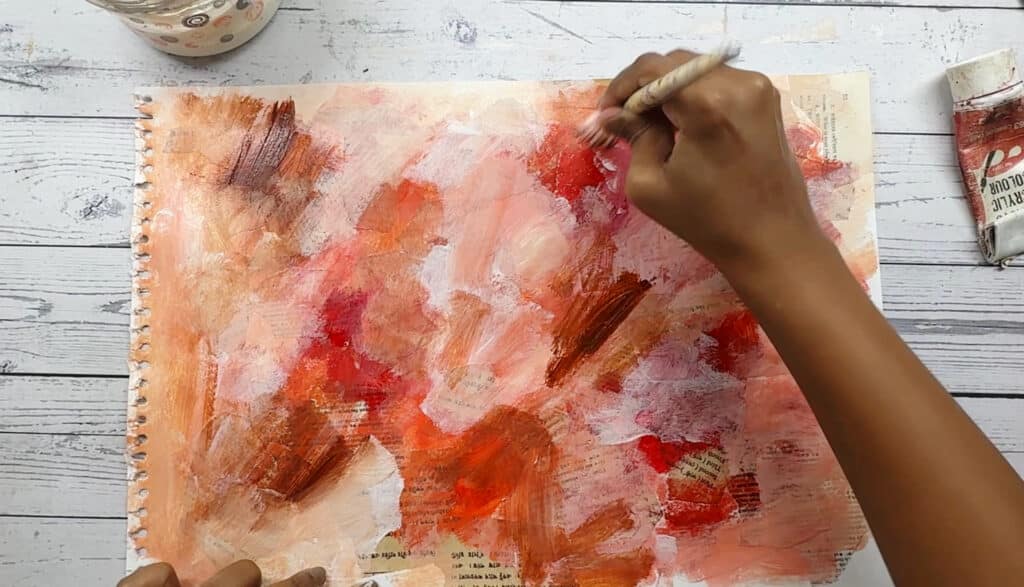
Step 2: Add a Layer of Acrylic Paint
Once the collage is dry, apply acrylic paint over it. Use a palette knife or brush to spread the paint loosely, allowing some of the collage elements to peek through. You can use soft, romantic shades or bold contrasts—whatever speaks to your vision of love.
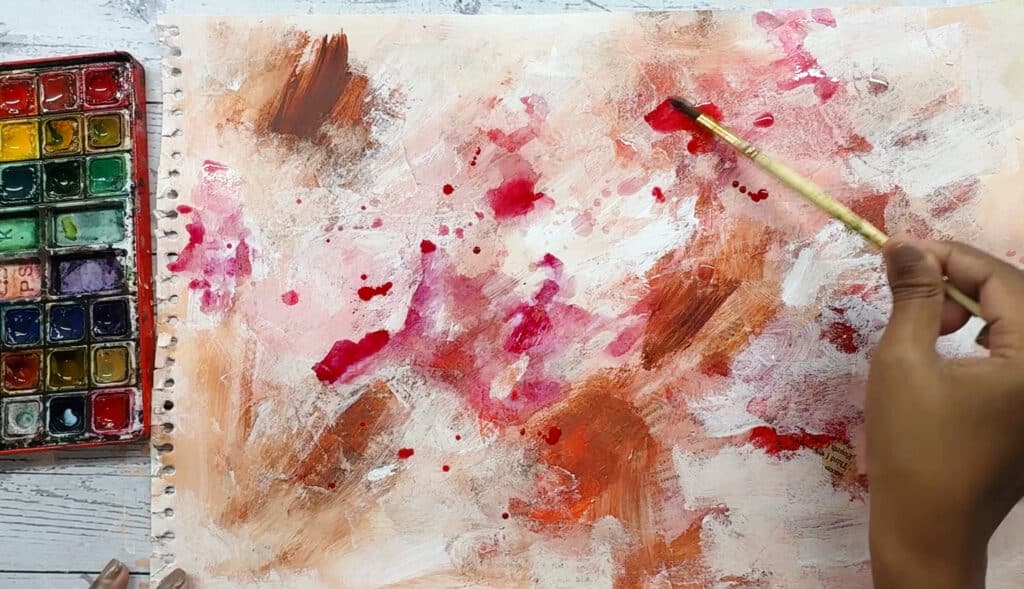
Step 3: Enhance with Watercolor
After the acrylic layer dries, apply watercolors to add fluidity and richness. Let the colors blend organically into the textured surface. Watercolors seep into the creases of the paper and reveal the layers beneath, adding depth and dimension.
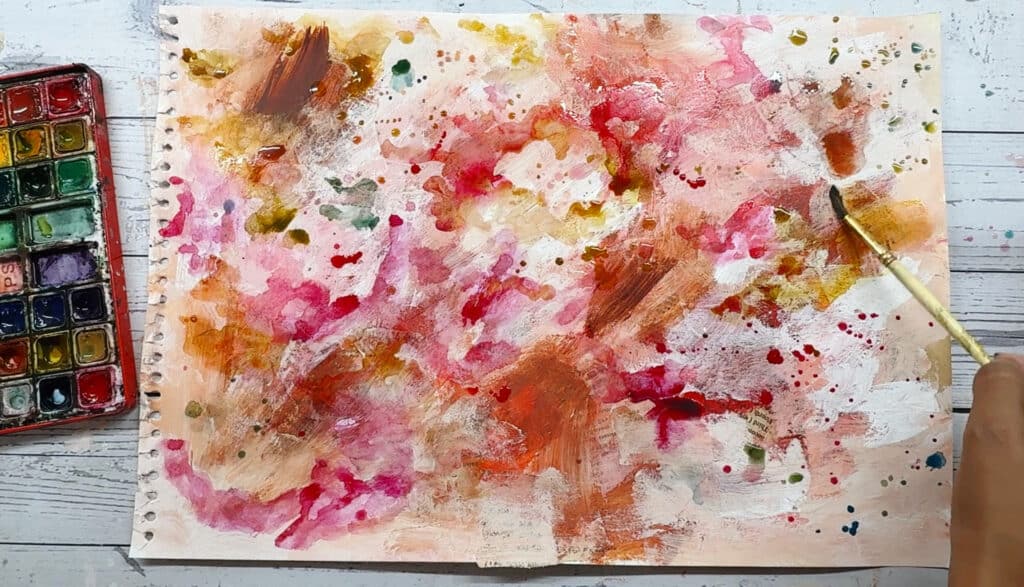
Step 4: Add More Collage Elements
Revisit your collage by adding more paper elements, layering them strategically where extra interest is needed. This step creates variations in texture and focal points.
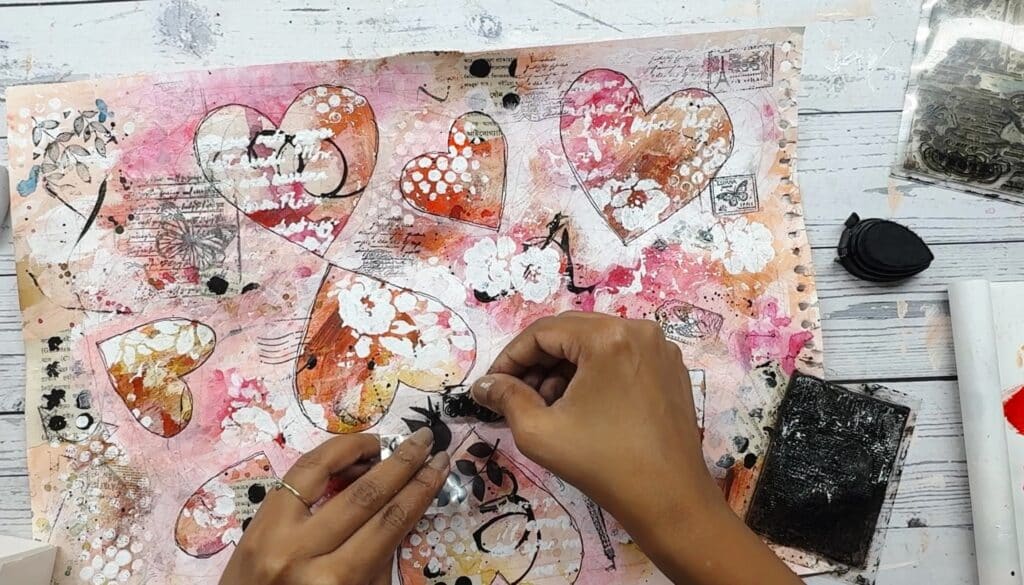
Use pens, pencils, brushes, or other mark-making tools to create abstract lines, doodles, and expressive details. This step adds a personal touch and enhances the organic feel of your journal.
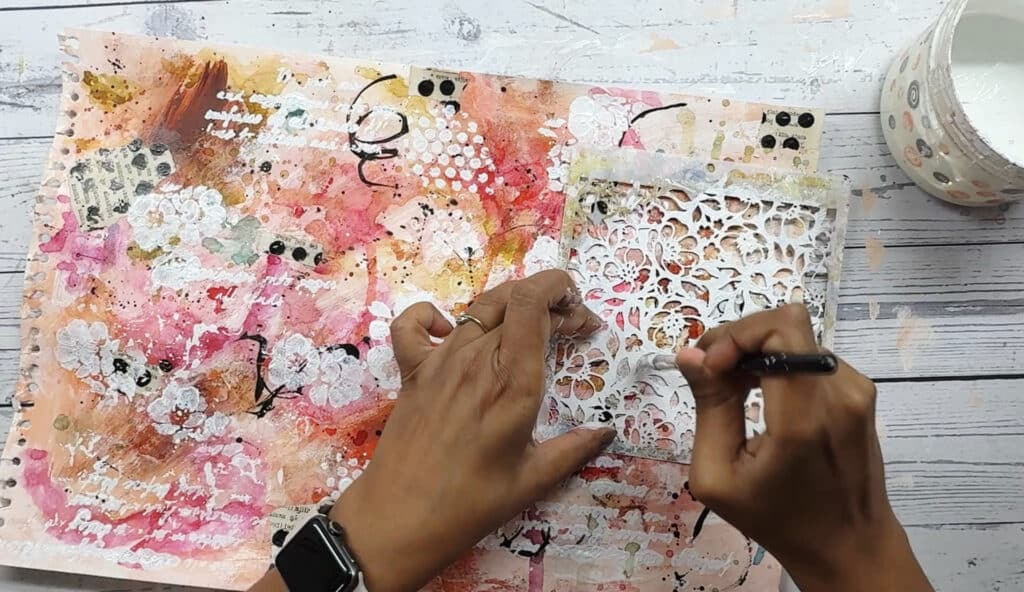
Step 5: Stencil with White Gesso
Introducewhite gessothrough astencilto create interesting patterns and contrast. Use aheart stencilor any meaningful design to reinforce theValentine’s theme. The gesso willbrighten up areas and unify the layers.
Step 6 - Negative Stenciling with a Heart Cutout
For a unique effect, do somenegative stenciling: place aheart-shaped cutouton the surface and paint around it, leaving aheart-shaped voidin the design. This createscontrast and a layered visual effect.
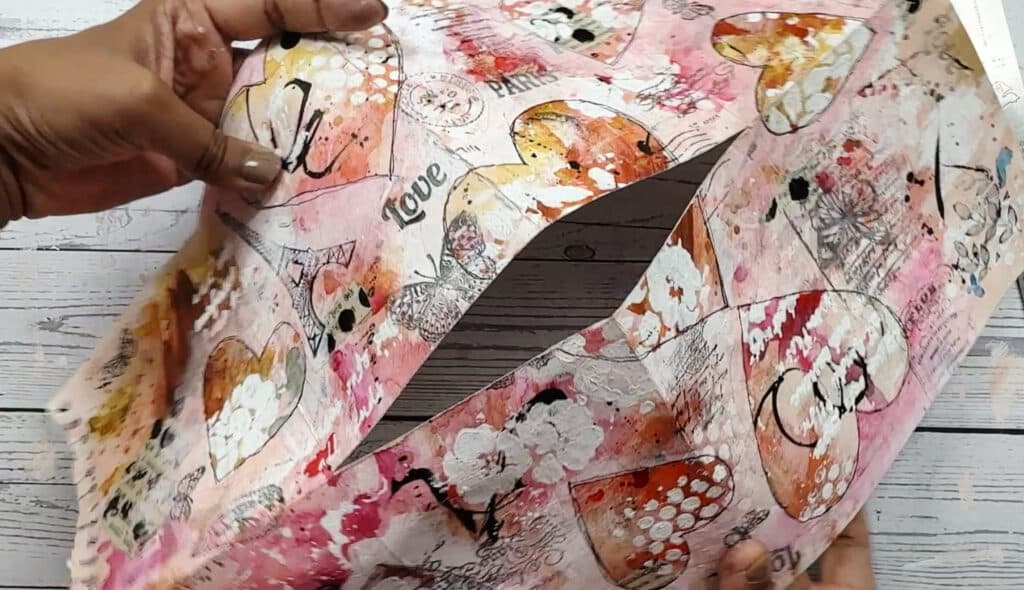
Step 7 - Fold the Paper into a Zine Journal
Once yourmaster sheetis complete and dry, fold it into afour-page zine journal. You can follow a simple zine-folding method:
Fold theA3 sheetin half lengthwise.
Fold it in half widthwise, then in half again, creatingeight equal sections.
Make asingle cut along the center foldand refold it into abooklet shape.
Glue the edges to createfour top-loading pockets.
Thesepockets are perfect for inserting handwritten messages, making this journal even more meaningful!
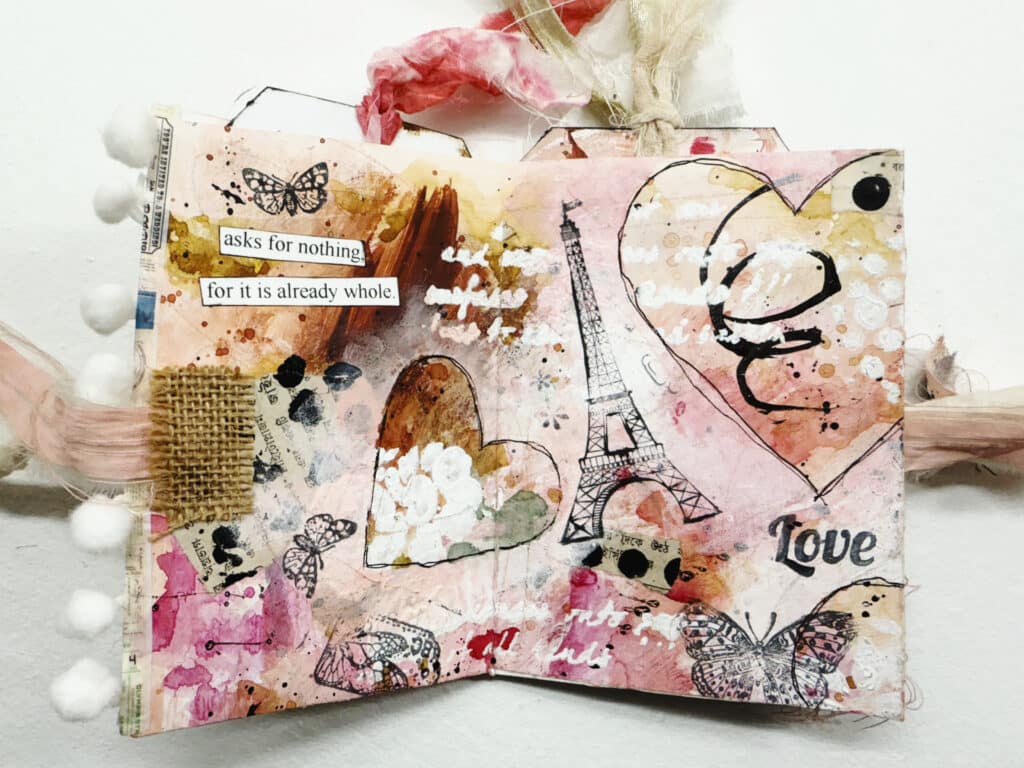
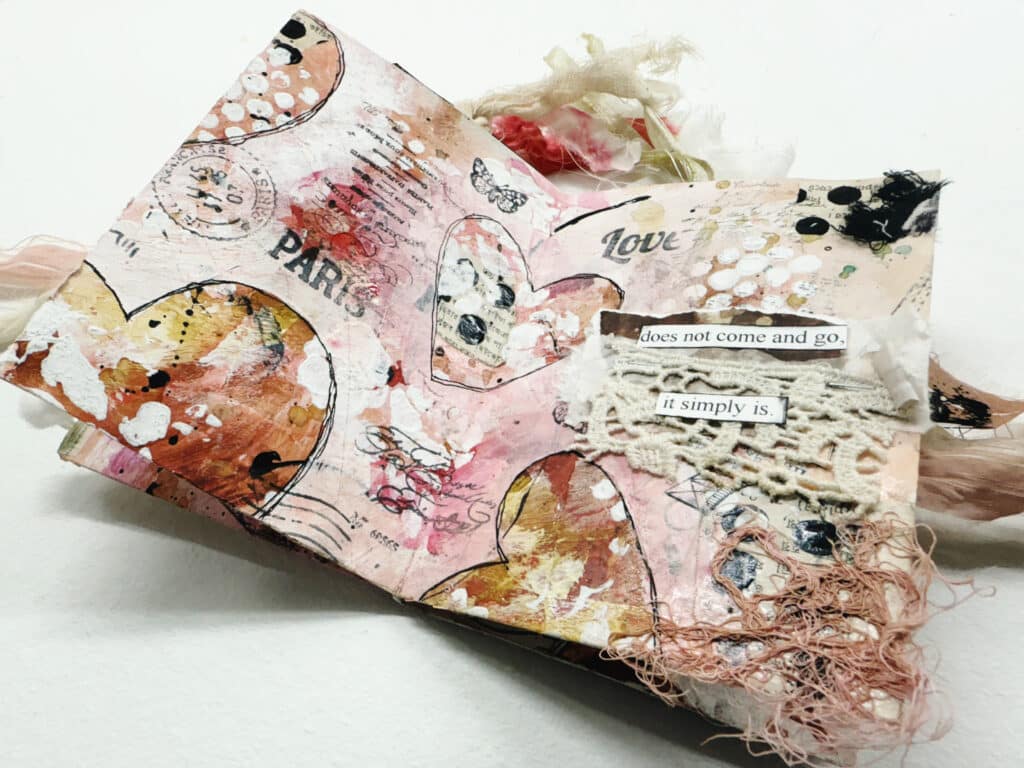
Step 8 - Embellish the Pages
Now, personalize your pages with fabric scraps, vintage paper bits, and decorative clusters. You can stitch fabric pieces for added texture or glue them directly onto the pages.
Step 9 - Add Focal Words and Quotes
Each page will have alove-themed quote or phraseas its focal point. Print or handwrite words like:
“Asks for nothing, for it is already whole.”
“Love does not come and go, it simply is.”
“You are love itself.”
Attach these words ontoclusters of fabric, paper, and embellishmentsto make them stand out.
Step 10 - Insert the Handmade Pink Tags
Scribble with pastels – Introduce soft pastels, colored pencils for extra pops of color.
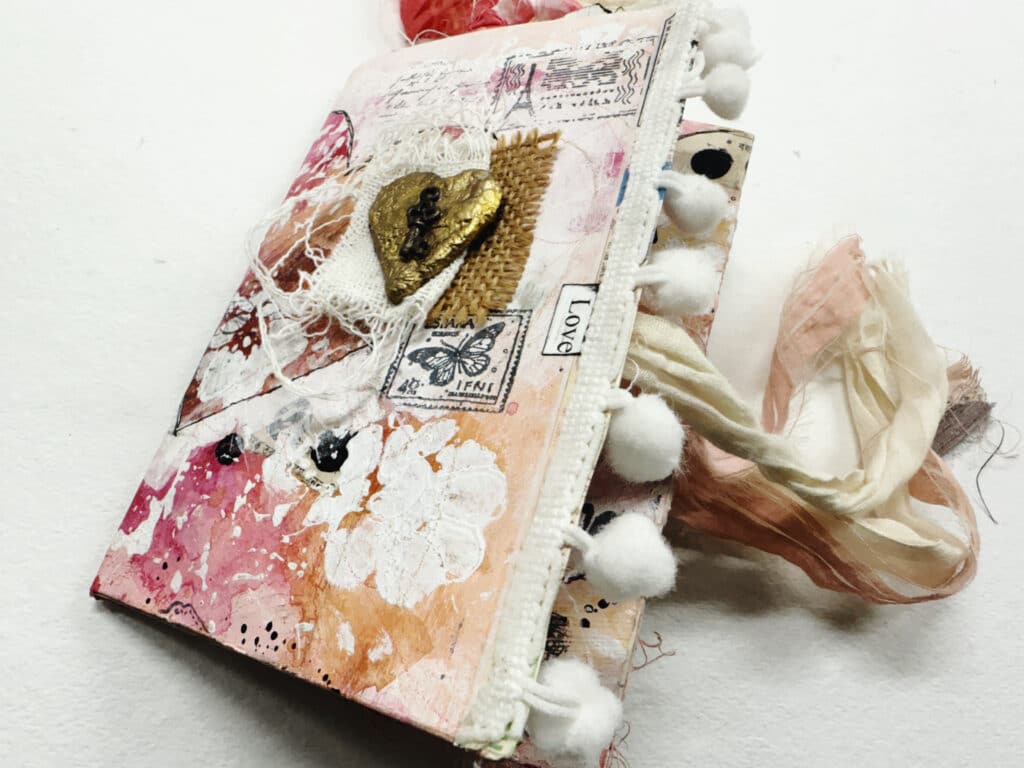
Step 11 - Create the Cover with a Golden Heart
For the cover, craft araised golden heartusing:
Acardboard cutout
APOP bandage wrapfor texture
Gold paintfor an elegant touch
Acharmfor embellishment
Thisdimensional heartadds aspecial finishing touchto your love book, making it feelprecious and symbolic.
YourDIY love bookis now complete! This project is aperfect Valentine’s Day gift, ameaningful keepsake, or anaffirmation of self-love. The combination ofcollage, paint, texture, and heartfelt wordsmakes it aone-of-a-kind journalthat carries deep personal meaning.
✨Want to see the entire process in action? Watch my step-by-step tutorial here:YouTube Video Link
✨Check out my previous tutorial on how to make the pink tags here:Pink Tag Tutorial
Give this love book to someone special or keep it as a reminder of your own love and wholeness.