
A Messy, Magical Way to Create Grungy Neutral Papers for Art Journaling
There are days when art flows like breath.
And then there are days when it’s stuck—heavy, bottled up, or simply uninspired.
That’s when I turn to scribbling. Not the tidy kind. Not the Pinterest-perfect kind. I mean raw, childlike, furious scribbles that release energy from my body, onto paper.
And today, I want to show you how I used that energy to create a stack of grungy, neutral, double-sided collage papers—perfect for tearing up, journaling on, or layering into your next mixed media piece.

The Magic of Scribbling
Before we jump into the how-to, let me say this:
Scribbling is not a filler activity. It’s a release. A warm-up. A form of movement.
Scribbling is your first “dance move” on the page.
It does more than mark paper:
It energizes. Moves stuck feelings.
It breaks creative block. You can always start with a scribble.
It removes pressure. There’s no such thing as a perfect scribble.
It connects you with your inner child. And brings joy back to the process.
It creates rhythm and authenticity. These become your marks—your voice.
Now let’s take that raw energy and turn it into something beautiful.

▶️ Watch the Flip Through + Grab Free Downloads
Want to see how these papers turned out? I’ve created a video on YouTube where I walk you through the entire stack of acrylic dyed papers. In the video, I talk about my process, show you my little containers of diluted paints and droppers, and talk about how beautifully this method comes together.
You’ll also get a closer look at the soft textures, watermarks, and accidental beauty that happens when you let go and let the colors flow.
And as a special gift, I’ve turned a few of the black and white dyed papers into printable downloads. They’re perfect for your collage work, journaling, or even printing on transparencies. You can download them for free—the link is right below the video.
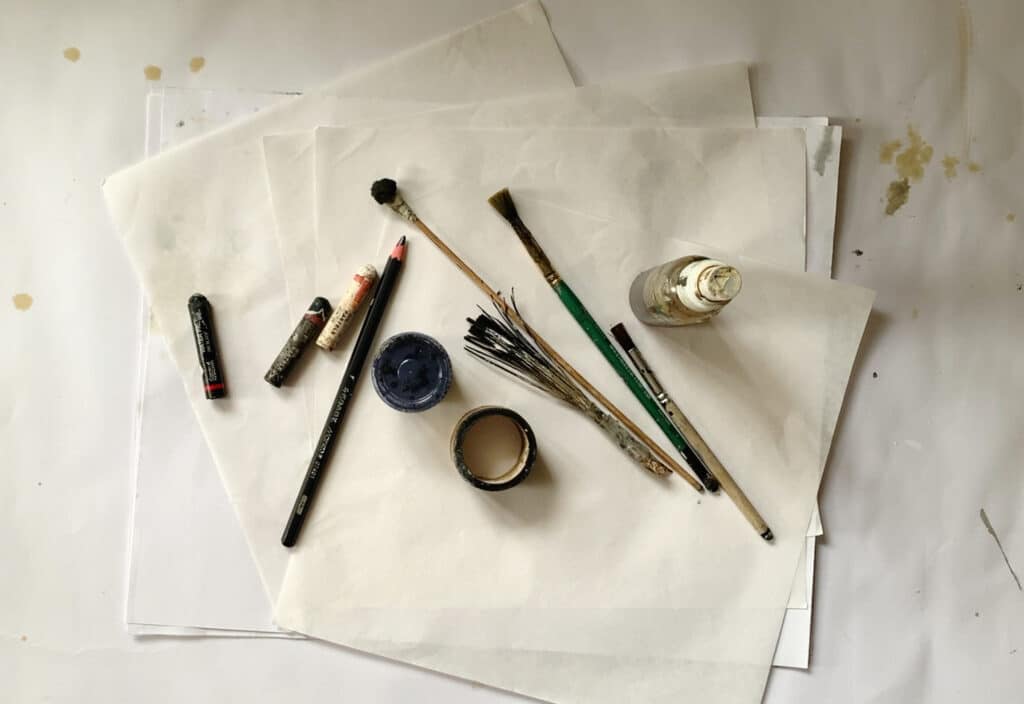
Supplies You’ll Need
This process doesn’t need fancy tools—just a few earthy materials and a willingness to play.
Papers
4 torn pieces of an underpaper already full of messy black/white/coffee marks
4 sheets of Delhi paper (butter paper)
3 printer papers
→ Total: 11 pages to work on
Mark-Making Tools
Black India ink
Black oil pastels, watercolor pastels, pencil colors
White pencils and white pastels
Handmade brushes, stencil brushes, branch brushes, sponge brushes
Color Sprays
Coffee solution in a spray bottle
Burnt sienna acrylic paint in a spray bottle

Mixed Media Artist Resource Library
Free printables, collage papers, creative prompts & how-to guides
I’ve put together a free resource library designed just for you, packed with everything you need to fuel your creativity. It’s my way of giving back to the mixed media community with resources to inspire your next project. Click here to join.
Step-by-Step Process
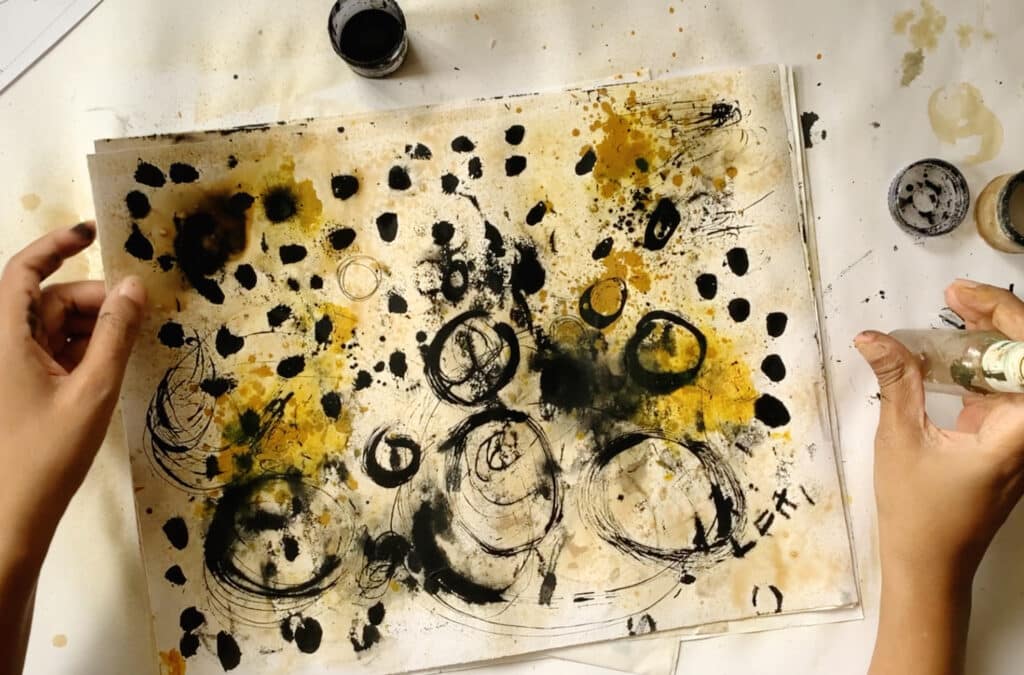
1. Begin with Black Scribbles
Start by making bold, messy black marks using your tools.
Refer to my Black & White Mark-Making Blog if you need inspiration.
Let the marks come from your body—not your brain. Try using your non-dominant hand too. I’m right-handed, so working with my left felt awkward, but it brought out a powerful energy and loosened me up completely.
Scribble your heart out. Lines, circles, scratches, chaos—anything goes.
2. Spray with Coffee and Burnt Sienna
Next, spray the pages with coffee solution. Watch the liquid soften the scribbles and create gorgeous spreads of earthy brown tones.
Layer in burnt sienna spray for extra depth and warmth.
This trio—black, white, and brown—creates that signature grungy neutral palette. It’s raw, organic, and full of movement.
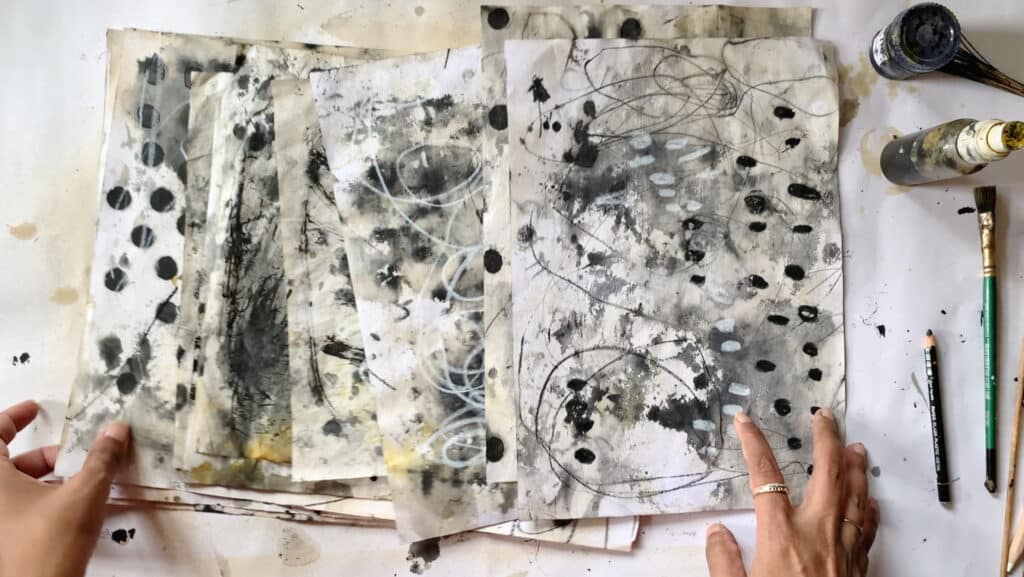
3. Stack the Wet Papers
Here’s where the magic happens:
Don’t dry each paper. Just stack one wet sheet on top of another as you go.
As the pages sit together, their marks and colors bleed into each other. The result?
Unexpected, authentic texture on both sides of every sheet.
The messier, the better.
4. Flip and Repeat
Once one side is done, flip each paper and repeat the process on the back.
Scribble. Spray. Stack again.
You’re building double-sided collage pages, each soaked with emotion, energy, and handmade marks. Perfect for tearing, journaling, layering, and stitching into your mixed media art.
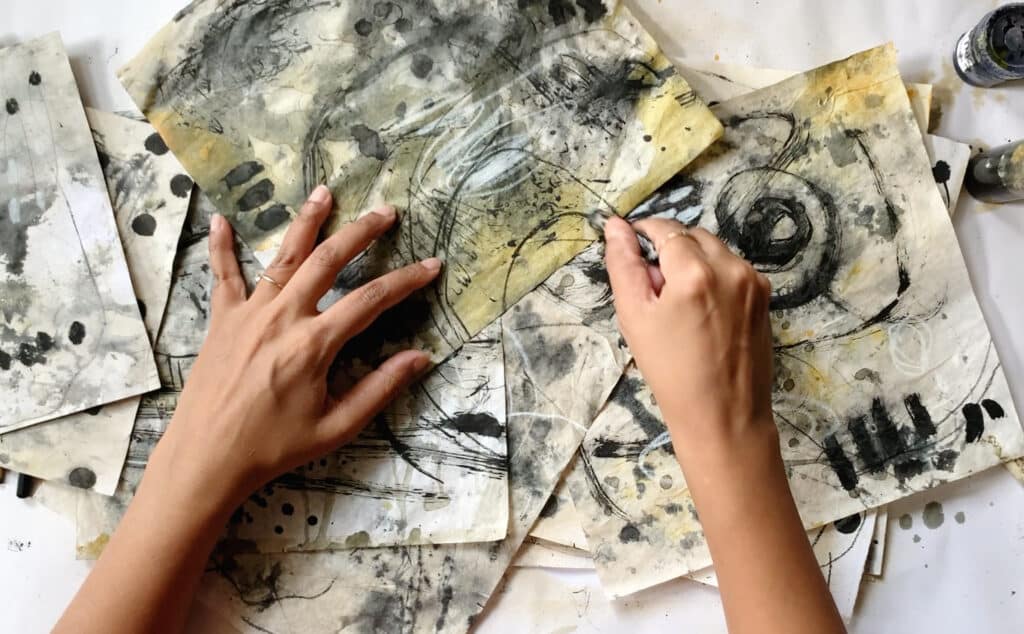
5. Final Scribble Layer (After Drying)
Once all the pages were fully dry, I went back in with black and white pencils and pastels—adding one more layer of spontaneous scribbles.
This extra layer brought everything together. The dry textured surface held the pastel beautifully, and the added marks gave a satisfying final touch to the entire process.
It was a quiet, joyful moment for me. I could’ve kept going forever.

Why This Process Matters
This isn’t about making perfect backgrounds.
It’s about loosening up. Getting messy. Releasing energy. Reconnecting with childlike play.
You don’t need fancy materials or complex steps.
Just a few basic tools and your full permission to scribble like no one’s watching.
✍️ FAQs
Q: Can I use other colors besides black, white, and brown?
Yes! But for this specific technique, staying within a neutral palette helps maintain that earthy, grungy feel. Once you’re comfortable, try muted greens or rusty reds for variation.
Q: Do I have to use both sides of the paper?
Not at all—but working on both sides means more usable paper and more layered effects when you tear them for journals.
Q: What if I don’t have a spray bottle?
Just use a paintbrush or even splatter with your hands. Spray bottles give a certain spread and misty effect, but they’re not essential.
Q: Won’t stacking wet papers ruin them?
That’s the fun part—it’s meant to be messy. The layers interact, transfer marks, and create unexpected beauty. Just separate the pages carefully after drying.

🧪 Ways to Improvise the Technique
Try textured papers: Handmade papers, recycled envelopes, or old book pages work beautifully for added texture.
Use stencils for scribbling: Place stencils down and scribble over them to get negative space textures.
Add stitching or collage: Once dry, stitch onto these pages or collage fabric scraps, old photos, or ephemera.
Fold and bind into a mini journal: Use these pages to create an instant handmade book with energetic, expressive surfaces on every page.
Layer transparent materials: Try layering tissue or deli paper with scribbles for a ghostly, layered look.
🎨 Why Scribbling Is a Practice in Itself
Scribbling isn’t just step one—it’s a way of checking in with yourself. It’s somatic, meaning it brings awareness into the body. You’re not just drawing. You’re breathing out through your hands.
When you let go of perfection and let marks flow, you begin to speak a language beyond words. Scribbling becomes visual journaling. It becomes meditation. And when mixed with coffee and paint—it becomes a textured, beautiful chaos.

Ways to Use Your Finished Papers
🌀 Make a Journal with Only These Pages
Bind them into a mini art journal (fold + staple or use fabric tape)
Each page already holds expressive marks—build upon them with words, collage, or paint
✂️ Tear into Smaller Pieces
Use as collage elements in other journals
Create abstract landscapes using torn edges
Combine with vintage ephemera or botanicals
💌 Add Layers & Texture
Stitch fabric scraps, thread, or lace directly on the paper
Add transparent layers: tissue paper, tracing paper, or deli paper
Use masking tape, washi tape, or wax for added texture
🖋️ Write Over the Scribbles
Use opaque white pens or gel pens to journal on top
Write poetry, phrases, or affirmations directly into the scribbled space
Use your non-dominant hand to continue the raw energy
🧵 Use as Tip-ins or Pockets
Fold and paste them into your main art journal
Use them as secret flaps or tuck spots for hidden journaling
📜 Create Standalone Art
Cut them into postcard-size pieces and embellish
Mount them on a black or kraft background and frame as intuitive abstracts
Final Thoughts
When you feel stuck, unsure, or creatively blocked—try this.
Grab your papers. Grab your pastels. Scribble. Spray. Stack.
And let your emotions come through in the most unexpected ways.
You’ll end up with a stack of grungy neutral pages—each infused with your energy, each one ready to become part of your art journal, collage, or creative story.
These aren’t just background papers.
They’re emotional layers. Authentic textures. A record of your movement.
Let it be imperfect. Let it be messy. But let it be yours.
🌿
If this inspired you, tag me @debasreedeyart or leave a comment—I’d love to see your versions of these expressive neutral pages.


