
What if coffee dyeing could be more than just brown? What if it could hold whispers of blue mist, crimson dusk, or earthy moss—all made with paint you already have?
After playing with plain coffee dyeing for a while, I found myself longing for more color, but without losing the raw, vintage textures that make coffee‑stained papers so magical. Boiling onion skins for that beautiful reddish tone was lovely—but not always practical. That’s when I thought: What if I just mix a tiny bit of acrylic into the coffee solution itself?And that opened the door to a whole world of earthy, muted, moody shades.
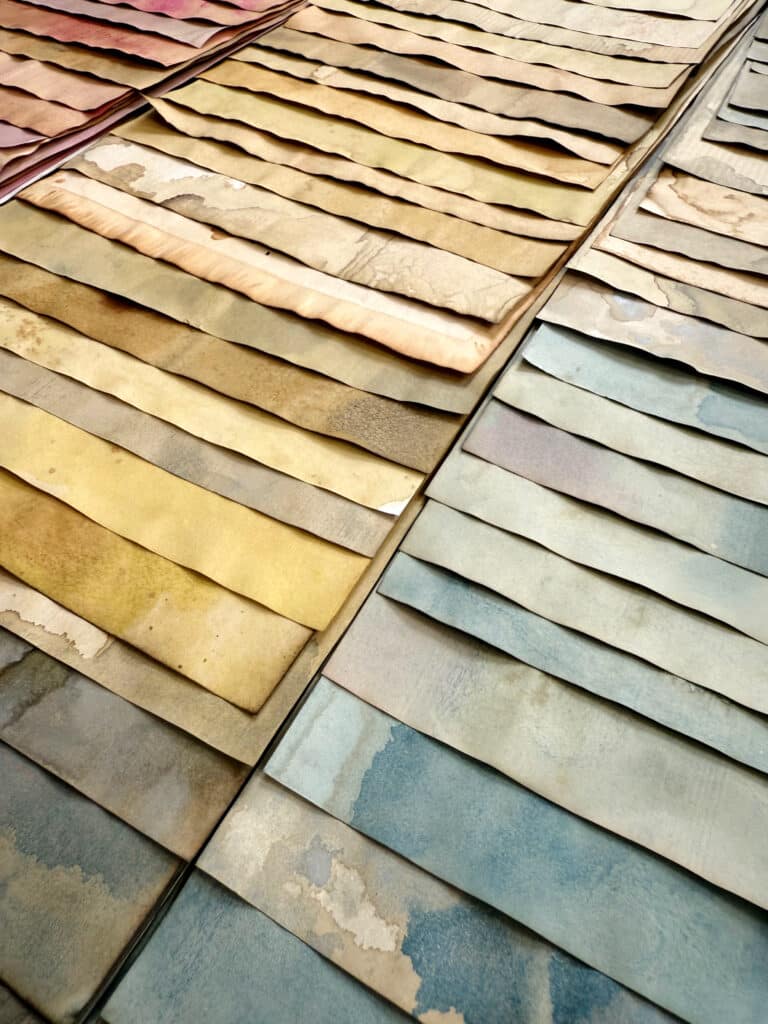
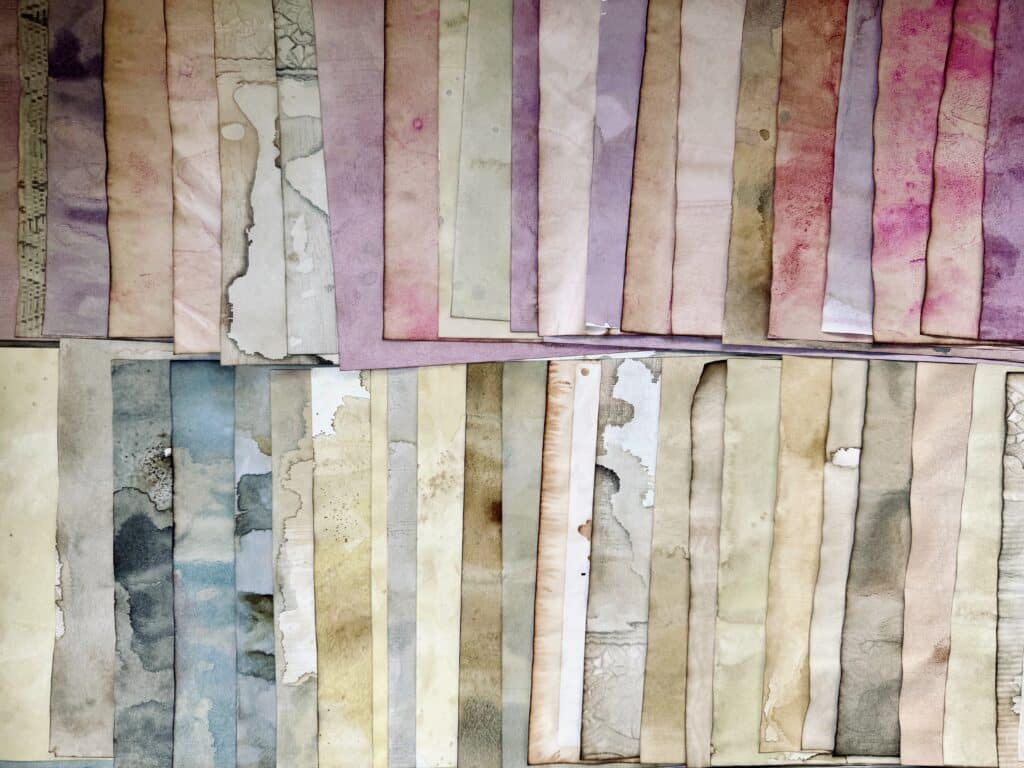
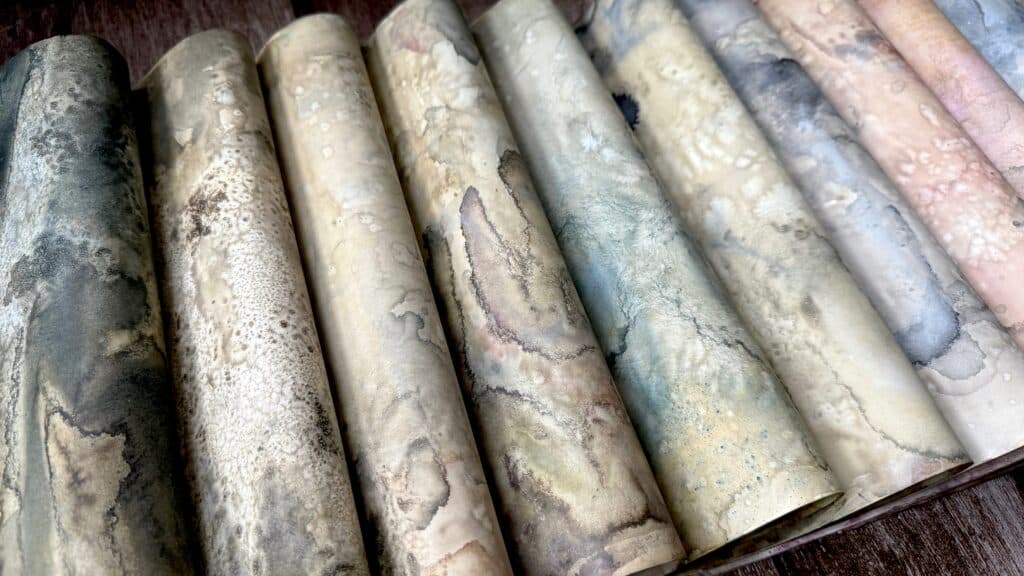
In this blog, I’ll take you behind the scenes of a larger experiment I did using ten custom-mixed coffee + acrylic dye baths. I stored each one in small plastic containers and played with both single colors and blended washes. I used a big flat brush to let the colors bleed into each other, creating rich, organic textures. In some papers, I even sprinkled salt and coffee powder for added visual depth.
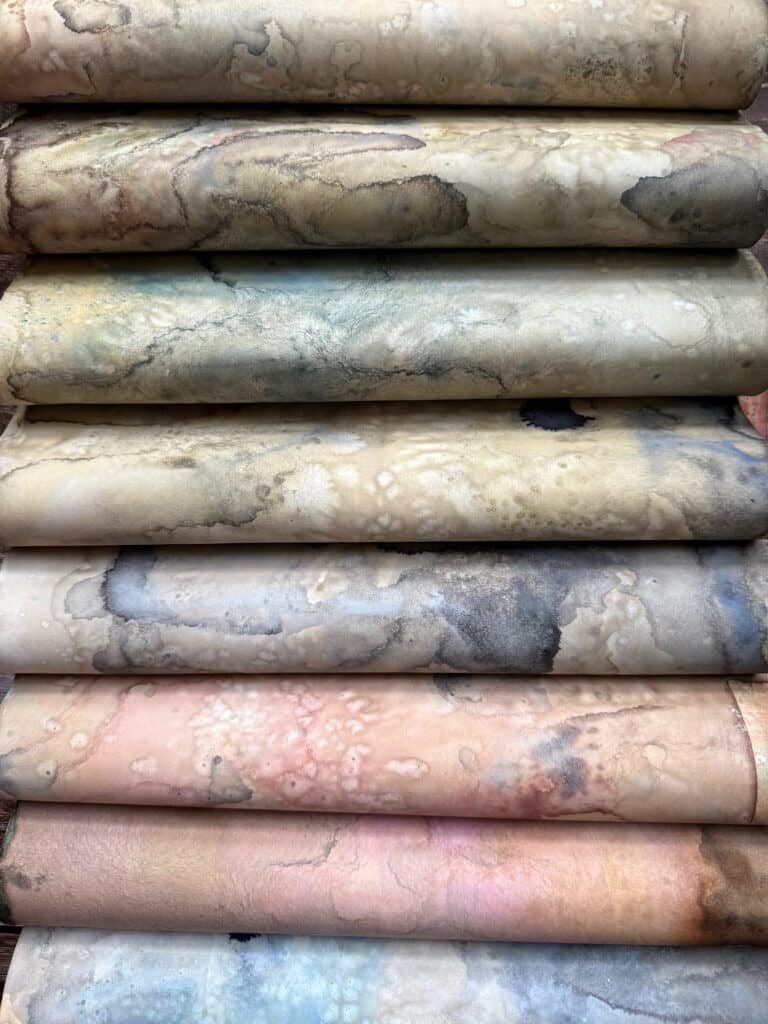
The result? A library of softly grungy, beautifully imperfect papers that look almost like they came out of some ancient storybook.
If you’re new to coffee dyeing, you might want to start with my earlier blog, Coffee Dyeing Basics for Mixed Media: 3 Simple Techniques, where I cover the foundational methods before moving into more experimental color play here.
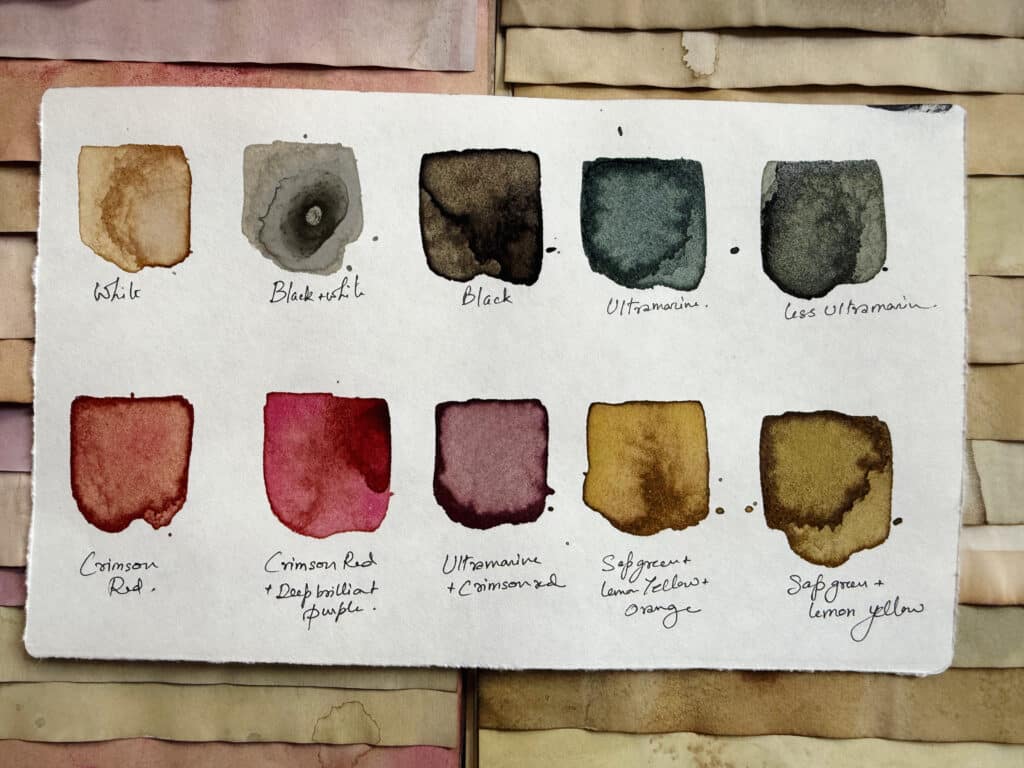
My Custom Coffee + Acrylic Color Chart
Here are the 10 muted color mixes I created by combining a small amount of acrylic paint with a standard batch of hot coffee:
| Color Mix | Notes |
|---|---|
| White | Soft sepia wash with a gentle cloudy translucency |
| Black + White | Warm gray tone with dreamy, smoky textures |
| Black | Deep, rich brown-black; great for contrast or moody backgrounds |
| Ultramarine | Cool, stormy teal with a mysterious depth |
| Less Ultramarine | Softer gray-teal, slightly more transparent and muted |
| Crimson Red | Warm blush pink, very similar to natural onion skin dye |
| Crimson Red + Deep Brilliant Purple | Rich berry hue, romantic and earthy |
| Ultramarine + Crimson Red | Muted plum or dusky mauve; balanced between cool and warm |
| Sap Green + Lemon Yellow + Orange | Warm mossy golden shade, like sunlit autumn leaves |
| Sap Green + Lemon Yellow | Cooler olive tone with grassy undertones |
Each of these was made with 4–5 tablespoons of instant coffee in ~500 ml hot water, plus about ½ teaspoon of acrylic paint—fully stirred to a smooth consistency.
Imp: How to Store Your Dye Solutions
Once mixed, your coffee + acrylic mixtures are best used within 3–4 days at room temperature. Beyond that, they may spoil, develop off-odors, or support bacterial growth.
Quick tip: Always stir the solution before dipping your brushes or paper, since pigments settle over time.
Refrigerate unused portions in airtight containers—this can extend shelf life to about 1–2 weeks.
If it smells sour or looks slimy, discard it and make a fresh batch.
Painted Papers
If you’re someone who learns best by watching the process unfold, I’ve shared this exact technique inside my class Painted Papers.
In the class, I walk you through 15 different ways of creating expressive, textured mixed media papers—and coffee + acrylic dyeing is one of them. You’ll see how I mix the solutions, how wet the paper should be, how I let colors bleed into each other, and how I work intuitively on the floor without overthinking the outcome.

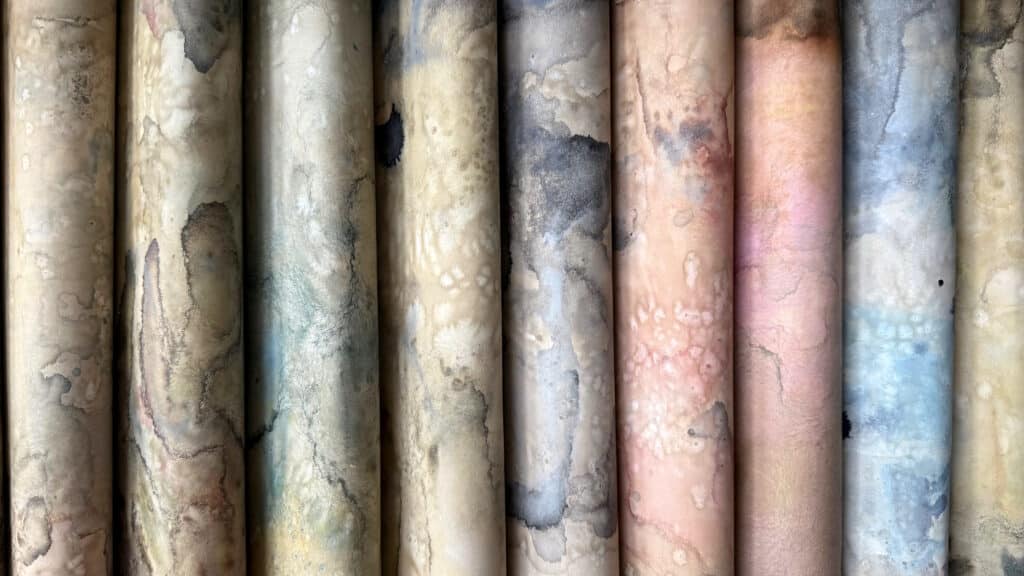
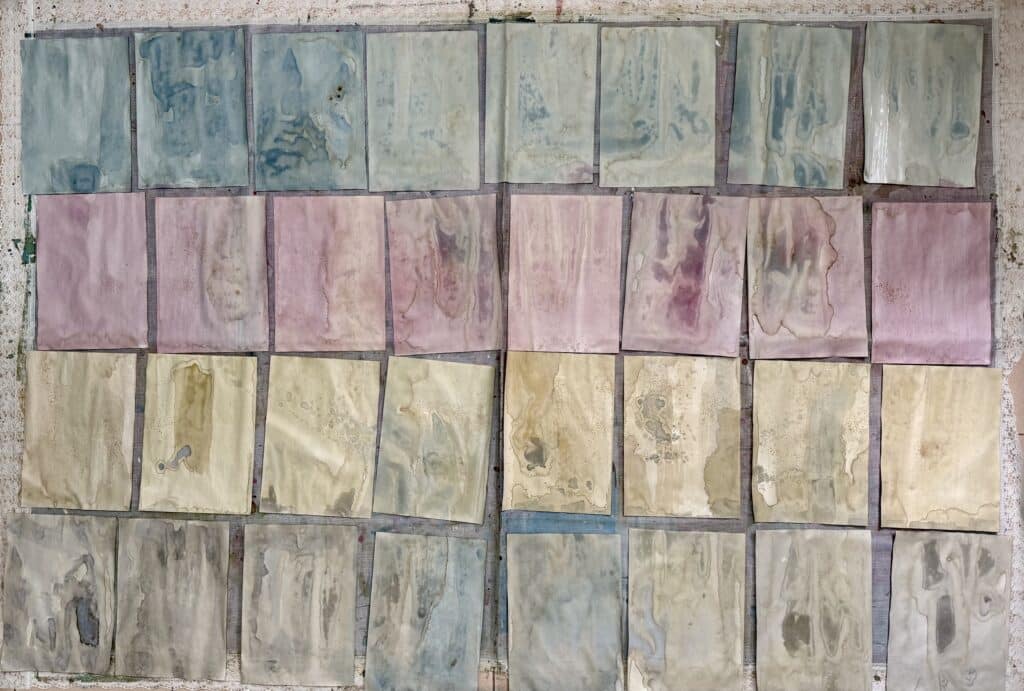
Experiment 1: Color Rows on the Floor
To test how these colors behave in groups, I laid out four rows of 8–10 sheets each on my floor mat. Then I used a big 2–3 inch flat brush and did one color per row:
Top row: Different shades of blue + coffee
Second row: Crimson + coffee tones, including some muted purples
Third row: Yellow, gray, and subtle green washes
Last row: Black, gray, and blue mixes
Because the papers were touching edge-to-edge, the wet washes spilled and bled into each other, creating stunning overlaps where one hue kissed the next. It was completely unplanned and absolutely beautiful—like a gradient of moody skies and faded fabric.

Mixed Media Artist Resource Library
Free printables, collage papers, creative prompts & how-to guides
I’ve put together a free resource library designed just for you, packed with everything you need to fuel your creativity. It’s my way of giving back to the mixed media community with resources to inspire your next project. Click here to join.
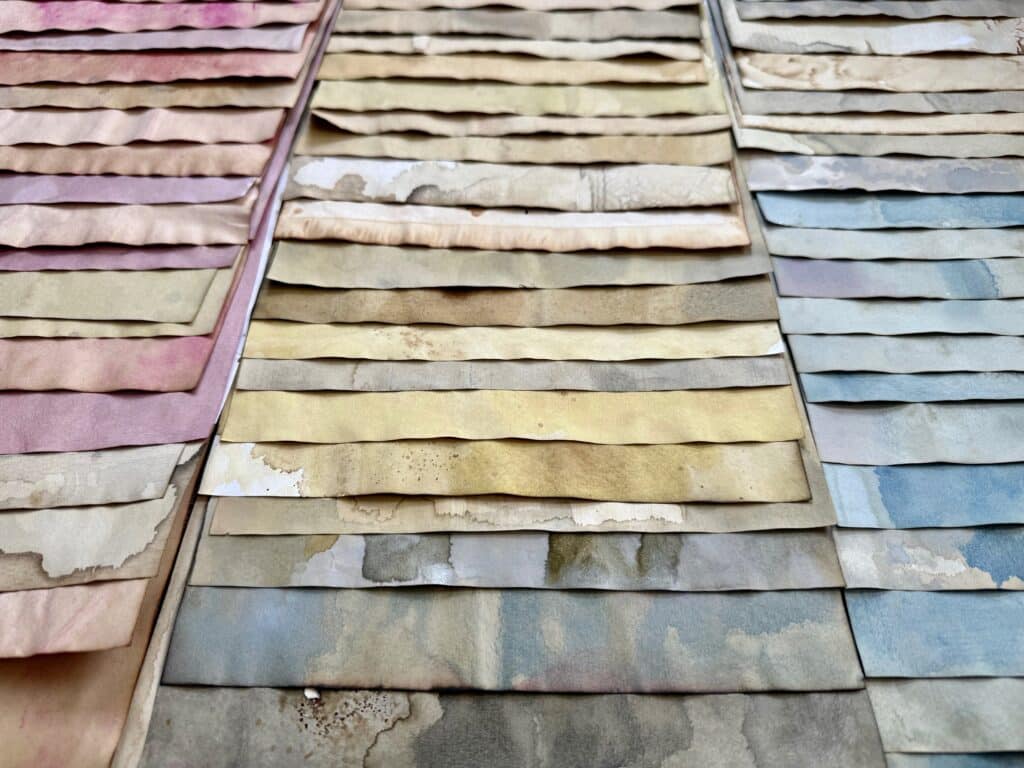
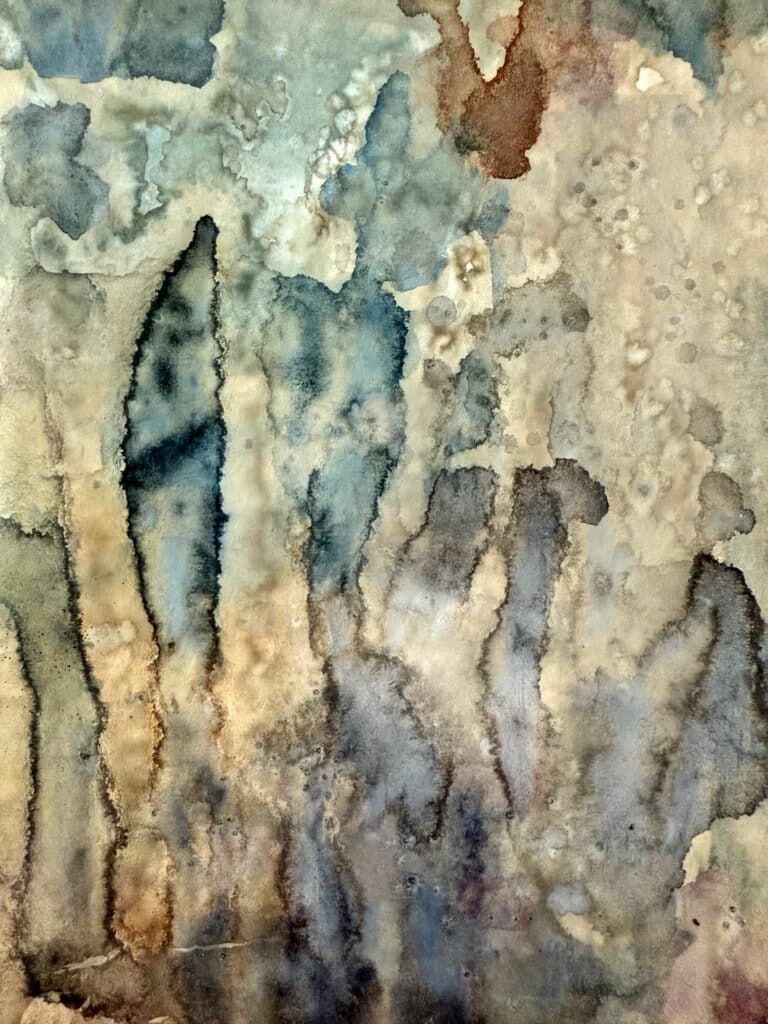
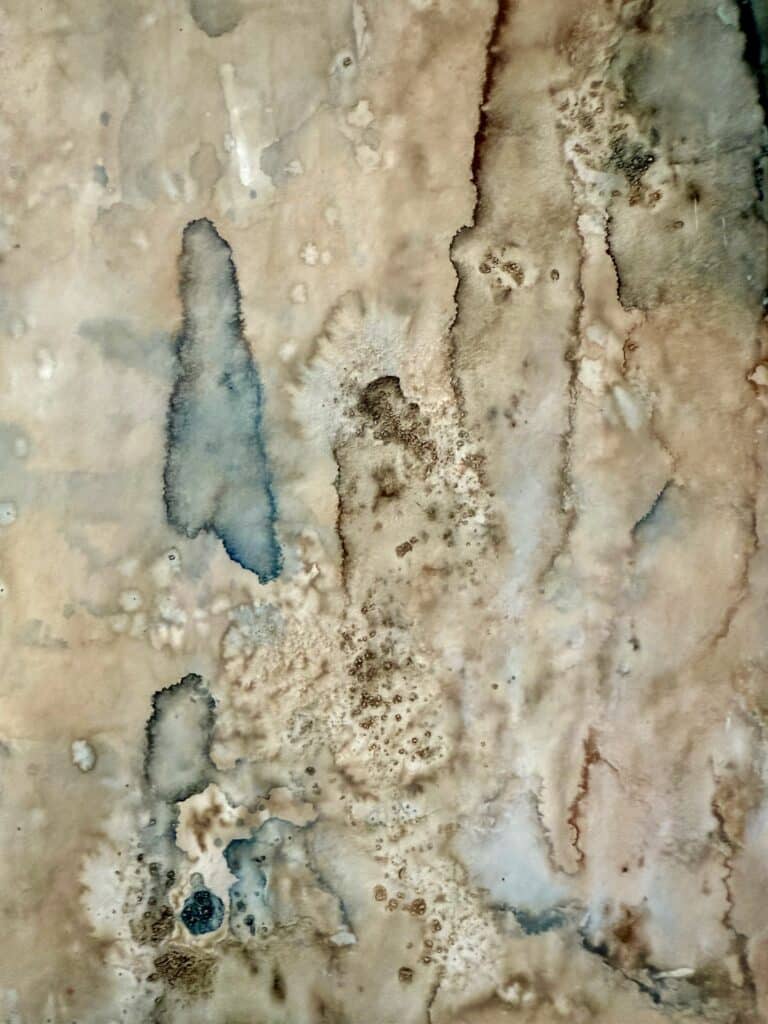
Experiment 2: Intuitive Color Mixing
Next, I dipped my brush into multiple dye containers, letting color happen intuitively. Some papers had 3–4 colors on them—like black + sap green + lemon yellow + crimson—and the results were dreamy.
Each paper became a mini painting in itself:
Some looked like rain‑washed walls
Others like ancient maps or pressed fabric
And a few resembled watercolor landscapes, all by accident
To push it further, I sprinkled salt and dry coffee powder on a few damp sheets. When they dried, they revealed textured blooms, soft speckles, and mineral-like patterns—perfect for layering in mixed media work.
Tips for Trying This Yourself
Use only a tiny amount of acrylic paint—too much can make the dye thick and streaky.
Stick with muted or earthy colors to preserve the vintage look.
Store each batch in a small container with a lid—you can reuse them for days!
Lay papers flat, edge to edge, to encourage natural color blending.
Try salt or coffee powder only when the paper is still slightly wet (not dripping).
Let them air dry fully before stacking or flattening.
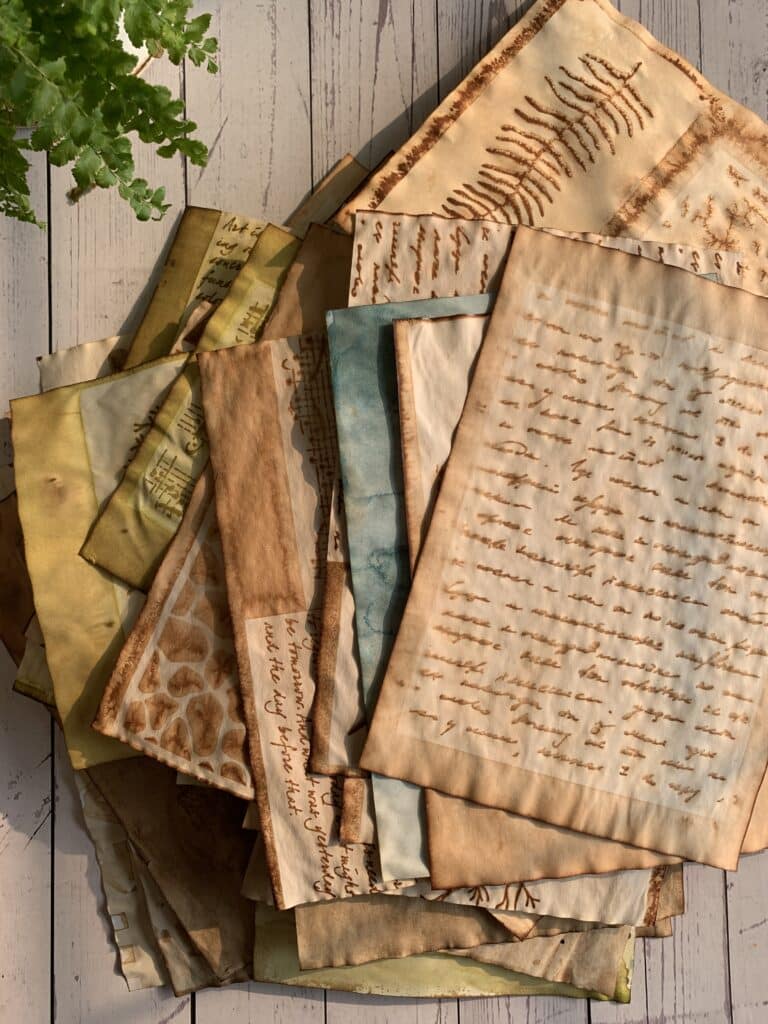
These Papers Make Stunning Art Journal Pages
The finished papers are not just backgrounds—they’re foundations for storytelling. Their weathered textures, muted tones, and layered imperfections make them ideal for:
Glue-booking and collage journaling
Layering with transparent papers or vellum
Writing with white pens or gel markers
Adding focal elements like stitching, stamping, or ink splashes
Whether used whole or torn into pieces, these papers immediately bring a sense of soul and age to any journal page.
✍️ Frequently Asked Questions (FAQ)
Q1: Can I use any kind of acrylic paint?
Yes. Fluid or heavy-body acrylics work well, but start with just ½ tsp. Too much pigment can make the mixture sticky or uneven.
Q2: What kind of paper should I use?
I used regular printer paper (70–100 gsm), and it worked beautifully. Lightweight paper absorbs the dye quickly and creates natural curls and pooling. You can experiment with watercolor or mixed media paper for different results.
Q3: How long can I store the dye solution?
At room temperature: 3–4 days max. After that, it starts to develop an unpleasant smell.
In the refrigerator: Up to 1–2 weeks. Stir before use.
Q4: Do I need to fix or seal the dyed paper?
Not necessarily. Once fully dry, the papers are ready to use in collage or journaling. If you plan to add a lot of wet layers later, you can seal them lightly with matte medium or fixative spray.
Q5: Why are my papers curling?
It’s natural with thin paper and wet dye. Once dry, just press under a heavy book for a few hours to flatten them out.
Q6: Can I combine these techniques with stenciling or stamping?
Absolutely. You can stencil on top of the dyed papers or even stencil during the wet dyeing phase using masking or resist techniques.
Final Thoughts
This technique has completely transformed how I prepare collage papers. Mixing acrylics into coffee not only expanded my color palette—it made the entire process feel intuitive and alive. Every paper felt like its own abstract artwork, rich in layers and texture.
So go ahead—brew a strong cup (for you and for your paper!), mix in some color, and let the dye flow freely. Your journal will thank you.


