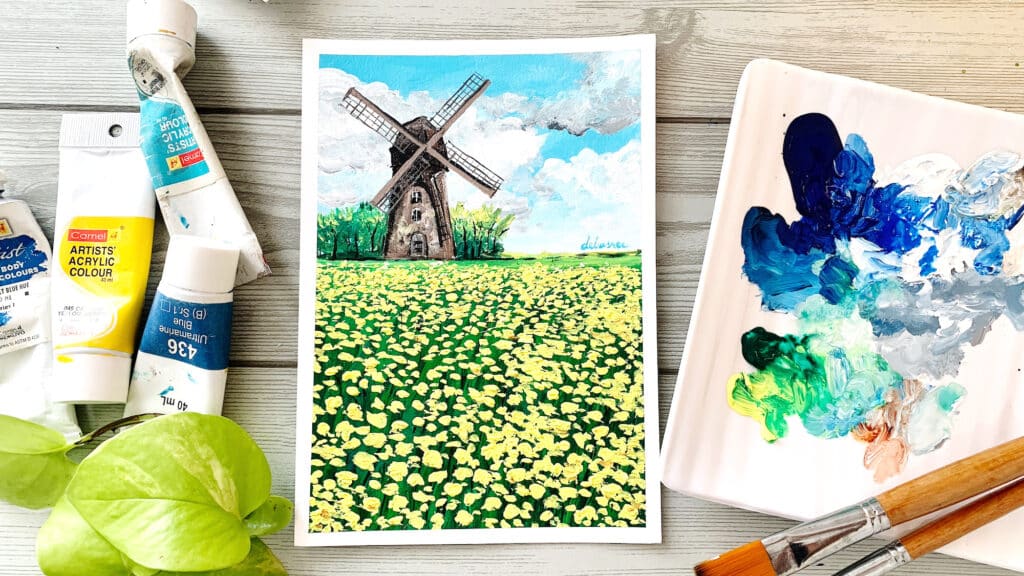
Have you ever wanted to paint a dreamy countryside scene filled with golden flowers, a rustic windmill, and a vibrant sky? This easy acrylic painting tutorial will guide you through six simple steps to create a stunning landscape full of depth and texture.
Whether you’re a beginner or an experienced artist, follow along to bring this scene to life!
If you want to learn more about clouds, check out my 15 Days of Summer Sky Masterclass.
15 Days of Summer Sky
Transform Your Canvas into Breathtaking Summer Landscapes
Love this class. It is so well explained with simple and easy steps to follow. After the first couple of painting I could see an improvement in my clouds. I followed Debasree’s instructions using gouache and love the outcome. This is a fantastic class. Loved every minute of it. – Breda Hughes
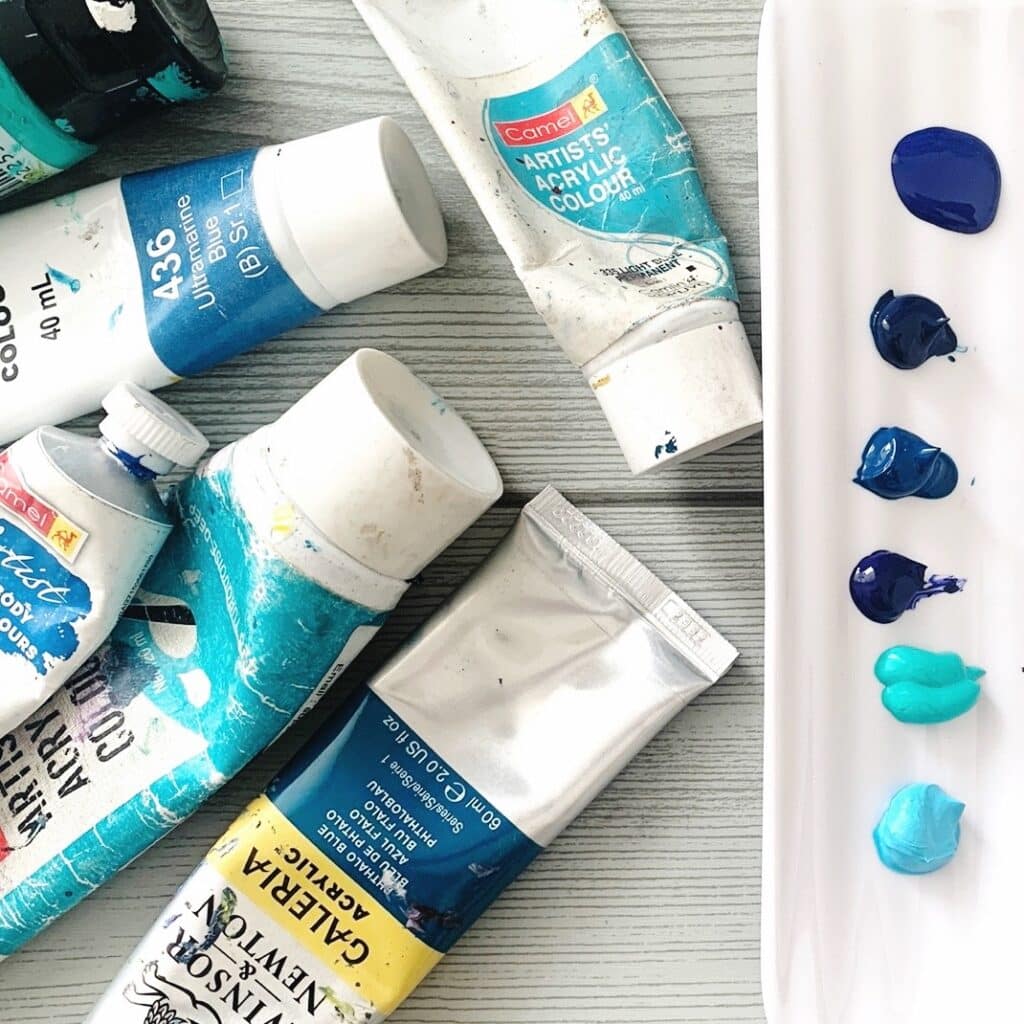
Materials You'll Need 🖌️
- Acrylic paints (Titanium White, Ultramarine Blue, Phthalo Blue, Sap Green, Lemon Yellow, Burnt Umber, Black)
- Brushes (Flat brush, Filbert brush, Fan brush, Detail brush)
- Palette knife (optional)
- Canvas or acrylic paper
- Water and a rag for cleaning brushes
- A palette for mixing colors
Love creating beautiful landscapes?
Explore more step-by-step painting tutorials to refine your skills & experiment with new techniques! From vibrant sunsets to misty mountains, there’s always something new to learn.
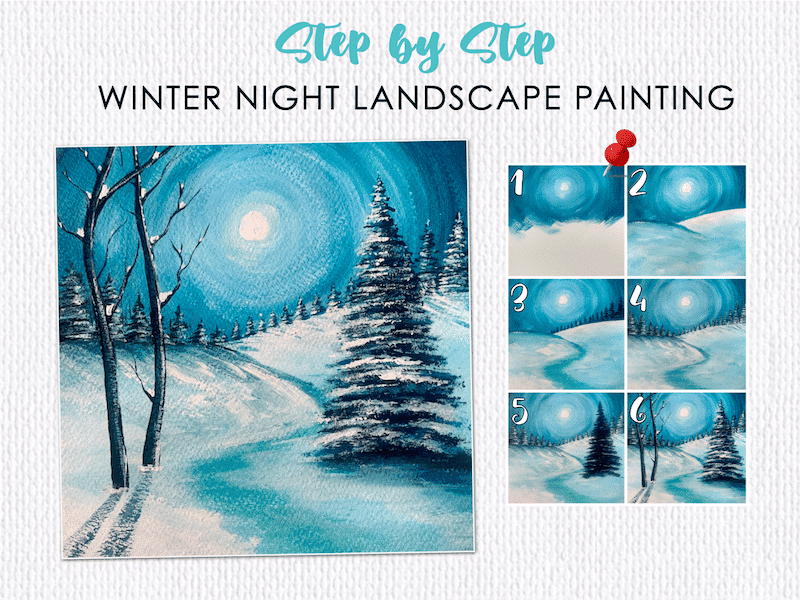
Pin for later

Painting Steps:
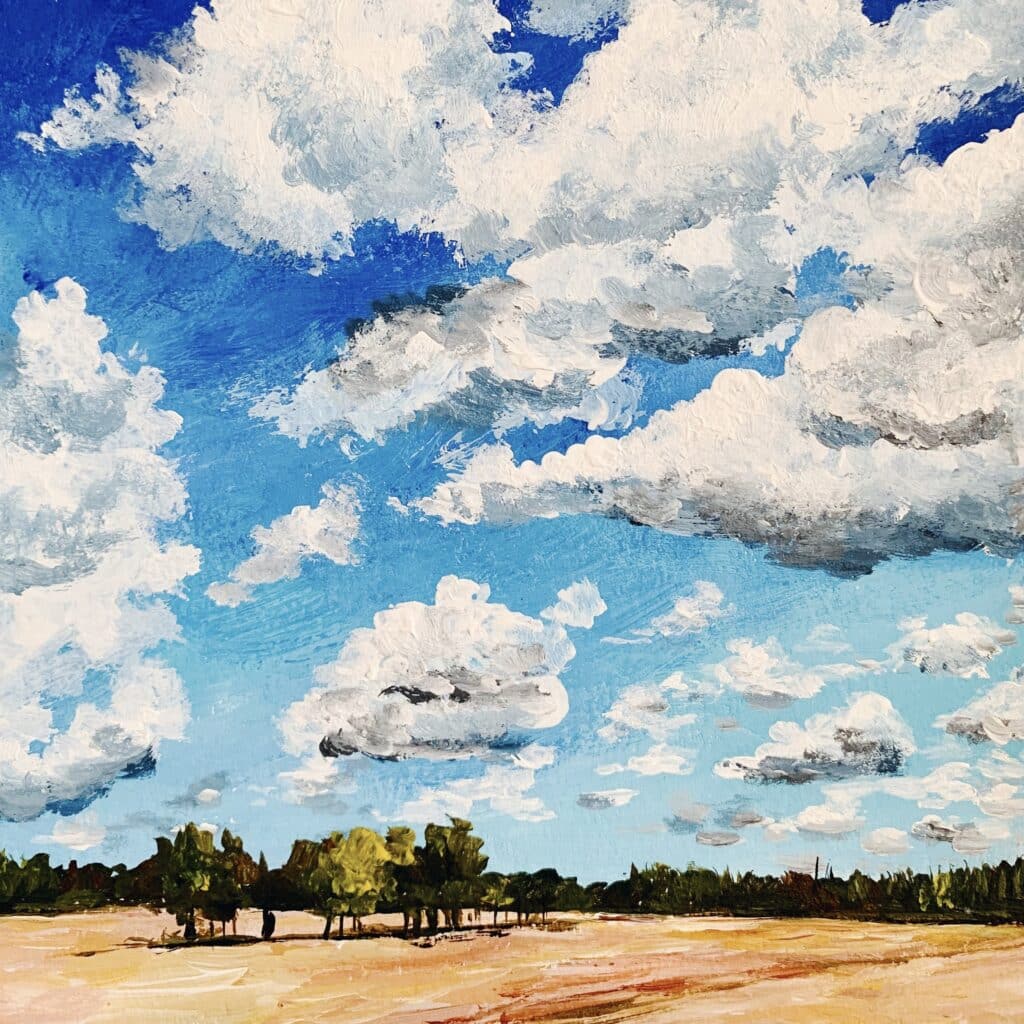
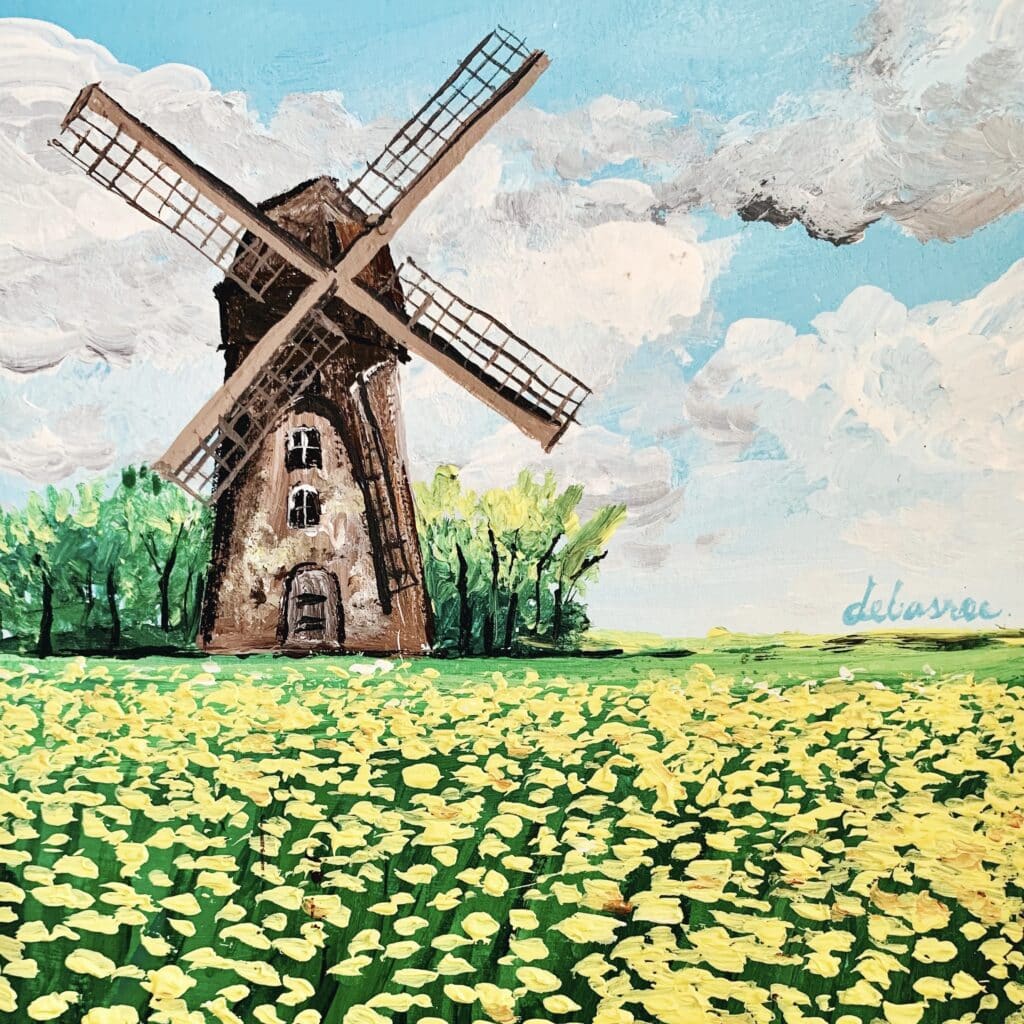
Step 1: Paint the Sky and Clouds
The sky sets the mood for your painting, so start by creating a bright and airy atmosphere.
- Mix Titanium White with a touch of Ultramarine Blue to create a soft sky color.
- Use a large flat brush to paint horizontal strokes across the top two-thirds of the canvas.
- For the clouds, use a round brush to dab in Titanium White, blending lightly into the sky.
- Add shadows in the clouds with a tiny mix of Burnt Umber and Blue to give them depth.

Step 2: Add the Trees in the Background
Now, let’s create depth by adding a lush tree line.
- Mix Sap Green with a touch of Lemon Yellow for a fresh, vibrant green.
- Use a fan brush to dab in foliage, creating clusters of trees.
- Add darker tones (Sap Green + Black) for shadows at the base of the trees.
- Lightly highlight the sunlit parts with Lemon Yellow and White.

Step 3: Block in the Windmill Structure
The windmill is the focal point, so get its shape in place early.
- Use Burnt Umber mixed with a little Black to sketch the windmill’s body.
- Block in the main structure with vertical brushstrokes to create a rustic, weathered effect.
- Use a detail brush to define the windows and door using a darker shade of Brown.
- Keep the windmill lighter on the side facing the sun by mixing Brown with a little White.

Step 4: Create the Golden Flower Field
This is the most eye-catching part of the painting, so be bold with color!
- Paint the base field using a mix of Sap Green and Lemon Yellow.
- Use a palette knife or filbert brush to layer clusters of bright yellow flowers.
- Vary the flower sizes—larger in the foreground, smaller in the distance—to create depth.
- Add shadows under flowers with a mix of Green and Burnt Umber.

Step 5: Paint the Windmill Blades
The blades add movement to the scene and should look structured yet delicate.
- Use a fine brush to sketch out the blades with a light Brown mix.
- Paint the crossbars with careful, straight strokes, ensuring they are evenly spaced.
- Add highlights with a lighter Brown to create a sunlit effect.
- Use a detail brush to outline key areas for definition.

Step 6: Add the Final Foreground Details
The last step ties everything together with highlights and finishing touches.
- Outline the windmill slightly with a thin dark brown stroke to make it pop.
- Use a fine brush to add small grass blades in the foreground.
- Highlight the tops of the flowers with White and Lemon Yellow.
- Deepen shadows where needed to enhance contrast.
Bonus Tips:
✅ Use a fan brush for quick, effortless foliage.
✅ Keep the windmill slightly off-center for a balanced composition.
✅ Use varying shades of green to make the landscape look more natural.
✅ Let each layer dry before adding highlights to avoid muddy colors.
✅ Have fun and don’t overthink it—expressive strokes bring the painting to life!Now, grab your brushes and start painting! 🎨🌻
FAQs 🤔
1. Can I change the color scheme of the flowers?
Yes! Try red poppies for a striking effect or lavender hues for a softer look.
2. How do I make the windmill look more weathered?
Use dry brushing with a light brown or white to add texture to the wood.
3. What if my clouds look too harsh?
Blend the edges with a dry brush or add a light blue glaze to soften them.
4. How can I make the flowers look more three-dimensional?
Use darker tones under each petal for shadows and lighter tones on top for highlights.
5. Can I use a smaller canvas for this painting?
Absolutely! Just use smaller brushes for finer details.
Final Thoughts:
Step back and look at your painting. If necessary, adjust the highlights and shadows to enhance depth. This painting is all about texture and movement, so keep your brushstrokes loose and expressive!
Would you try this tutorial? Let me know in the comments below!
Don’t forget to check out my 15 Days of Summer Sky Masterclass.
What You'll Learn
☁️ MASTER CLOUDS THAT LOOK GOOD ENOUGH TO FLOAT AWAY
🌈 COLOR THEORY MADE SIMPLE (AND MAGICAL)
🌻 15 LANDSCAPES, 15 WAYS TO FALL IN LOVE WITH PAINTING
Pin for later