If you’re anything like me, you probably have a growing collection of collage scraps—tiny torn pieces, leftover painted papers, vintage book pages, fabric bits, and all sorts of textured treasures. I’ve been saving mine for over a year, and instead of letting them pile up, I decided to transform them into something purposeful: collage clusters.
These little clusters are a perfect way to use up scraps while creating interesting focal points for your mixed media artwork.
In this blog, I’ll walk you through my process, sharing how I group, arrange, and layer scraps to make dynamic, textured clusters that can later become part of a larger artwork.
Video:
Want to see exactly how I create collage clusters from my scrap paper collection? I’ve filmed my process, showing how I select, layer, and arrange scraps to form unique clusters. In the video, you’ll get a closer look at my collage scraps and how I build these small compositions step by step.
If you enjoy watching hands-on creative processes, don’t forget to like, comment, and subscribe for more mixed media inspiration!
Thank you!
Why Make Collage Clusters?
Creating collage clusters is a fantastic way to repurpose small scraps of paper while adding a unique touch to your art. Here’s why they are so useful:
✔ They serve as focal points in larger mixed media collages ✔ They help you use up leftover scraps instead of wasting them ✔ They allow for intuitive art-making without overthinking composition ✔ They add texture and depth to your collages
I have incorporated collage clusters into my 100 Days of Collage project, and they have made my process so much easier. Instead of starting from a blank page, I simply add a cluster as a base and build my artwork around it.
I’ve put together a free resource library designed just for you, packed with everything you need to fuel your creativity. It’s my way of giving back to the mixed media community with resources to inspire your next project. Click here to join.
Step-by-Step Guide to Creating Collage Clusters
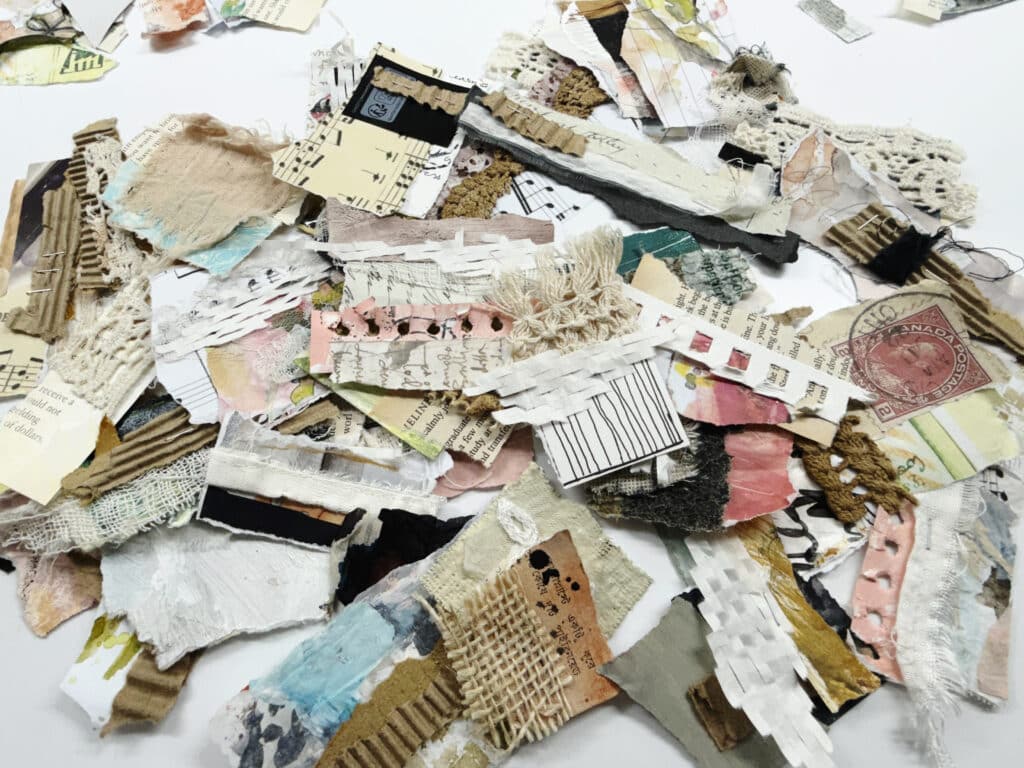
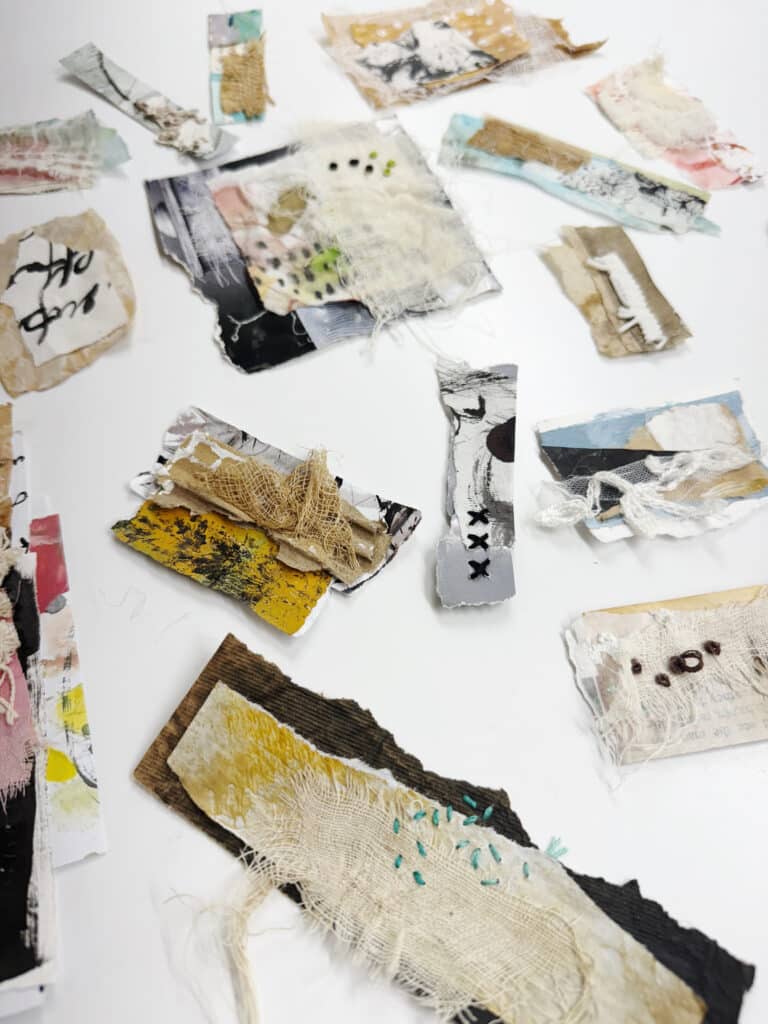
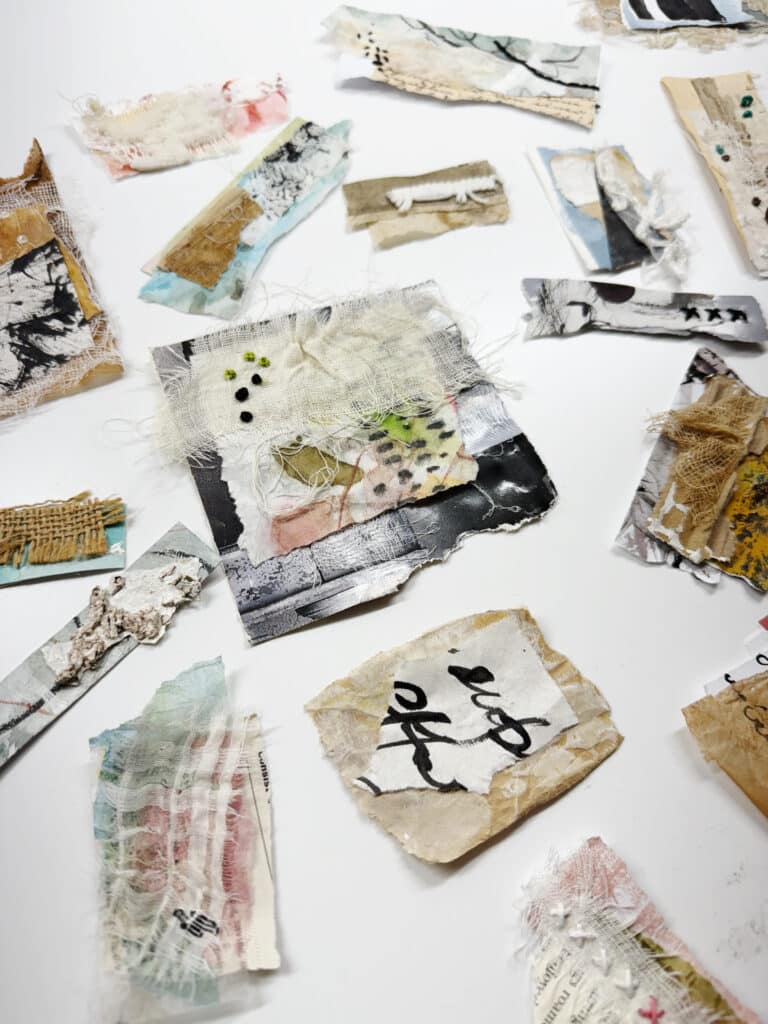
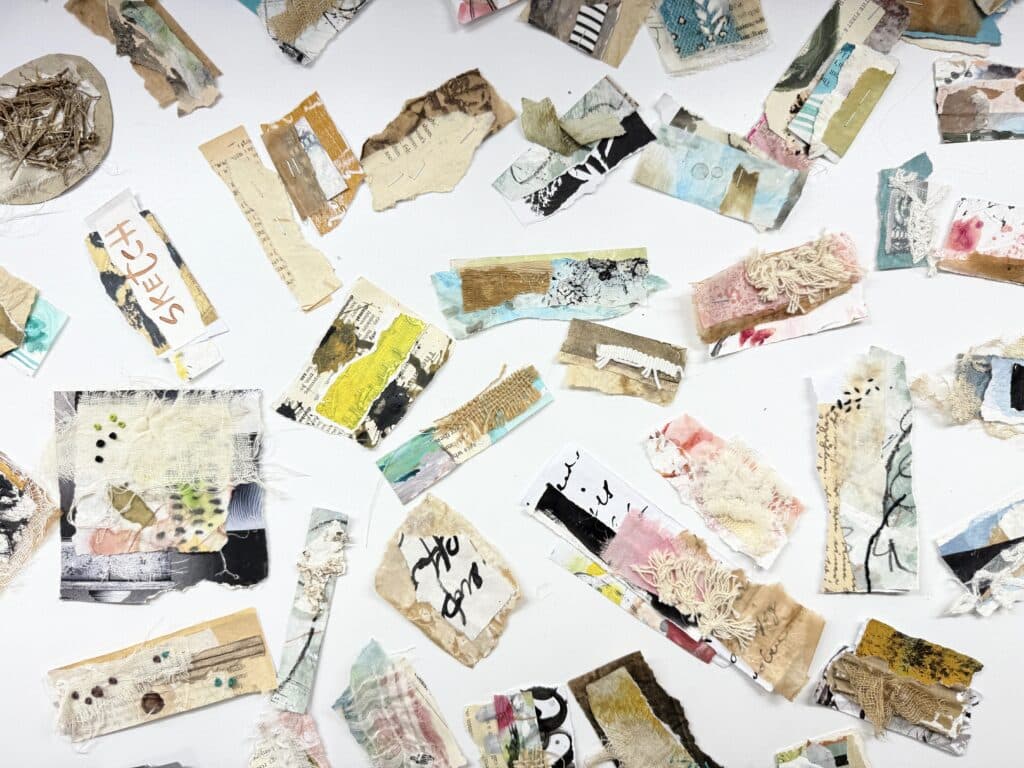
Step 1: Gather Your Scrap Papers
To createcollage clusters, start by gathering all your leftover collage scraps. These could include:
✔ Torn book pages, vintage ephemera, or text fragments ✔ Painted or dyed paper scraps ✔ Handmade papers or textured elements ✔ Fabric pieces or lace for added texture ✔ Any other small bits from previous mixed media collage projects
Spread them out so you can see your options clearly.
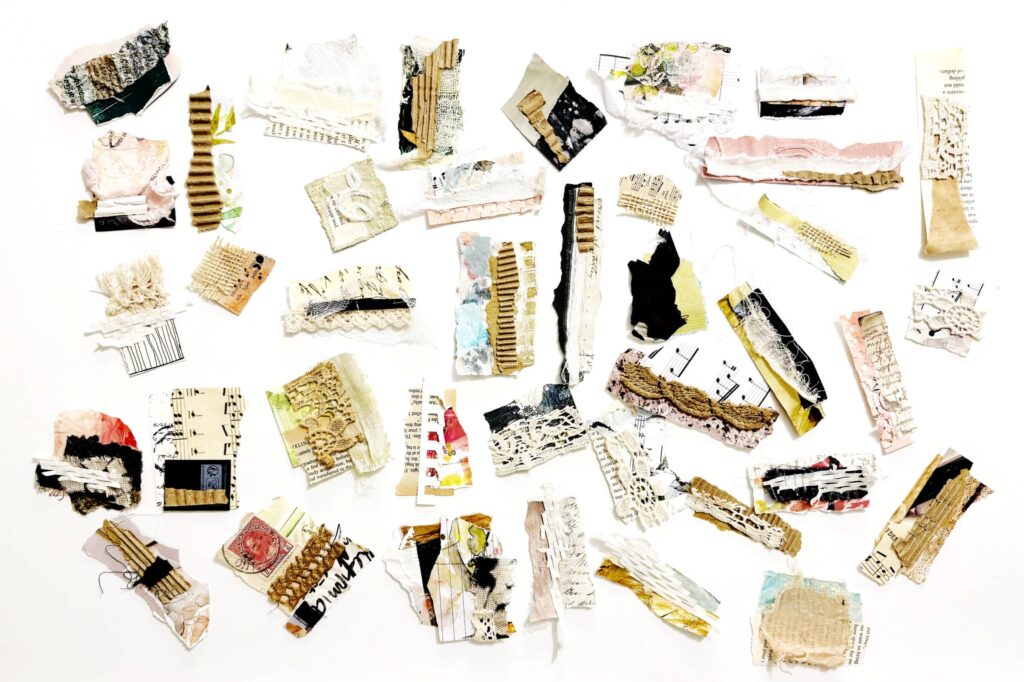
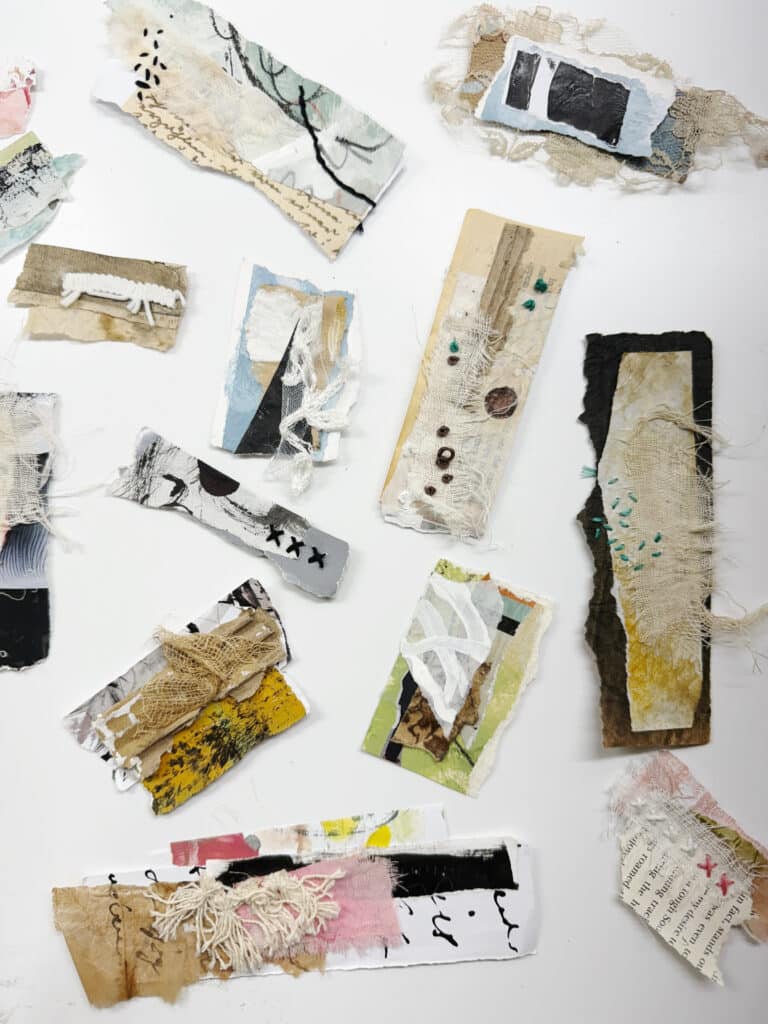
Step 2: Select and Layer Your Scraps
Choose 2-4 scraps that look good together. You don’t need to overthink it—just go with what feels right. Some ways to decide:
✔ Look for contrasting or complementary colors
✔ Mix different textures (smooth paper with rough edges, for example)
✔ Vary the sizes—have one larger base piece and layer smaller elements on top
✔ Overlap pieces to create depth and dimension
✔ Keep some torn edges visible for a raw, organic look
Step 3: Attach Your Collage Cluster
Now it’s time to secure yourcollage cluster! You have a few options:
Glue stick or matte medium: Perfect for a smooth, long-lasting hold.
Stapler: If you want to work quickly, staple your collage clusters together first. Later, if you decide to add stitching, you can remove the staples before sewing.
✨ Quick Tip: I often staple my collage clusters when I want to move fast, then take out the staples and stitch them by hand for extra texture.
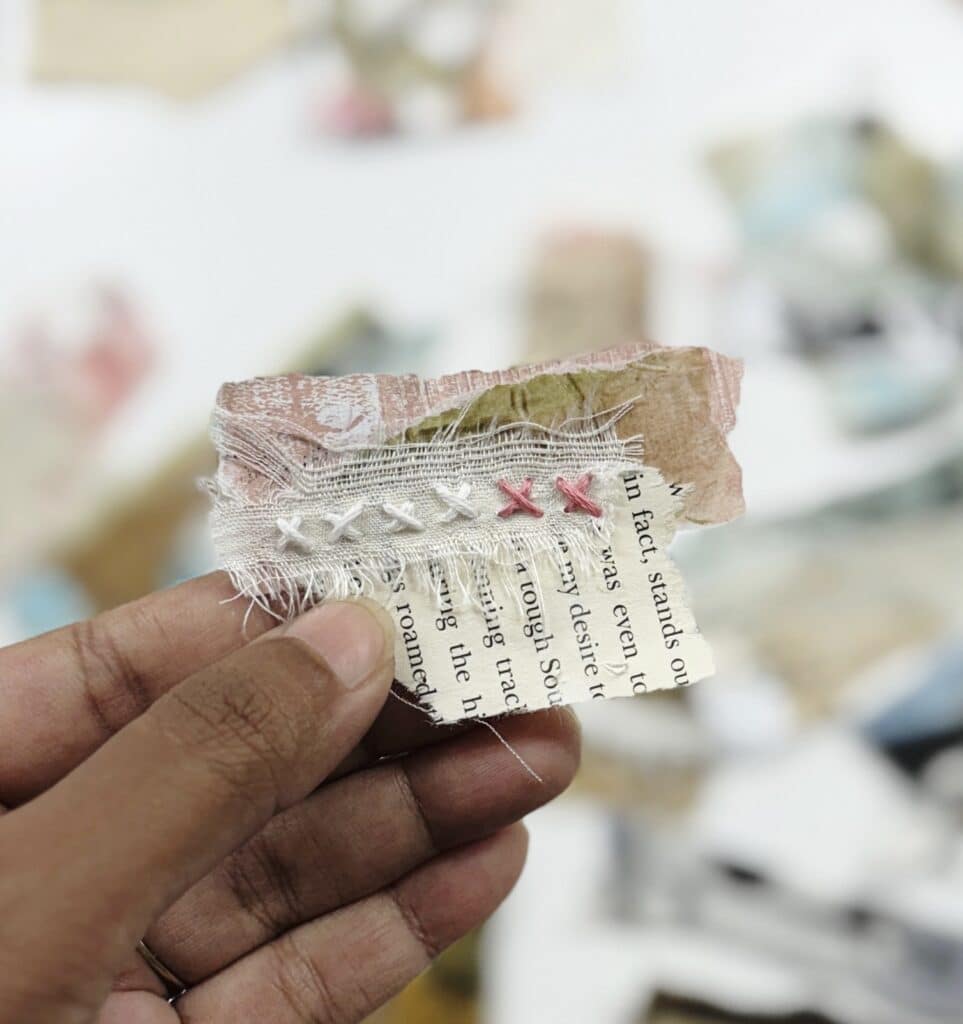
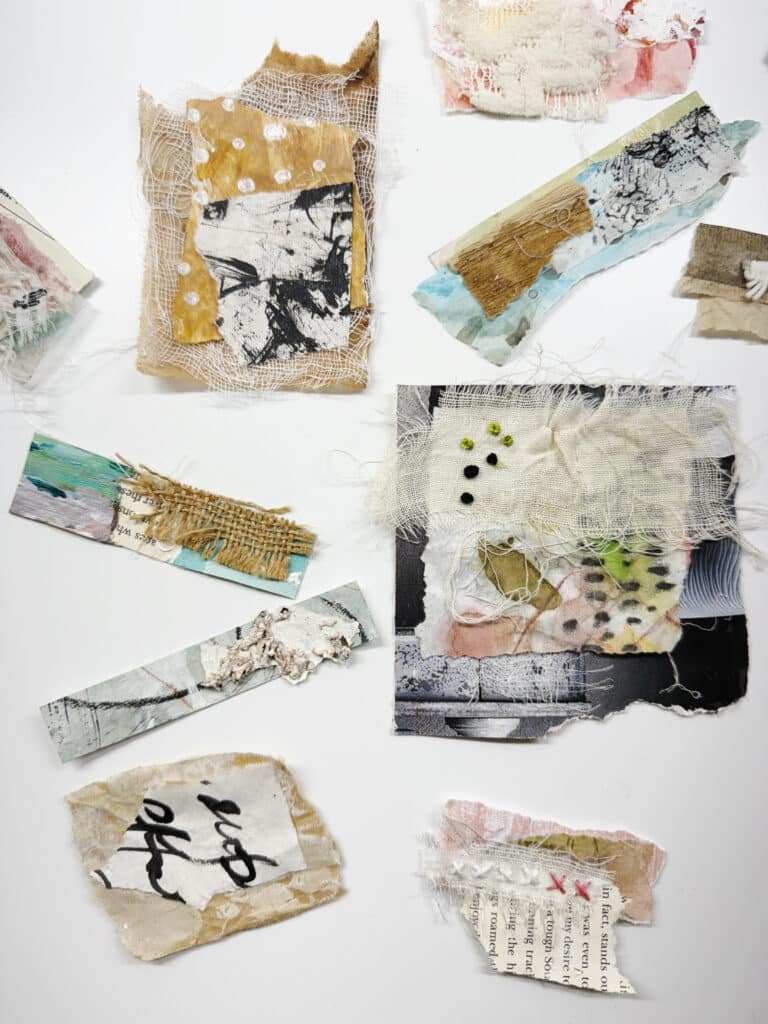
Step 4 (Optional): Add Stitches or Mark-Making
If you love texture, try enhancing yourcollage clusterswith:
✔ Hand-stitching with embroidery thread ✔ Pencil or pen scribbles for a sketchy effect ✔ Stamps or subtle ink marks ✔ Watercolor drips or splashes for extra depth
Even a few stitches or marks can make your collage clusters look more intentional and artistic!
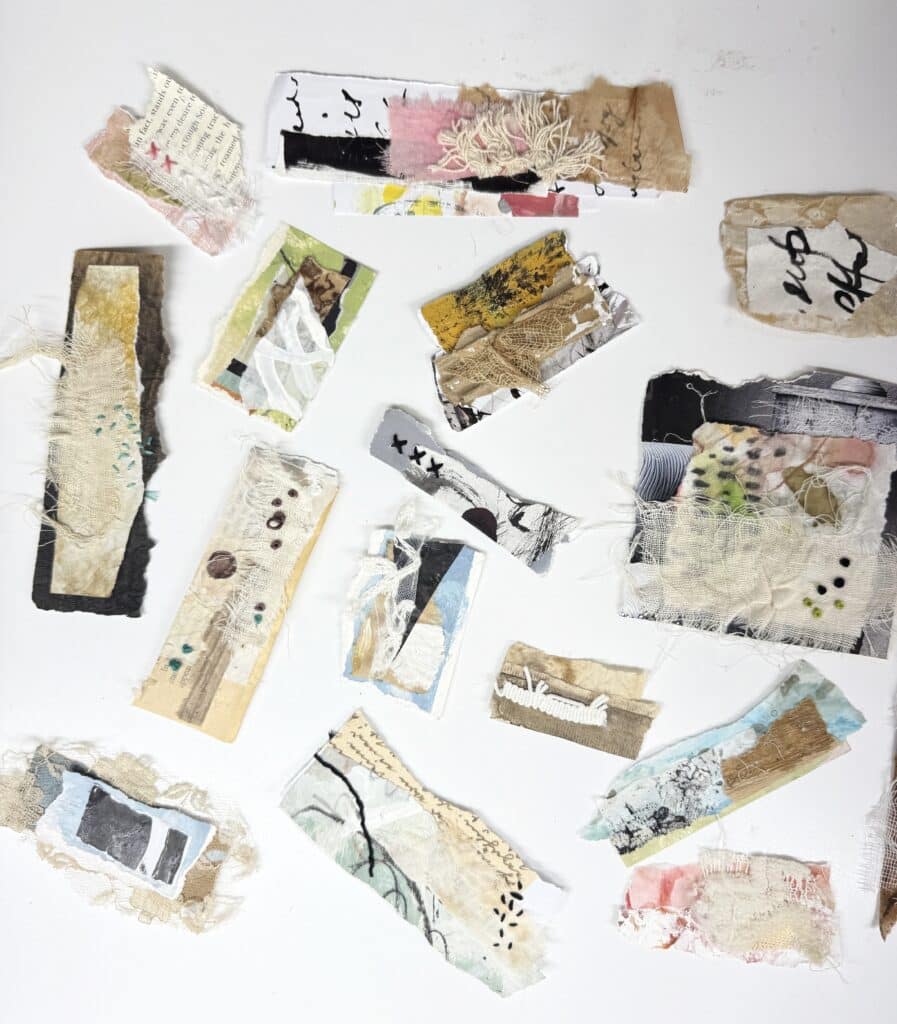
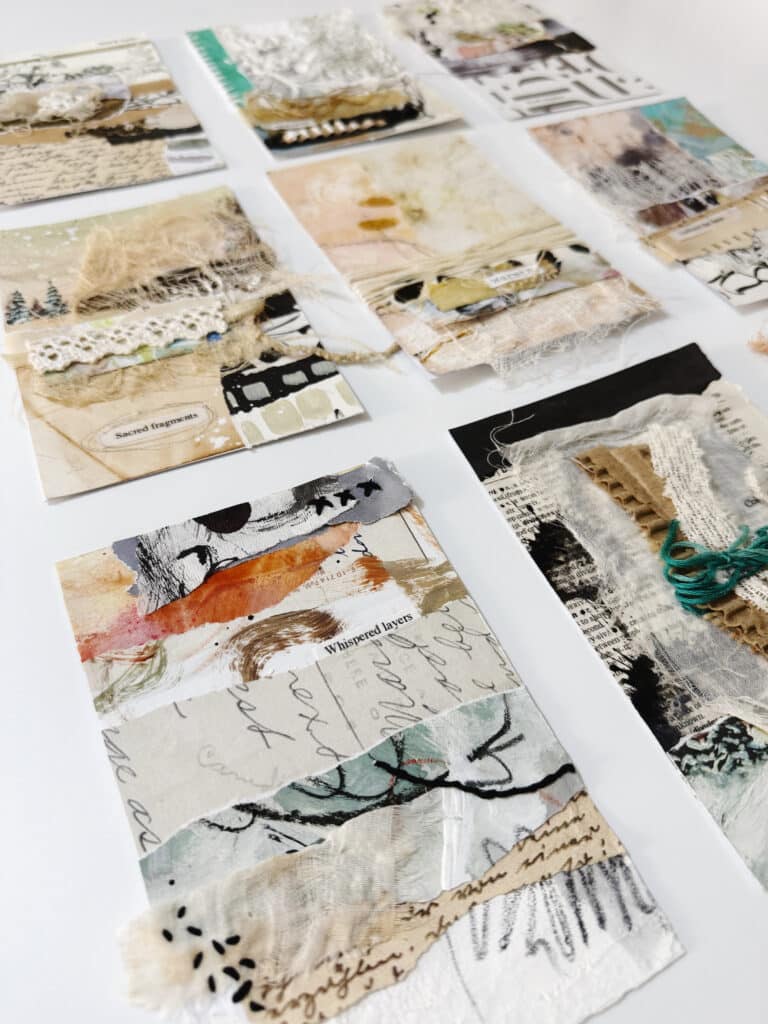
Step 5: Use Your Collage Clusters in Artwork
Once you’ve created a fewcollage clusters, it’s time to integrate them into your mixed media artwork. Here’s how I’ve been using them in my100 Days of Collageproject:
✔ Placing them as focal points in my art journal pages ✔ Layering them onto painted backgrounds for extra depth ✔ Combining them with acrylics, inks, and fabric for rich, textured compositions
These collage clusters help me build my artwork faster because they provide a starting point instead of staring at a blank page.
See My 100 Days of Collage Progress!
I’ve been using these collage clusters in the first group of my 100 Days of Collage project. If you’d like to see how they come together in my artworks, click hereto check out my blog post on the first set of collages!
Final Thoughts
Creatingcollage clustersis a simple, intuitive way to use up scrap papers while adding interest to your art. Whether you use them inscrap paper collages, mixed media journals,or as standalone elements, these small compositions can transform your creative process.
Have you tried making collage clusters before? How do you use your leftover scraps?Let me know in the comments!
And if you want to see this process in action, check out myYouTube videowhere I walk through my collage scraps and show you how I assemble these clusters.