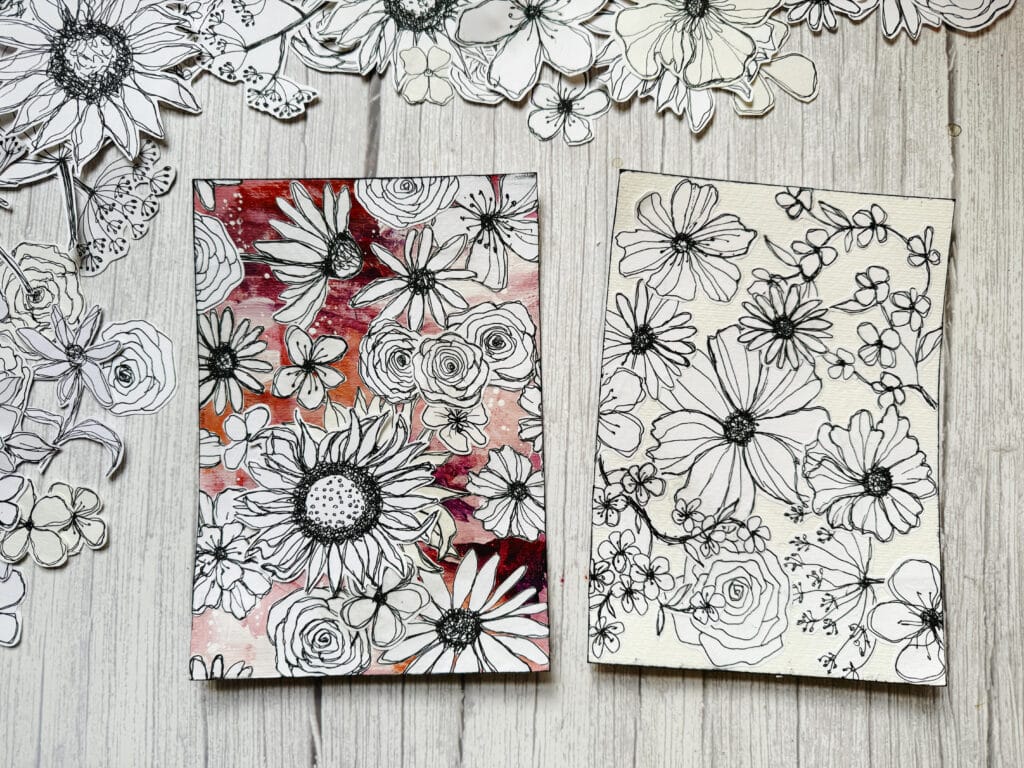
Floral line art is a timeless and versatile way to add elegance to your art projects. In this tutorial, we’ll create two beautiful A5 floral paintings using black-and-whitefloral line artcutouts from myMessy Flower Doodles class. One piece features an acrylic background, while the other uses a plain white background for a clean, minimalist look.
Whether you’re a beginner or a seasoned artist, this guide will help you create visually pleasing compositions while experimenting with layers, textures, and simple black-and-white floral designs. Let’s get started!
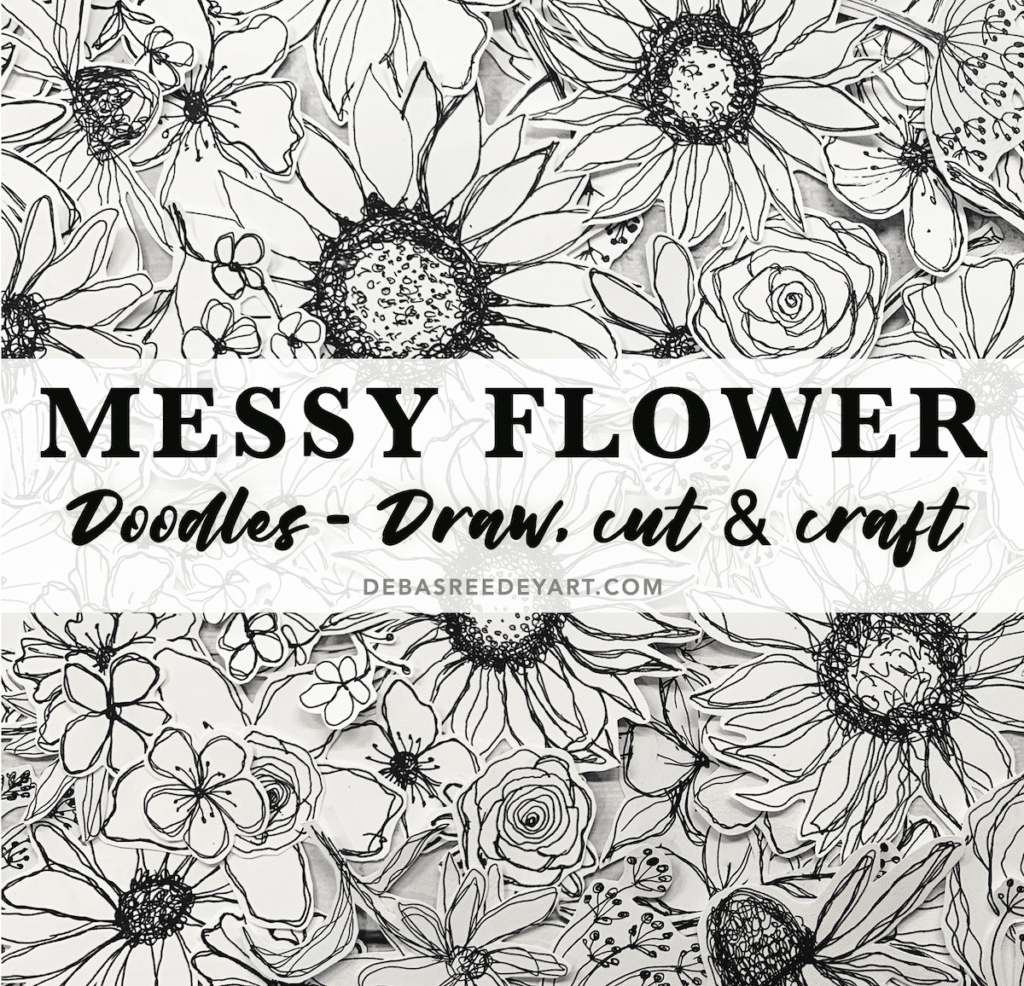
What is the Messy Flower Doodles Class?
The Messy Flower Doodles class is all about learning to create beautiful, free-form floral line art.
You’ll explore eight different flower designs, including daisies, roses, and cherry blossoms, using simple black pens and a messy, expressive style.
These floral doodles can be cut out and used in various creative projects, such as art journaling, collages, or as the focal point
“I always thought I couldn’t draw, but this class completely changed my perspective! The messy and free-form approach made it so much fun, and now I feel confident creating beautiful floral designs. Highly recommended!” – Neha Gupta
Messy Flower Doodles cutouts (or your own floral line art designs)
Glue or adhesive
Painting Steps:
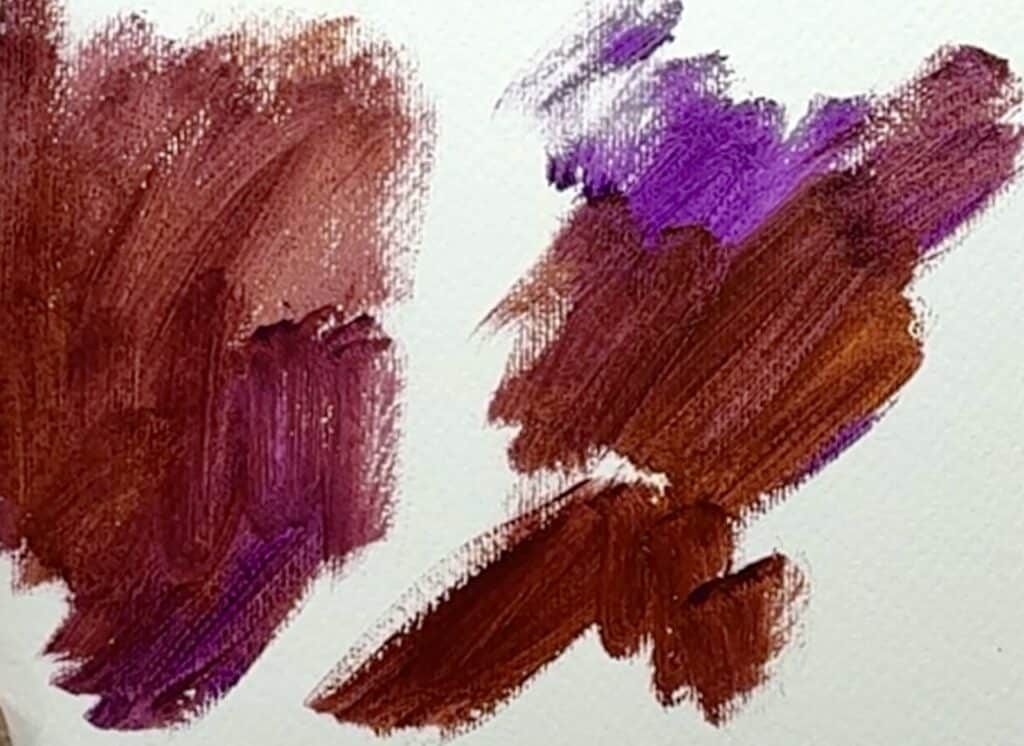
Step 1: Choose Your Colors
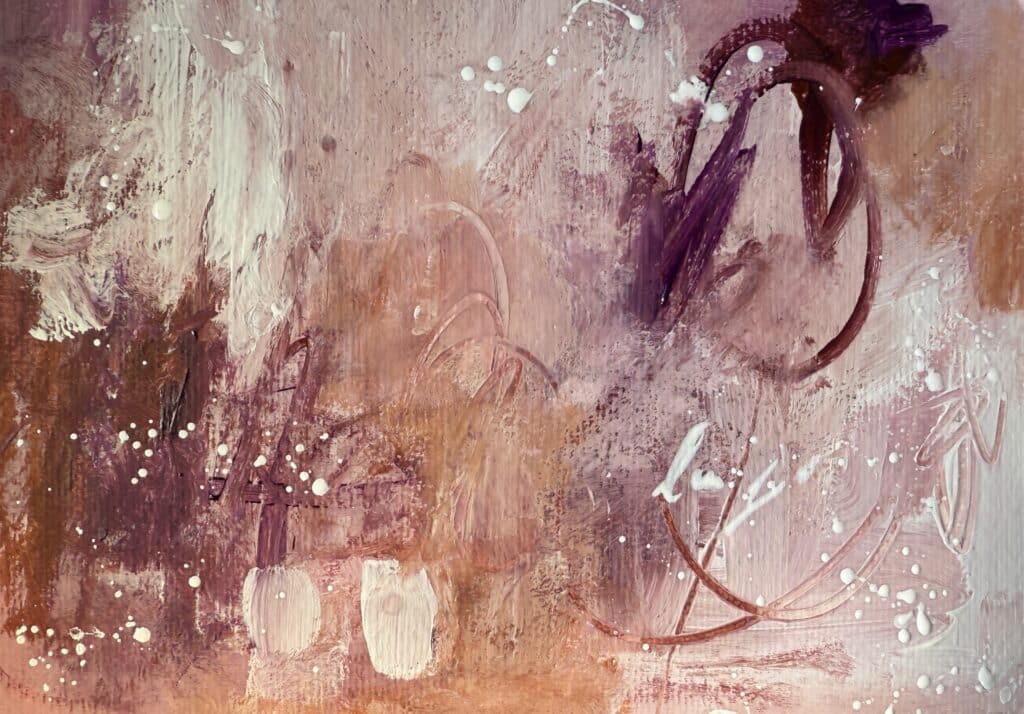
Select two acrylic paint colors that complement each other. These will form the background for your floral line art. You can use bold contrasting hues or stick to a soft, pastel palette for a calming effect. I used burnt sienna and purple.
Step 2: Paint Your Base Layer
Add both acrylic colors simultaneously to your A5 paper and have fun with it! Let go of perfection—make bold marks, blend, swirl, or even scribble with your brush. Enjoy the process of covering the paper with colors in your unique style.
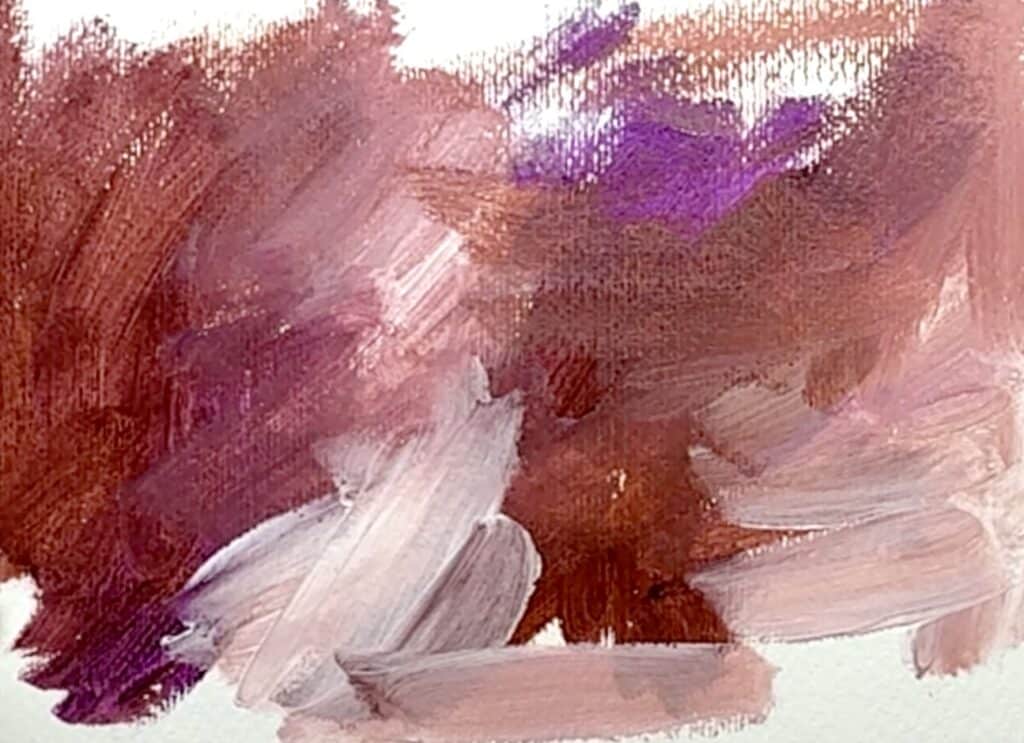
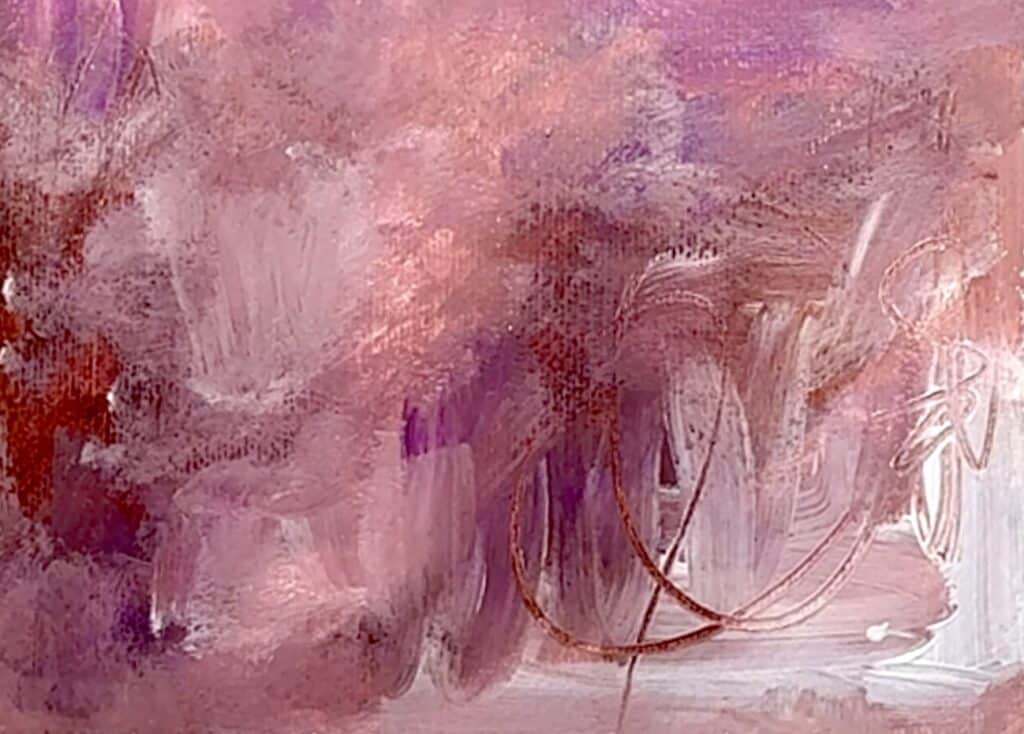
Step 3: Lighten with Gesso
Apply a thin layer of gesso to soften the colors and create a dreamy, textured background. Use a dry brush to let some of the base colors peek through.
Step 4: Add Marks and Splashes
Enhance the background with marks and splatters. Use your paintbrush to make playful strokes, dots, or even splatter paint for a lively effect. Let your creativity flow!
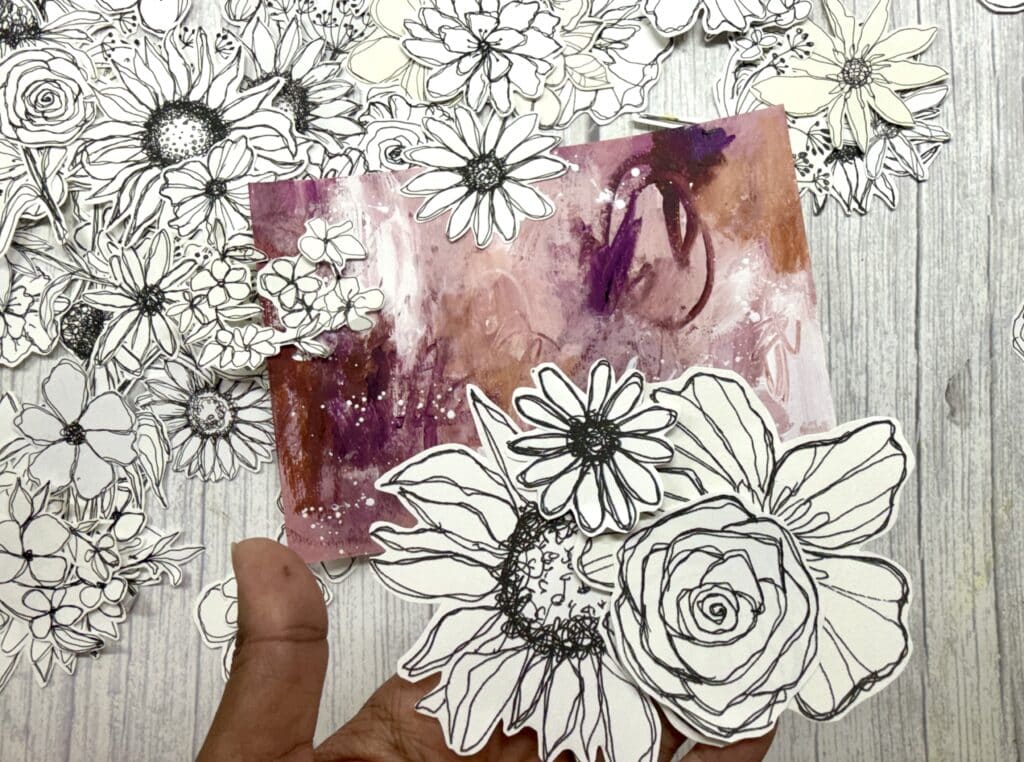
Step 5: Gather Your Messy Floral Doodles
If you’ve already finished the Messy Flower Doodles class, gather your floral doodle cutouts for this step. If not, you can check out the class to learn how to create these fun, free-form floral designs. Once you’ve drawn and cut out your doodles, come back here to continue with the next step!
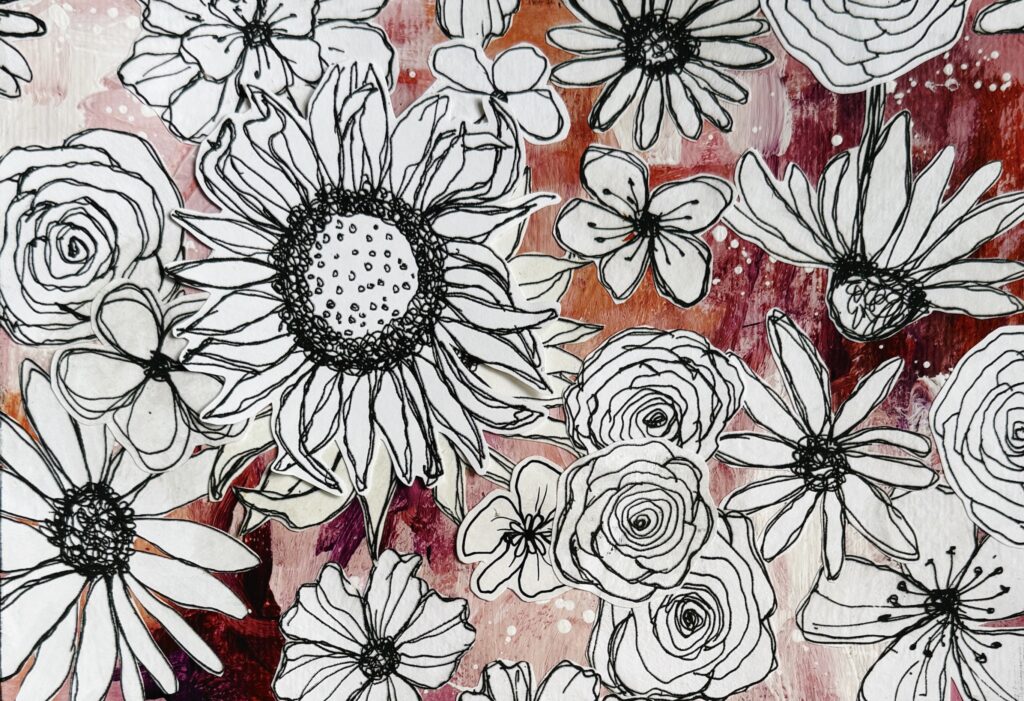
Step 6: Arrange and Assemble
Lay out the floral cutouts on your prepared background, experimenting with different placements until you’re happy with the composition. Once finalized, glue them down securely.
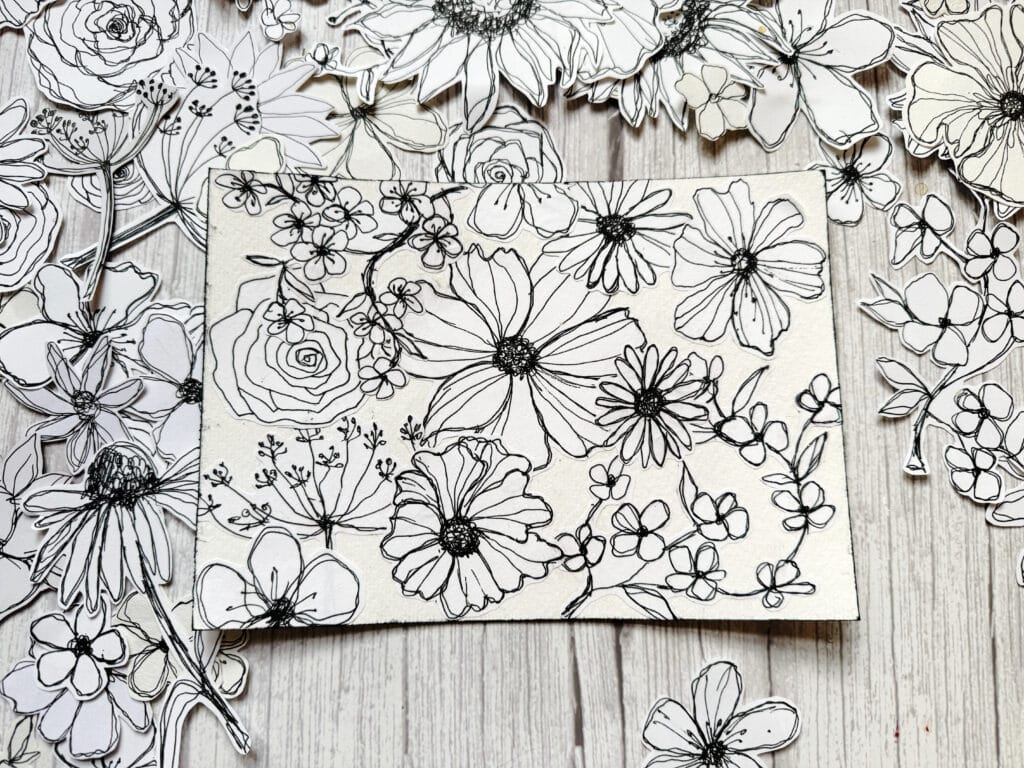
Bonus: Create a Minimalist White Background
For a clean and crisp design, skip the acrylic layers and work directly on plain white paper. Arrange your black-and-white floral doodles to form an eye-catching composition.
And there you have it—a simple yet elegant way to create stunning floral line art compositions! Whether you prefer a vibrant acrylic background or a minimalist white one, these projects are perfect for wall art, greeting cards, or even gifts.
If you want to learn how to make your own floral cutouts, check out my Messy Flower Doodles class—it’s a fun and beginner-friendly way to explore floral line drawing!
I’d love to see your creations! Share your artwork in the comments or tag me on social media. Let’s inspire each other with our floral designs!