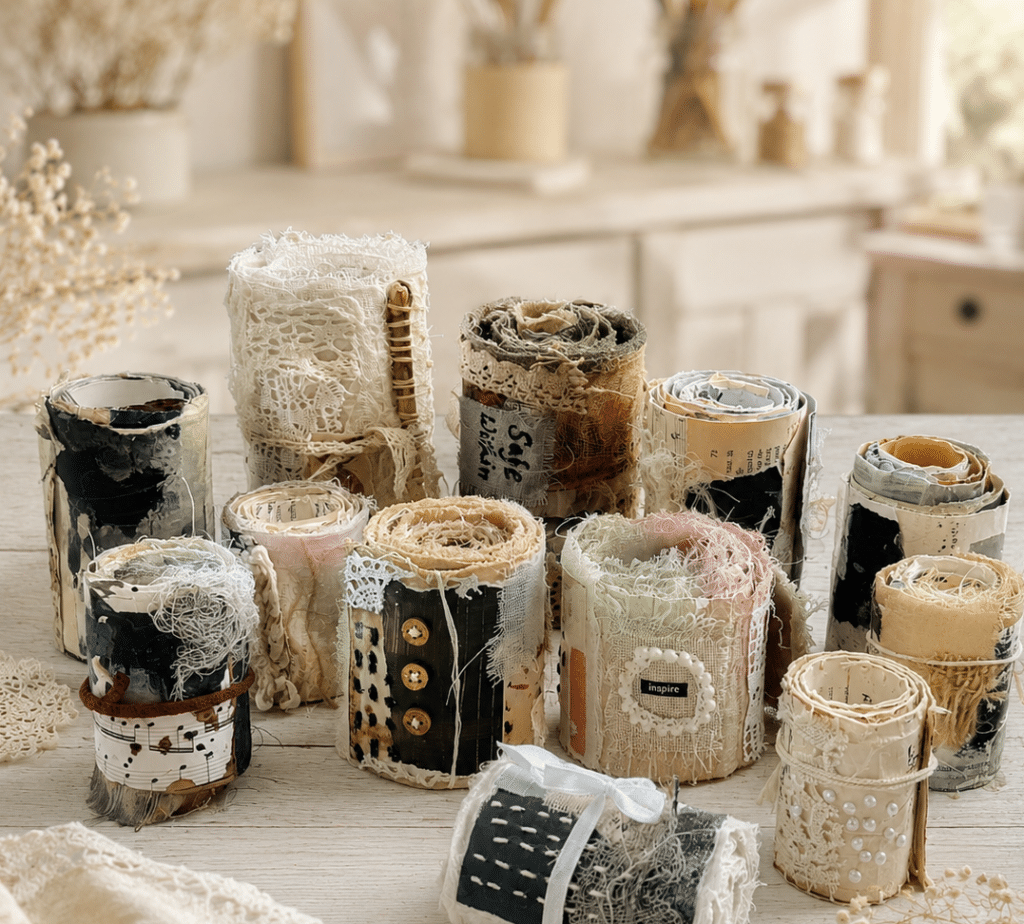
Ever since I published my Gathered Rolls class, my inbox, DMs and comments have been filled with one question: “But what do we actually do with a snippet roll?”
And I completely understand the question. When you spend time gathering tiny scraps of paper, fabric, lace, thread and other beautiful bits and turn them into one long, textured roll, it can almost feel too precious to cut into.
But that’s exactly where the fun begins.
A snippet roll isn’t meant to simply sit on your shelf looking beautiful. It is a collection of little pieces waiting to become something else—a journal cover, a tag, a pocket, a collage, a page edge, a small artwork and so much more.
So I thought I’d put together some of my favourite ways to use snippet rolls, especially if you have one sitting in your studio and are wondering “Now what?”
Here are some of my favourite ways to use snippet rolls in junk journals, art journals and mixed media projects.
1. Use Snippet Rolls on Art Journal Covers
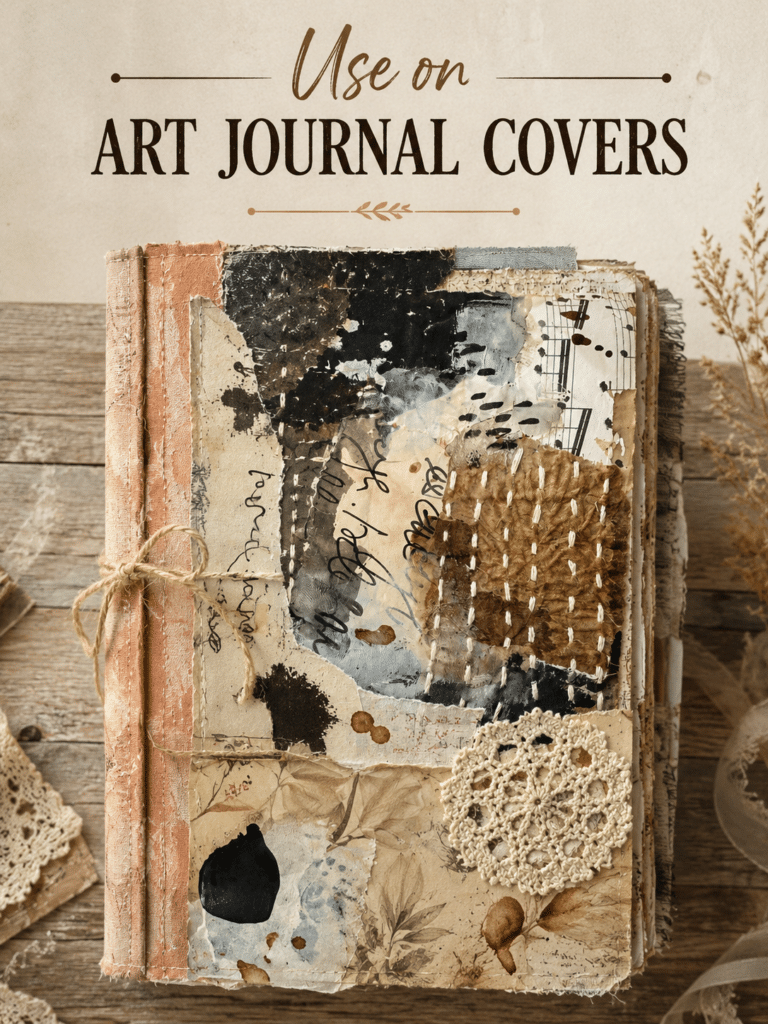
One of my favourite uses for a snippet roll is to add a section of it directly to an art journal cover.
You don’t need to use the entire roll. Cut a section that works with the colours and textures of your cover and attach it as a focal area.
The beautiful thing is that the snippet roll already contains so many layers—paint, paper, fabric, stitching and texture—so it can instantly give a simple cover more depth and personality.
You can use:
- One long vertical section
- A horizontal strip
- Several smaller pieces
- A section wrapped around the spine
- A piece layered over an existing collage
And because every section of the roll is slightly different, you can choose exactly the part that works with your journal.
2. Decorate Handmade Tags
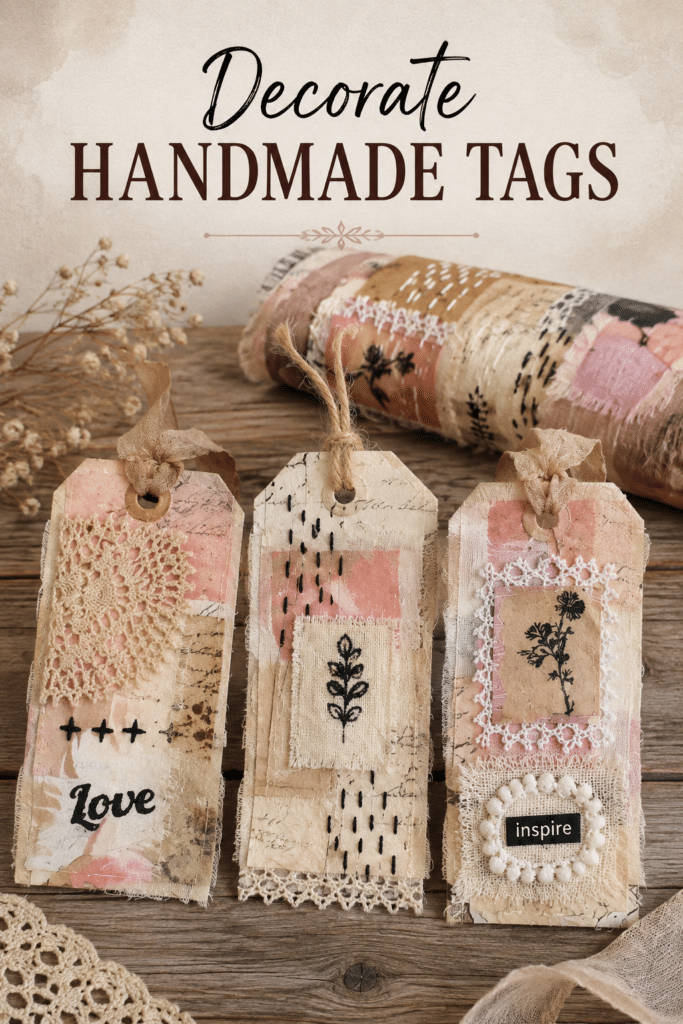
Snippet rolls are wonderful for making handmade tags.
Cut a small section from the roll and attach it to a plain paper or cardstock tag. You can leave the edges raw and frayed, stitch around it, or layer additional lace and fabric over it.
You don’t need much.
A tiny piece of snippet roll can become the main embellishment on an otherwise simple tag.
This is particularly useful when you’re making several tags and want them to feel connected without making every one identical.
3. Turn Them Into Collage Clusters and Embellishments
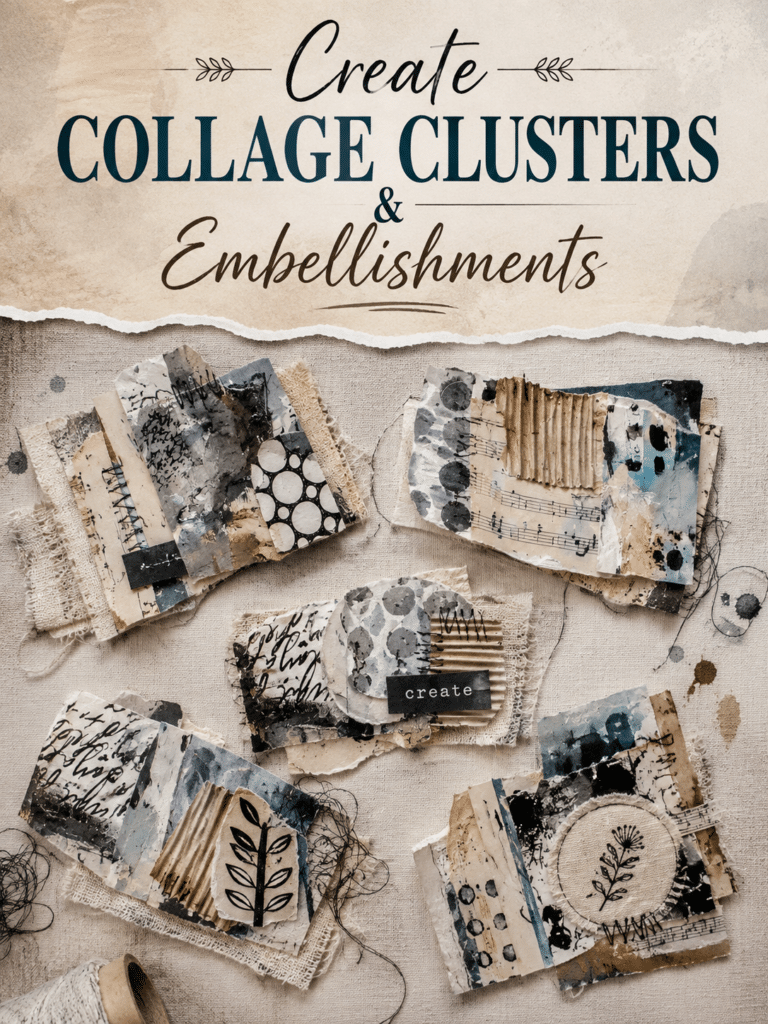
This is where snippet rolls become incredibly versatile.
Instead of treating the roll as one continuous piece, cut it apart and look at the individual sections. A small piece might already look like a finished collage cluster.
You can add one to an art journal page, use as focal points, and mixed-media embellishments.
Cut it out. Use it. Let it become something else.
4. Add Texture to Junk Journal Page Edges
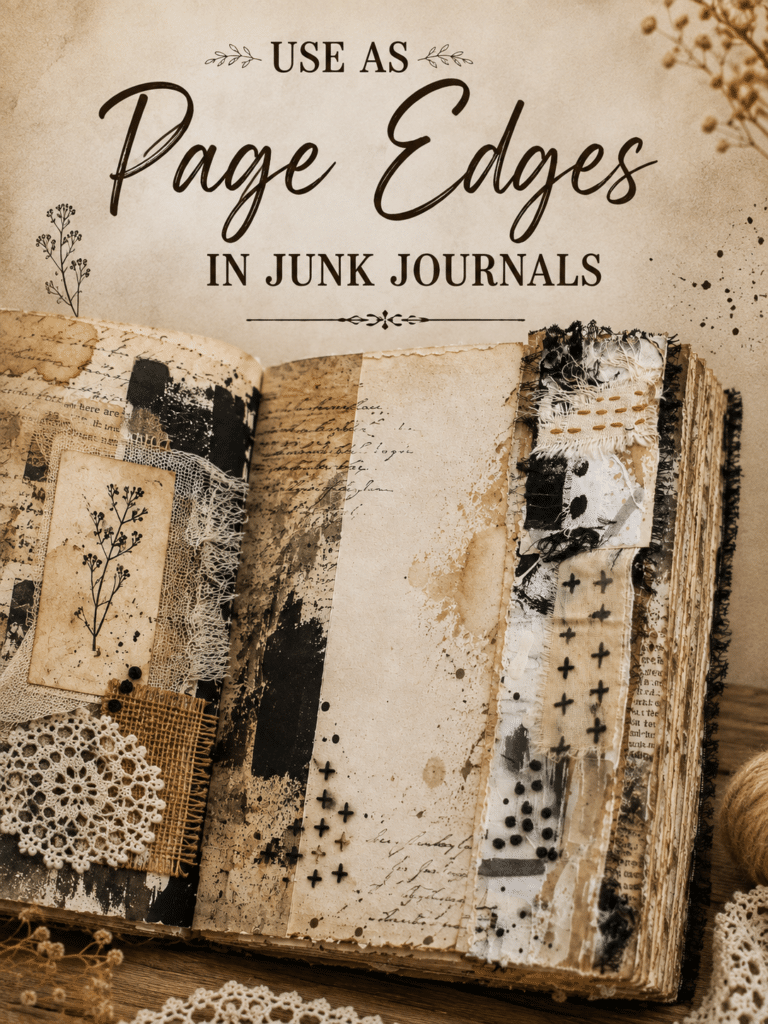
This is one of the simplest ways to use a snippet roll, and one of my favourites.
Cut a narrow section and attach it along the edge of a junk journal page.
The result is almost like a textile trim—but one that contains your own collage, paint, stitching and marks.
You can let the edges remain frayed and imperfect, which works beautifully with the tactile character of junk journals.
Want to Make Your Own Snippet Rolls?
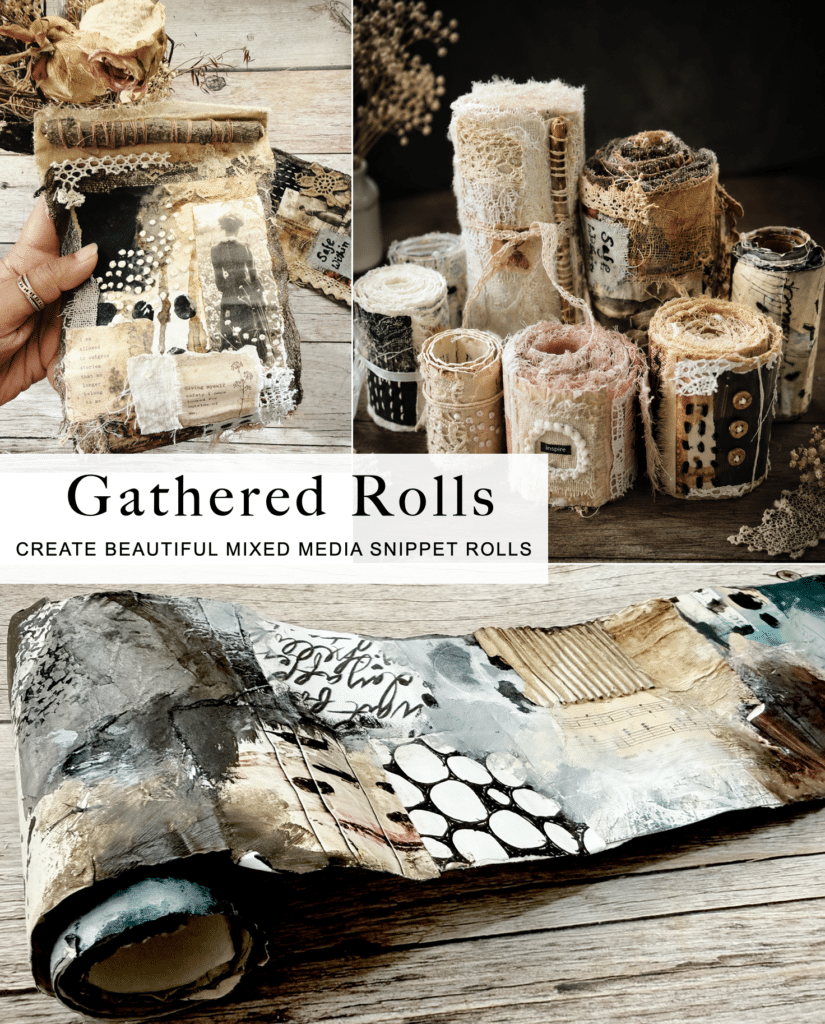
If seeing all these possibilities has you wanting to make your own snippet rolls, that’s exactly what I created Gathered Rolls for.
In this class, I teach you four completely different approaches to creating snippet rolls—from fabric-based and painterly rolls to patchwork-style rolls and a more layered scroll journal.
You’ll learn how to work with the scraps you already have, combine paper, paint, fabric, texture and stitching, and create your own collection of snippet rolls that you can keep and use across your art journals, junk journals, collage projects and mixed media artwork.
5. Decorate Boxes and Other Objects
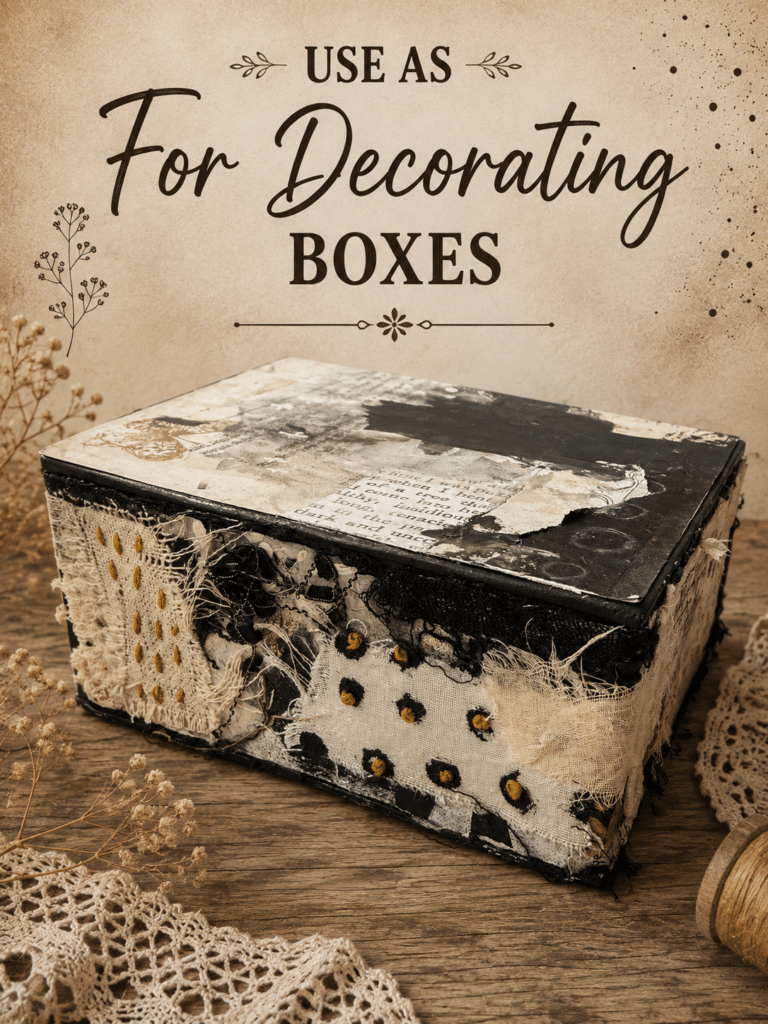
Don’t limit snippet rolls to paper projects.
A section of snippet roll can be used to decorate boxes, storage containers and other handmade objects.
For example, you could cover part of a box with a snippet roll and build the rest of the surface around it with paint, collage and additional texture.
This works particularly well when you’re altering something ordinary and want to give it a handmade, collected feel.
And because the snippet roll already has layers built into it, you’re essentially transferring a little piece of your mixed media artwork onto another object.
6. Create Tuck Spots and Pockets
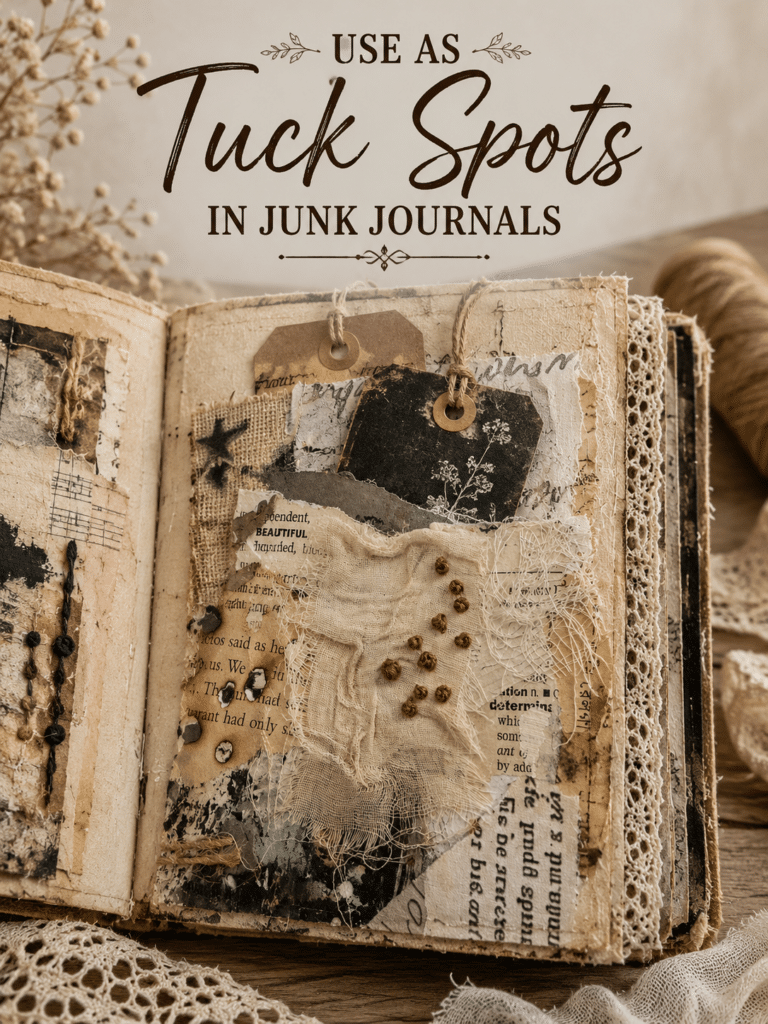
A snippet roll can also become a functional part of your journal.
Cut a section and attach only part of it to the page, leaving an opening underneath. This creates a tuck spot where you can slip in tickets, tags, cards, small photographs, notes.
You can also use larger sections to decorate the front of a pocket.
This is one reason snippet rolls work so well in junk journals: they aren’t only decorative. They can become part of the structure of the journal.
7. Make Collage Strips and Borders
Sometimes you don’t need a focal point. You just need a strip of something interesting.
Cut a long, narrow section from your snippet roll and use it as a border along the top, bottom or side of an art journal page.
You can also:
- Run it horizontally across a page
- Place it vertically through the centre
- Frame a photograph
- Divide two areas of a collage
- Use it like a decorative strip
- Layer several narrow strips together
This is particularly useful when a page feels a little too empty but you don’t want to start another complicated collage. One beautiful strip can be enough.
8. Use Snippet Rolls Inside Handmade Books and Junk Journals
Snippet rolls can become part of the actual bookmaking process, not just decoration.
Use sections as:
- Page tabs
- Tuck points
- Decorative page inserts
- Pockets
- Belly bands
- Page dividers
- Spine embellishments
9. Turn a Snippet Roll Into Mini Artworks
This is one of the most exciting possibilities.
What if you made a very long snippet roll and then cut it into several sections?
Each section can become a small artwork in its own right.
You could mount individual pieces onto 4 × 6-inch panels / Cardstock/ Watercolour paper
A long roll can therefore become a collection of related artworks rather than one single piece.
10. Build a Larger Mixed Media Artwork
And finally, you can use snippet rolls as material for your larger mixed media work.
Instead of adding individual scraps one at a time, use a completed section of snippet roll as one layer in a larger composition. Add it to a canvas, panel or heavy mixed media paper and continue building around it with paint, mark-making, collage.
This gives you an interesting starting point because some of the visual decisions have already been made for you.
You’re not beginning with a blank surface. You’re beginning with a little piece of history you’ve already created.
A Few Tips for Using Snippet Rolls
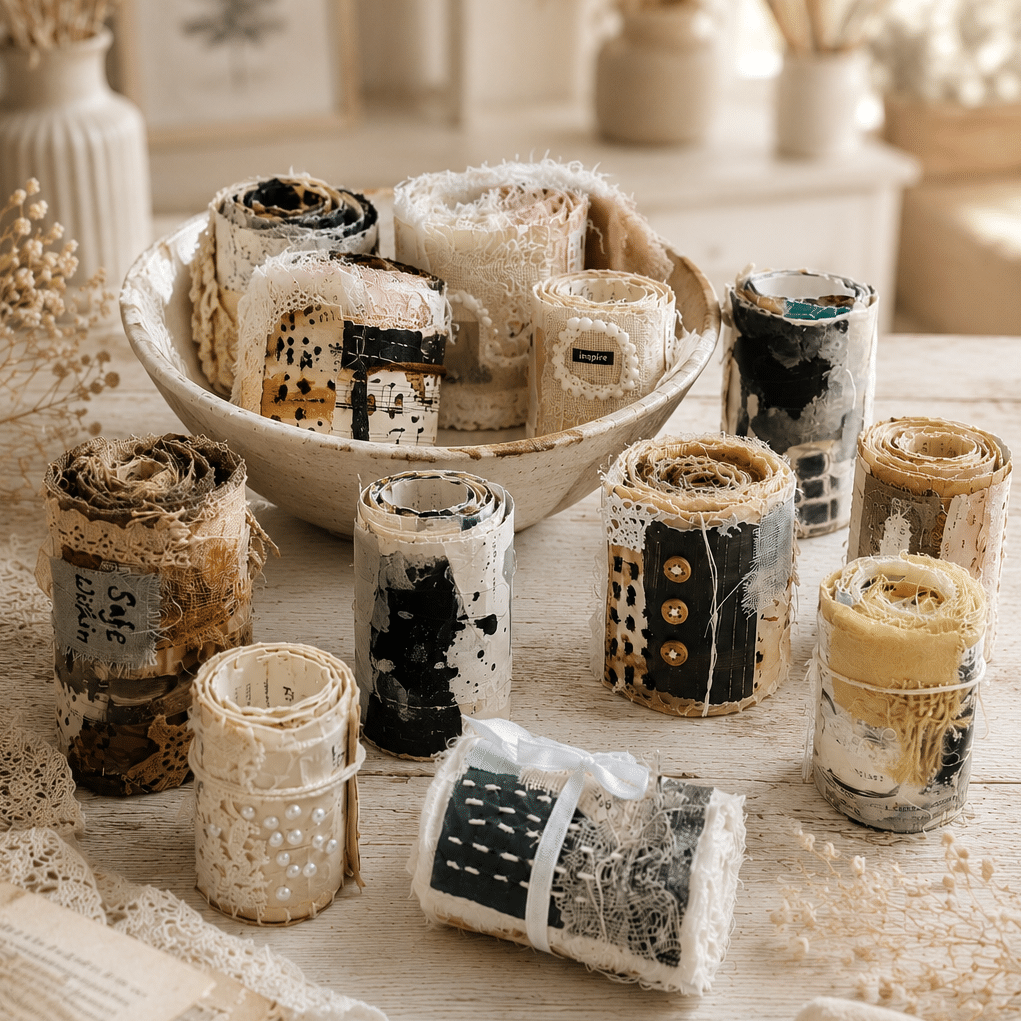
1. Don’t be afraid to cut them
I know this can be difficult.
After spending so much time making a beautiful roll, cutting into it can feel almost wrong.
But that’s actually the purpose of making one.
The roll is a collection of possibilities. Once you cut it, each section can become something new.
2. Choose the section that fits your project
You don’t have to use the first piece you come across.
Unroll your snippet roll and look at the whole thing.
Maybe you need something quiet and neutral for a journal page.
Maybe you need a heavily textured section for a focal point.
Maybe you need a tiny piece with stitching and buttons.
Let the project tell you which part to use.
This is one of the reasons snippet rolls are so useful: different sections can serve completely different purposes.
3. Make rolls in different widths
Don’t assume every snippet roll has to be the same size.
A narrow roll can work beautifully as a border or page edge.
A wider one can become a focal point, pocket, journal cover embellishment or even a small artwork.
And that’s one of the things I love most about making them: you can decide what your roll needs to become before you even start creating it.
The Best Part of Making Snippet Rolls
For me, the magic of a snippet roll isn’t just in the finished roll. It’s in the uncertainty.
You gather scraps without necessarily knowing where they’re going. You put one piece beside another. You add a little paint, some fabric, a bit of lace, perhaps a stitch or two.
And slowly, something begins to emerge. You can’t completely predict what the finished roll will look like. That element of surprise is part of what makes the process so enjoyable.
And once you’ve finished, you have something even better: a collection of future possibilities.
You can cut it. Tear it. Layer it. Stitch it. Add it to a journal. Turn it into a tag. Make a pocket. Create an artwork. Or simply keep it rolled up until the perfect project comes along.
That’s why I think of snippet rolls less as finished artworks and more as a stash of handmade possibilities.
A Little Reminder: You Don't Have to Save It Forever
There is something wonderfully contradictory about snippet rolls. We make them from the scraps we couldn’t bear to throw away—and then we have to be willing to cut them apart. But that’s what makes them useful.
The beauty isn’t in keeping the roll perfectly intact. The beauty is in knowing that whenever you need a little piece of texture, colour or collage, you already have something handmade waiting for you.
Cut a piece. Tear a piece. Use it. Let it become part of something new.
And when you’ve used one section, you still have the rest of the roll waiting for the next idea. That’s the magic of gathering scraps: nothing has to be wasted, and nothing has to be decided all at once.
I hope these ideas have given you a few new ways to look at your own snippet rolls—and perhaps made you want to pull out those little scraps you’ve been saving and start gathering again.
Browse Blogs By Category