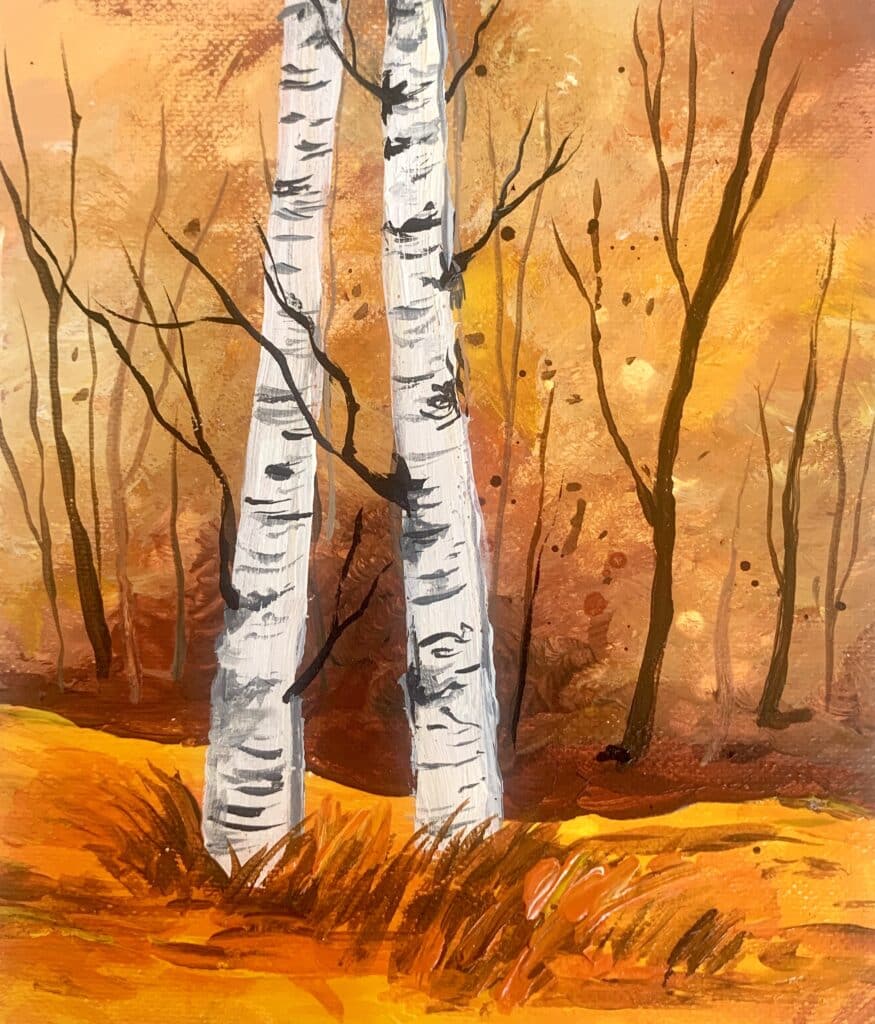
In this blog, I’ll guide you step by step to create this easy autumn birch tree forest painting with acrylics.
This tutorial is perfect for beginners who want to follow and paint along with me. And if you are a pro, you can also paint along and create this autumn beauty!
Cut this Canson acrylic paper into 6 equal pieces and you’ll get the size I used.
Acrylic Brushes:
I used a size 4 flat brush from this flat brush set which is perfect for this canvas size. If you are painting bigger, then switch to a size that is proportionate with your painting surface.
Pin the below image in your Pinterest board for future reference.
painting steps:
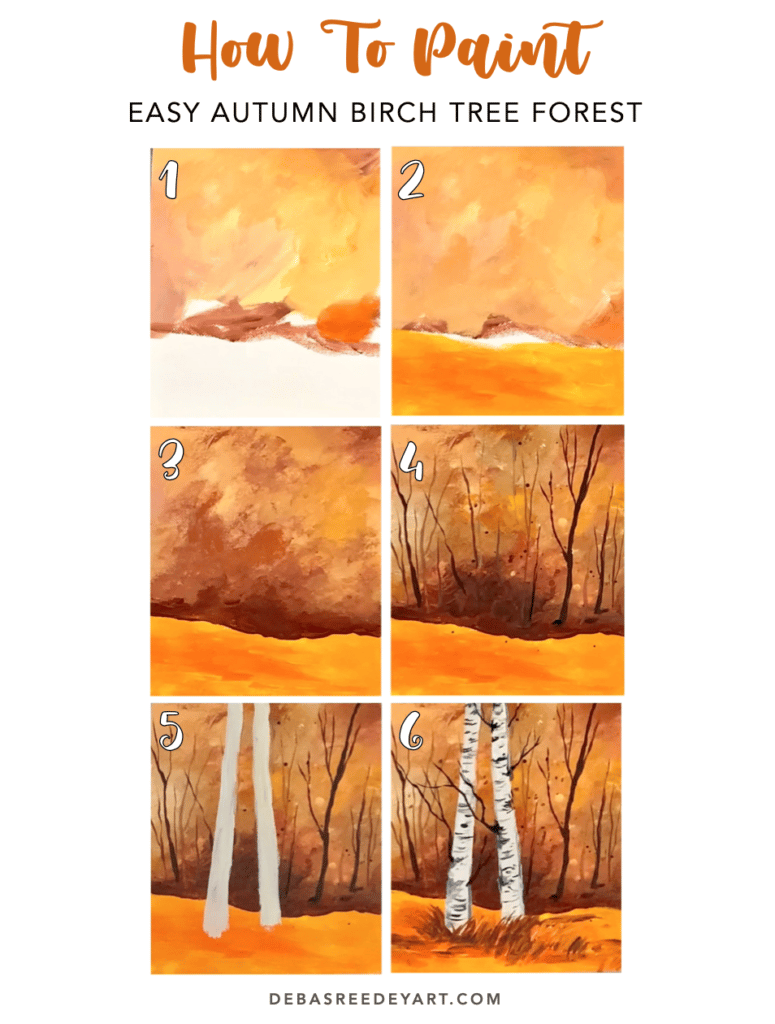
1. Background
Start with a lot of white along with a mix of yellow and burnt sienna. Keep blending it all in the background to create a gradual gradation of a blend of colors. Use a touch of orange also in the mixture. Right now the focus is simply covering the bakground paper.
2. Land
Paint the land using a mix of yellow and orange. Blend the 2 colors in horizontal direction.
3. Background texture - layer 1
Now add textures to the autumn birch tree forest background. Start with pure burnt sienna and add just above the ground. Now blend it in with the background keeping it darkest in the centre.
Pro tip: Use the flat side of the brush, almost laying it on paper, to blend the colors.
4. Background Texture - Layer 2
With the similar brush strokes, keep moving the burnt sienna color up and blend it with the background by creating textures. Remember to have less paint in your brush, because you need dry brush to create such textures.
5. Background Texture - Layer 3
Now the most fun part of texturing. I love creating textures with this method. Dip your small round brush in water and mix with burnt sienna. Splatter the brush on top of your canvas to create some beautiful dot textures.
6. Distant forest trees
Now with a liner brush and a lighter value of burnt sienna, add the distant trees. Make sure to mix it with white and water to create the lighter tints.
Creating trees with light colors will create the depth in the birch tree forest.
7. Closer Trees
Use a darker value of burnt sienna to create the dark shade of trees.
8. Foreground birch trees
Let the background dry completely. Now add the foreground prominent birch trees of this autumn tree forest. Add the trunks with a round brush and white.
9. Birch tree textures
With a liner brush, create the horizontal strokes in the birch tree to create the trunk textures. First do it with grey and then with black. Also add some branches going out from the tree trunk.
10. Grass
In the last step of painting the autumn birch tree forest painting, add the grass in the bottom using a mix of orange, burnt sienna & black.
And that’s it… just by following these 10 steps, you can now create your very own autumn birch tree forest landscape painting.
Did you enjoy following this tutorial? What is the next painting you want me to teach? Let me know how it turned out for you by commenting below!
Happy Painting!
Pin the below image in your Pinterest board for future reference.