Painting water drops can be a fascinating and rewarding artistic endeavor. The way light interacts with water creates mesmerizing reflections and refractions, making water drops an intriguing subject to capture on canvas.
The glistening and transparent nature of water drops can seem challenging to capture, but with the right techniques and a step-by-step approach, you can master the art of painting water drops with acrylics.
In this “how to paint water drops” step-by-step tutorial, we will guide you through the process of painting water drops with acrylics, allowing you to bring a touch of realism and beauty to your artwork.
By mastering the art of painting water drops, you can elevate your skills as an artist and create visually stunning pieces that captivate viewers with their realistic portrayal of nature’s marvels.
PS. Real-time guidance in the online class: Master the Art of Rainy Landscapes with Acrylics. Watch the class intro at the end of this blog.
Pin the below image in your Pinterest board for future reference.

MATERIALS YOU NEED
Acrylic Colors:
- Prussian Blue
- Pink (for background texture)
- White
- Black
Surface:
- I painted on a A6 inches acrylic paper
Acrylic Brushes:
- Size 6 & 2 round brush (round brush set)
Get my exact supply list for acrylic paintings, with helpful color mixing tips that you can start implementing right away!
1. Mixing Colors for the background

Squeeze out a small amount of blue paint onto your palette. Using a palette knife or brush, mix a bit of white into the blue to create a lighter shade of blue. This will serve as the base color for your water drops. Additionally, have a small amount of black available for shading purposes.
2. Painting the Base Shape

Begin by painting a small round or oval shape on your canvas using white, which will form the base of your water droplet. Repeat this step to create as many droplets as you desire, varying their sizes and shapes (see step 6).
3. Adding Highlights and Reflections

With the same round brush, dip it into the mixture of blue and white. Apply a streak of light blue on one side of each droplet, indicating the shadow, while the other side with white indicates the highlights. This creates a shiny and reflective appearance. Next, use the fine liner brush to add thin, curved lines inside the droplets, representing reflections.
4. Creating Depth and Shading
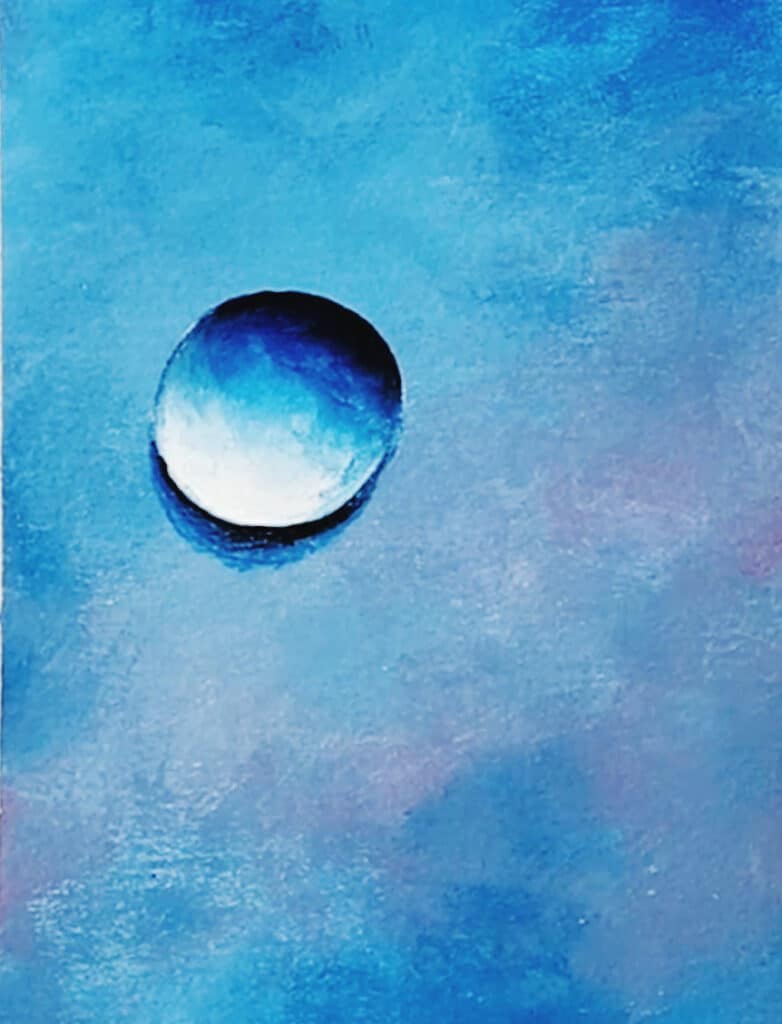
Mix a tiny amount of black paint with your original blue mixture on the palette. Using the small round brush, carefully apply a small amount of the darker color around the bottom and sides of each droplet. Blend it gently to achieve a smooth transition between the shades. This step adds depth and realism to the water drops.
5. create more drops of various shapes
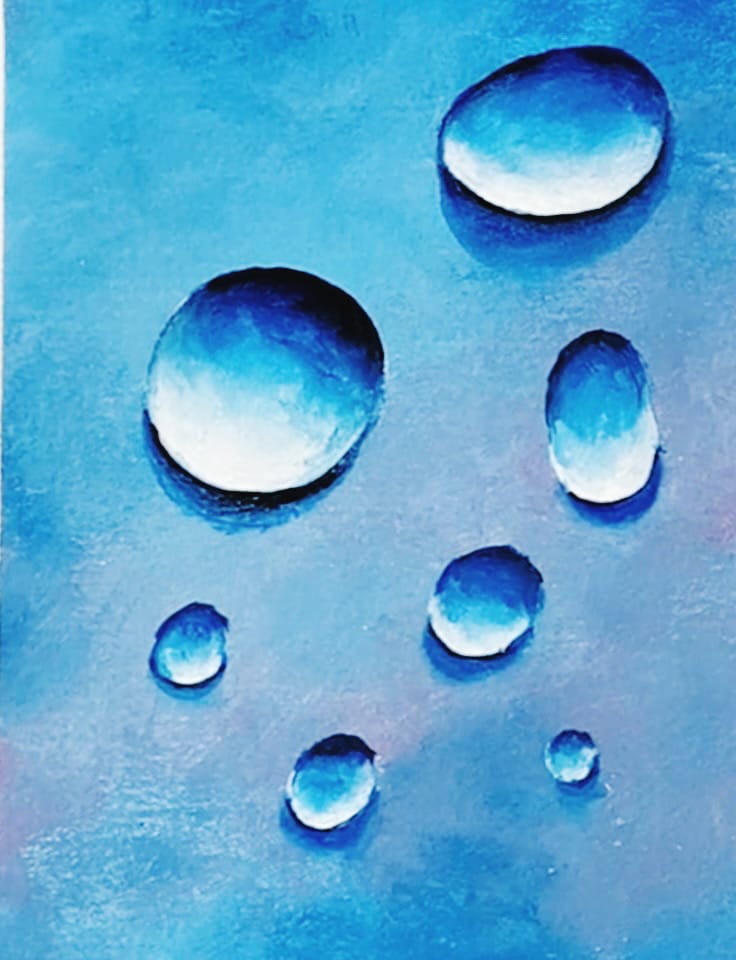
Now create some more drops of varying shapes and use the same techniques of highlighting and shadowing to create the depth.
To make the water droplets appear more realistic, blend and soften the edges of the droplets, especially where the colors transition from light to dark. This technique helps create a smooth and natural appearance.
6. Refining Details

Using the fine liner brush, further enhance the details of the water droplets. Add additional fine lines, highlights, and reflections to give them a more intricate and captivating look. Pay attention to areas where light hits the droplets and create small, thin lines to indicate reflections or ripples.
Pin the below image in your Pinterest board for future reference.

Painting water drops with acrylics opens up a world of artistic possibilities. By following this step-by-step tutorial, you have learned how to create stunning water droplets on your canvas.
Remember, practice and experimentation will help you refine your skills and develop your unique style.
Now, armed with the knowledge and techniques from this tutorial, go forth and let your creativity soar. Allow the beauty of water drops to captivate viewers, inviting them into your world of artistry.
What stories will your paintings tell? How will you mesmerize and inspire others through your acrylic masterpieces?
Some more ideas for you to try:


