Have you ever wondered what happens when you let go of control and simply let color, texture, and marks guide the way?
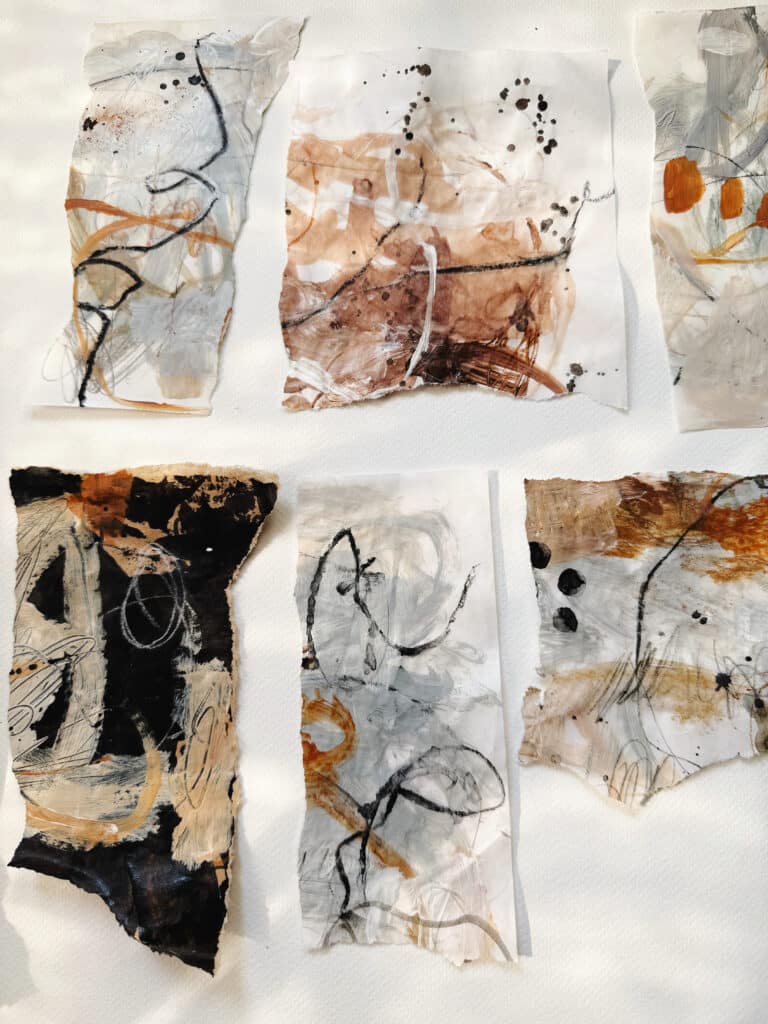
This blog isn’t about perfectly planned compositions. It’s about surrendering to the moment—layering, scratching, dripping, scribbling, and making meaning from instinct. Using everything fromacrylics to pastels, pencils to powdered pigment, I explored mark-making on different papers like deli paper and brown paper bags—each with its own personality and surprise.
Below, I break downstep-by-step techniques,mark-making tools,color recipes, andpaper typesthat emerged organically in my process.
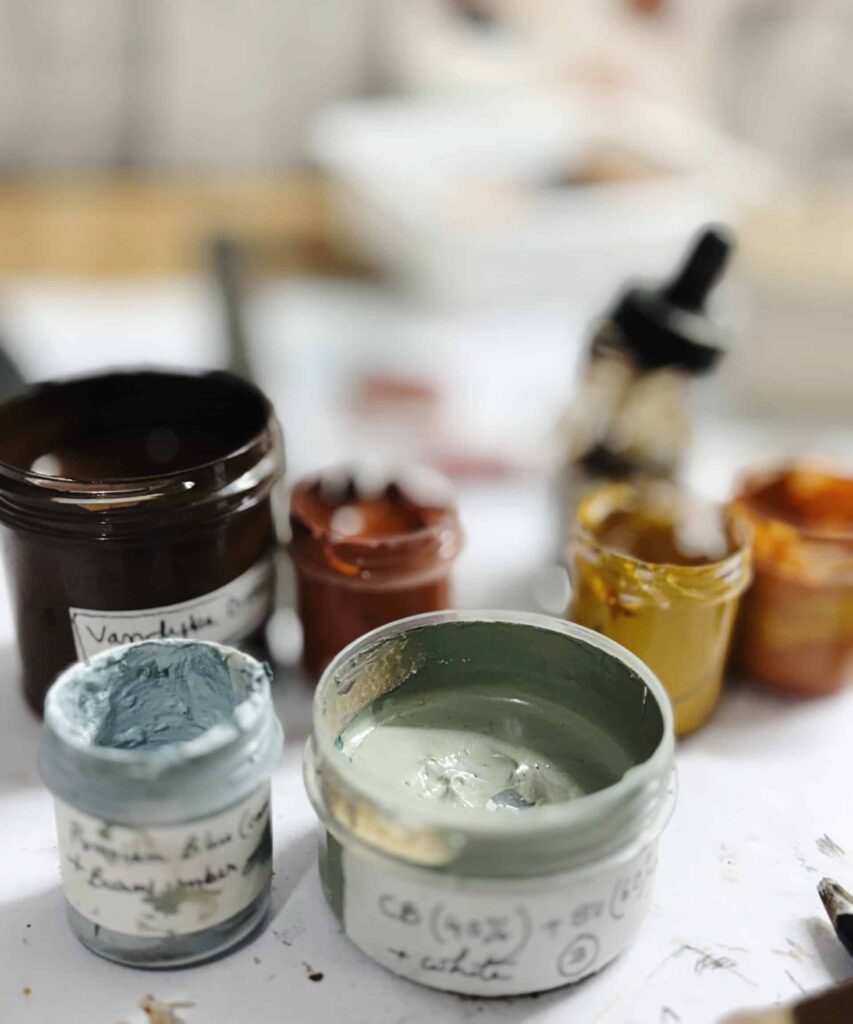
✳️ Color Palette Recipes (Acrylics & Mixed Media)
Here’s the full range of earthy, moody, and muted colors I created and used:
Frosted Sage= Cerulean Blue + Burnt Umber
Light Blue-Gray= Prussian Blue + Burnt Umber
Van Dyke Brown= Pure pigment
Raw Sienna= Burnt Umber + Yellow Ochre
Cream Ochre= Ultramarine Blue + Yellow Ochre
Warm Beige= Burnt Umber + Sap Green
Light Pink= Burnt Sienna + White
Soft Gray= Black + White
Yellow Ochre= As is
These earthy tones blended and contrasted beautifully with one another—especially whengray was addedto warm colors like Yellow Ochre or Raw Sienna, creating unique, unexpected tones.
I’ve put together a free resource library designed just for you, packed with everything you need to fuel your creativity. It’s my way of giving back to the mixed media community with resources to inspire your next project. Click here to join.
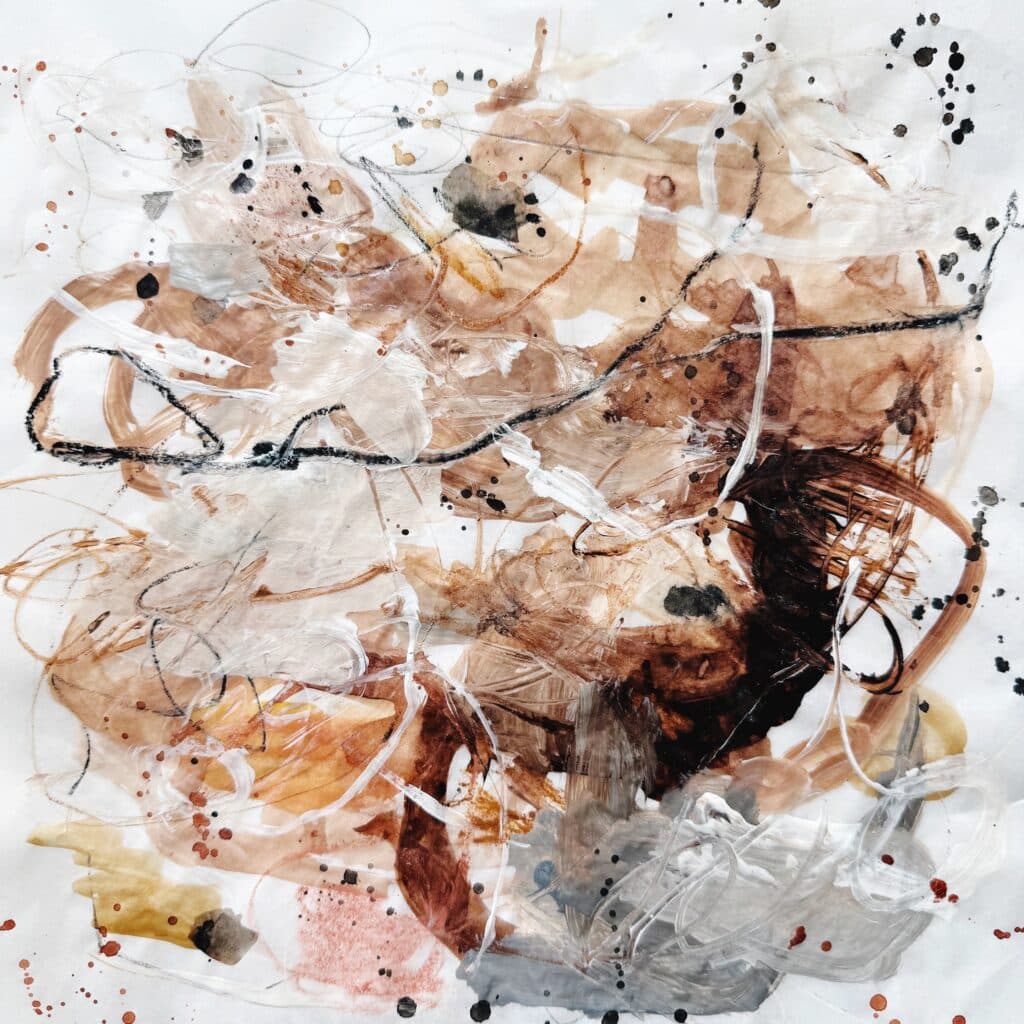
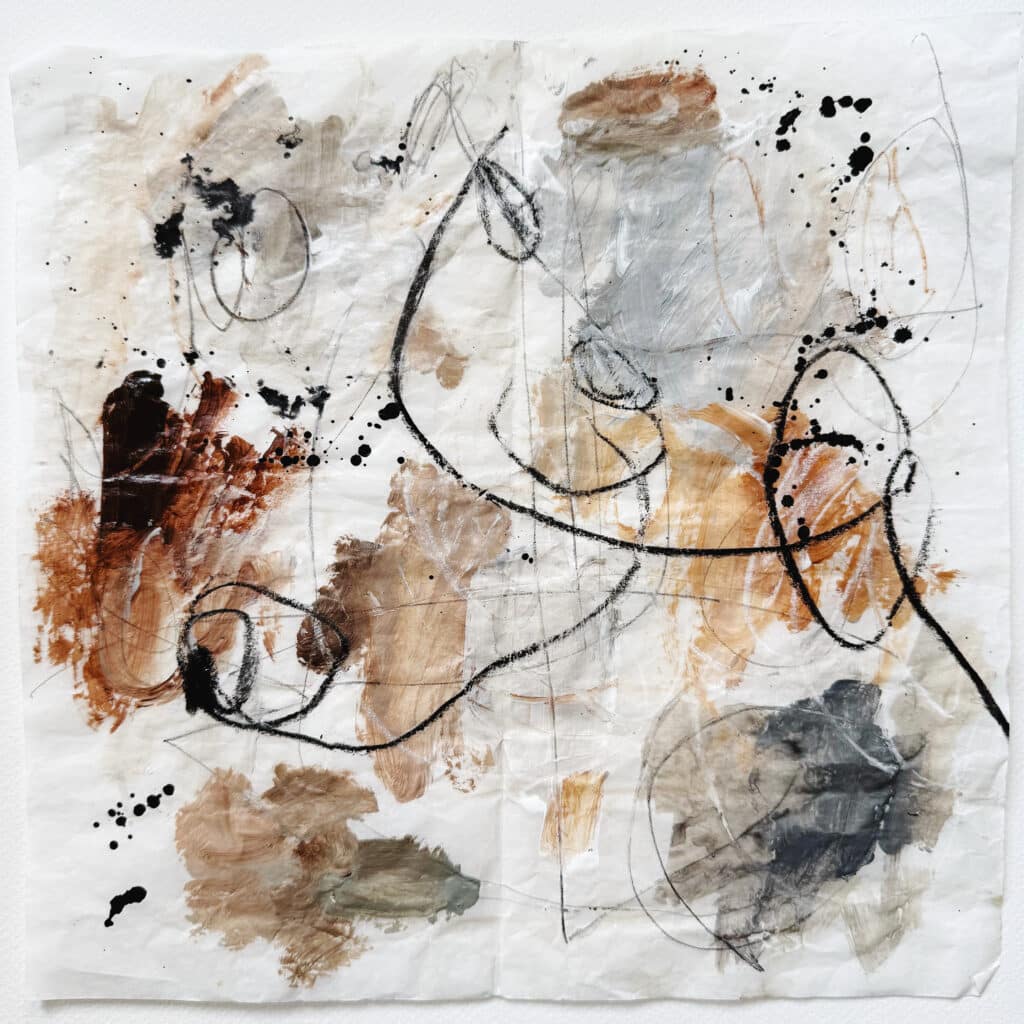
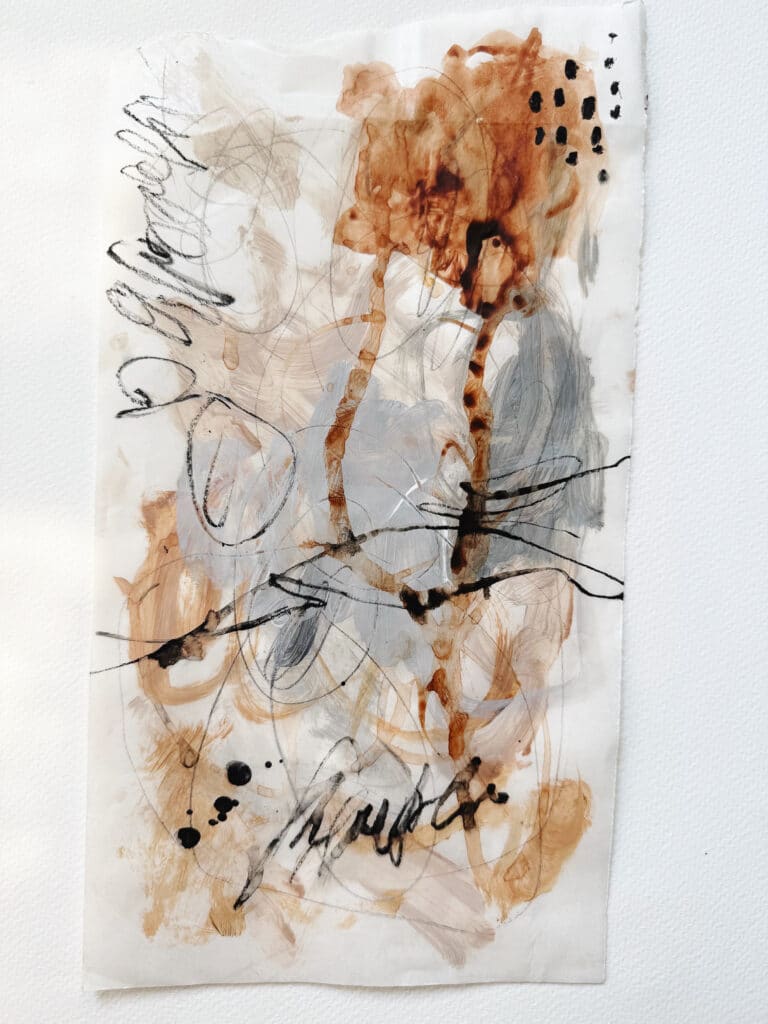
Process Overview:
Base Layer: Started with loose brush marks using acrylics (colors of your choice)
Building Texture: Added contrasting pastel marks over the dried acrylics.
Scribbles and Lines: Introduced energetic pencil marks and layered with colored pencils in various shades.
Watercolor Play: Splashed watercolor into the textured base, allowing it to flow and settle naturally.
Scratching Through Layers: Used tools or fingers to scrape into semi-wet layers, revealing depth underneath.
Final Mark Making: Used a rigger brush to draw expressive white lines over everything—like threads stitching it all together. You could also use a white pencil to mimic this effect.
This intuitive mark-making session is all about layering, energy, and allowing different mediums to interact on the deli paper—each one leaving its trace, its voice in the composition.
✏️Mark Making Techniques You Can Try
Here’s a complete list of the marks I used—and you can explore too:
Rigger brush lines (especially in white)
Colored pencil scribbles
Oil pastel gestures (black to anchor light tones)
Soft pastel smudges and pigment flakes
Scratching through wet paint with sharp tools
Asemic writingas visual texture
Pointed-tip tools for scratching or writing
Splattering paint and ink
Dripping diluted acrylics or watercolors
Scribbling over dry paint for contrast
TIP:Use a combination of dry and wet mark-making to create tension and flow.
🌿 Tips for Working This Way
Let go of perfection—this is all about process over outcome
Try working on multiple papers at once to stay loose
Create a few custom color mixes beforehand and see what surprises happen
Don’t be afraid to layer dry and wet media together
When in doubt, add a touch of black to bring harmony
Expanding Your Practice
Combine Text & Image:Integrate fragments of handwritten thoughts or poetry.
Color Swatch Journal:Keep a small sketchbook ofeach custom mix—note proportions!
Shared Challenge:Try a “Gray + One Color” daily sketch for a week to discover new harmonies.
Dive in, experiment fearlessly, and let each scratch or drip tell its own story. Your next favorite mark is just waiting to be made!
❓FAQs
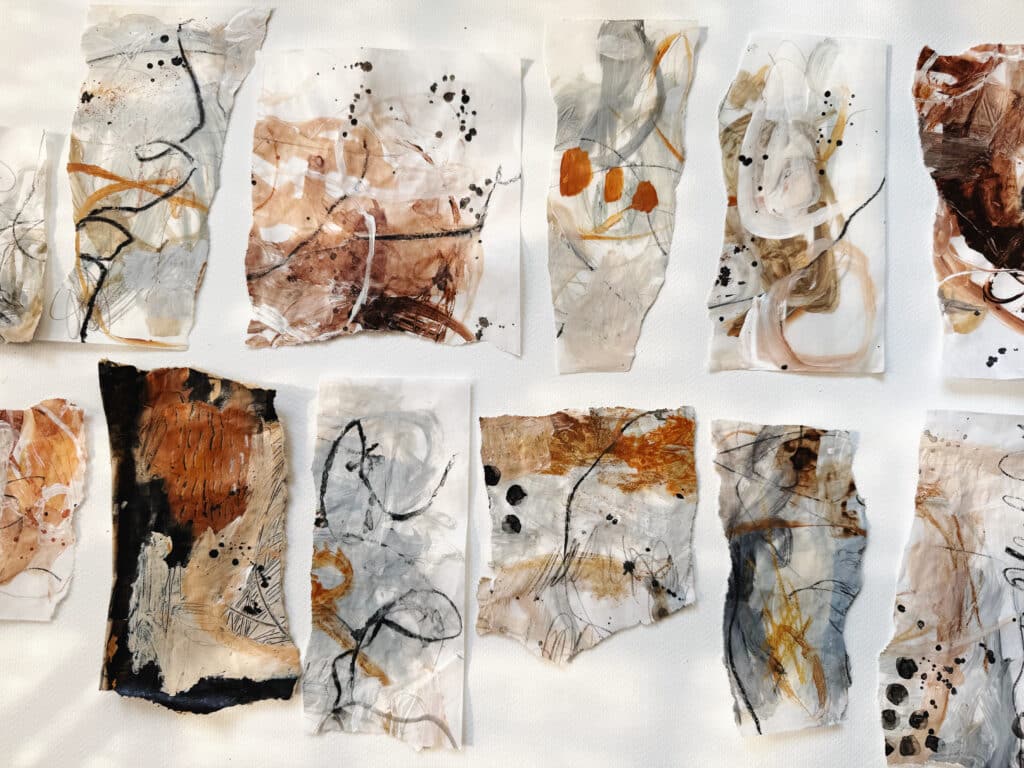
Q: What’s the best paper to use? A: Anything you have! Deli paper, brown paper bags, old sketchbook pages, mixed media paper—all work beautifully depending on what you want: texture, translucency, absorbency, or grit.
Q: How do you make powdered pastel pigment? A: Simplyscrape the side of a soft pastel stickwith scissors or a blade. Sprinkle it over wet gel medium and press gently to set.
Q: Why do you use black at the end? A: It anchors the page—like visual punctuation. It creates contrast and brings unity to layered colors.
💬 Final Thoughts
These pages aren’t just experiments—they’re conversations between color, material, and intuition. Whether you’re just getting started with mixed media or deep in your own process, I hope this gives you inspiration to try new surfaces, new marks, and new surprises.
If you’re feeling stuck creatively, try pickingjust two colors and one mark-making tooland see what happens. Let the paper guide you.