Immerse yourself in the captivating world of acrylic painting as we embark on a step-by-step tutorial to paint water drops on a leaf.
The delicate, translucent nature of water drops presents a unique challenge for artists, but with the right techniques and a touch of creativity, you can master the art of capturing their realistic beauty.
In this comprehensive guide, we will walk you through the process of painting water drops on a leaf using acrylics, unveiling the secrets behind achieving depth, transparency, and the subtle interplay of light and shadow.
Within the realm of acrylic painting, water drops offer an enchanting opportunity to infuse your artwork with a sense of life, movement, and intricate detail.
These mesmerizing orbs gracefully rest upon the surface of a leaf, reflecting the world around them and adding a touch of magic to your composition.
Get my exact supply list for acrylic paintings, with helpful color mixing tips that you can start implementing right away!
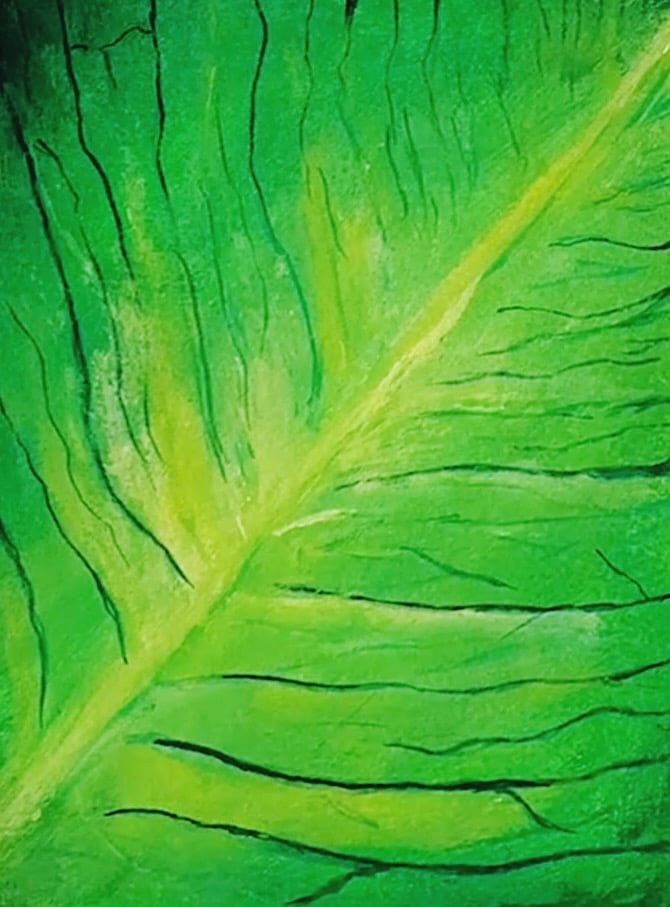
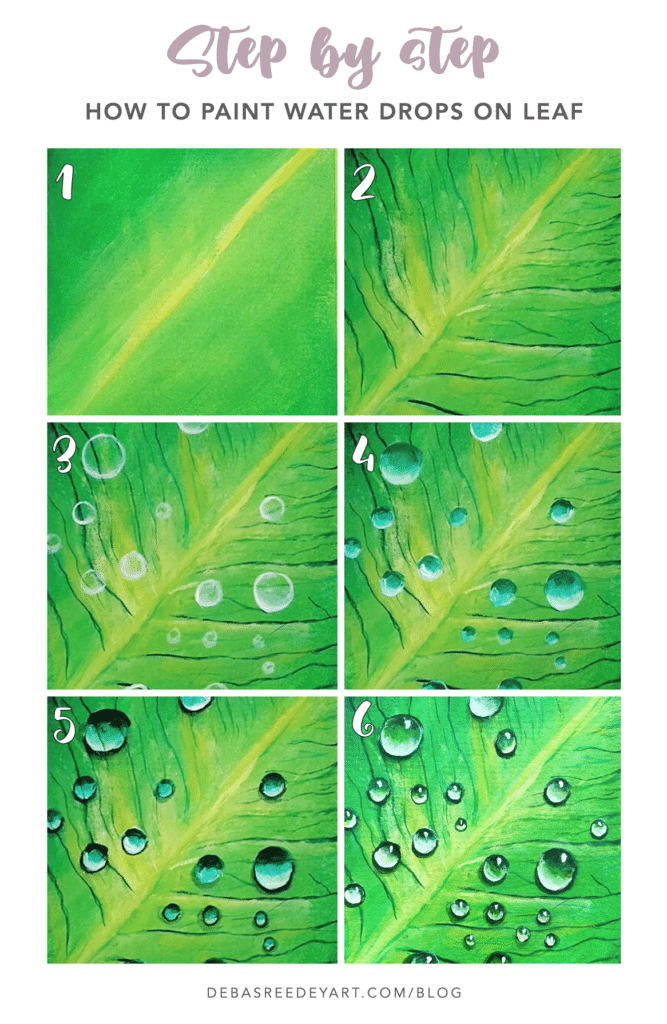
1. Base Layer
Start by painting the base layer of the leaf. Mix the appropriate shades of green to match the leaf’s color. Using a flat brush or a larger round brush, apply the base color evenly on the leaf, leaving out areas where the water drops will be placed. Allow it to dry completely.
2. Leaf Veins
Using a small round brush or a fine liner brush, lightly sketch the outlines of the leaf veins on the surface of the leaf. You can use a light mix of black with the green to create the initial lines. Remember to keep the lines uneven and place them asynchronously. Remember that water drops are not perfectly round; they have irregular shapes due to the refraction of light.
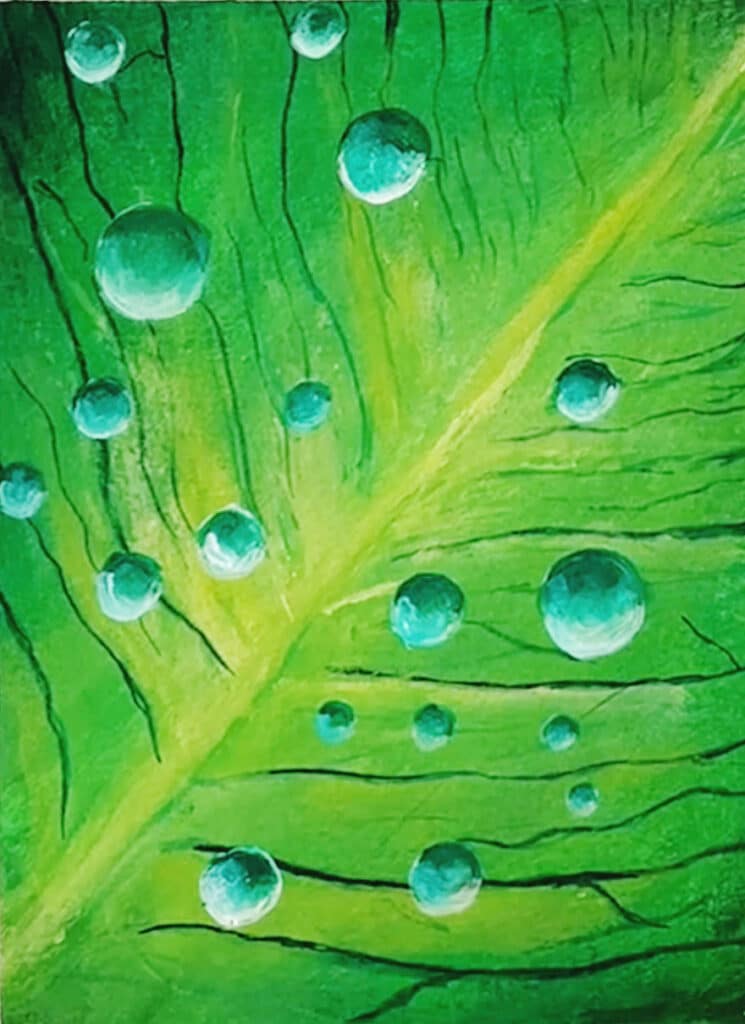
3. Paint the Water Drops
Using a small round brush or a fine liner brush, lightly sketch the outlines of the water drops on the leaf. Use white to create the initial shapes and blend them gently towards the bottom. Remember that water drops are not perfectly round; they have irregular shapes due to the refraction of light.
4. Shading and Highlighting the Drops
Mix a darker shade of the leaf color and apply it to the upper parts of the water drops to create shading. Use the reference image to determine the areas where the shadows fall. Gradually build up the shading, keeping the darkest tones near the top of each drop.
Next, mix a small amount of white with the base color of the leaf to create a highlight color. Apply this color to the lower portions of the water drops, where the light hits them. Blend the highlight color with the base color to create a smooth transition between light and shadow. Be mindful of the reflections on the drops, which might show hints of the surrounding environment.
5. Creating shadows & depth
Using the small round brush, carefully apply a small amount of the black around the bottom and sides of each droplet. Blend it gently to achieve a smooth transition between the shades. This step adds depth and realism to the water drops.
6. Creating Transparency
Observe the reference image closely to identify smaller details within the water drops. Use a fine liner brush or a small round brush to add highlights, reflections, and subtle imperfections. Pay attention to the tiny distortions caused by the water’s surface tension.
Take a step back and assess your painting. Make any necessary adjustments to the colors, values, and shapes of the water drops. Ensure that the drops are integrated seamlessly into the overall composition of the leaf. Consider adding additional details to the leaf, such as veins or texture, to enhance realism.
Pin the below image in your Pinterest board for future reference.
As you conclude your artistic exploration of painting water drops on a leaf with acrylics, you have acquired a valuable set of techniques to capture the mesmerizing beauty of these ethereal creations.
With attention to detail and a keen understanding of light, shadow, and transparency, you have unlocked the ability to infuse your artwork with a touch of magic and realism.
Now, as you step back and admire your finished masterpiece, consider the impact that these delicately painted water drops have on your composition:
Do they transport viewers to a serene rain-kissed landscape, evoking a sense of tranquility and wonder? Or do they serve as a focal point, capturing attention and inspiring curiosity about the natural world?
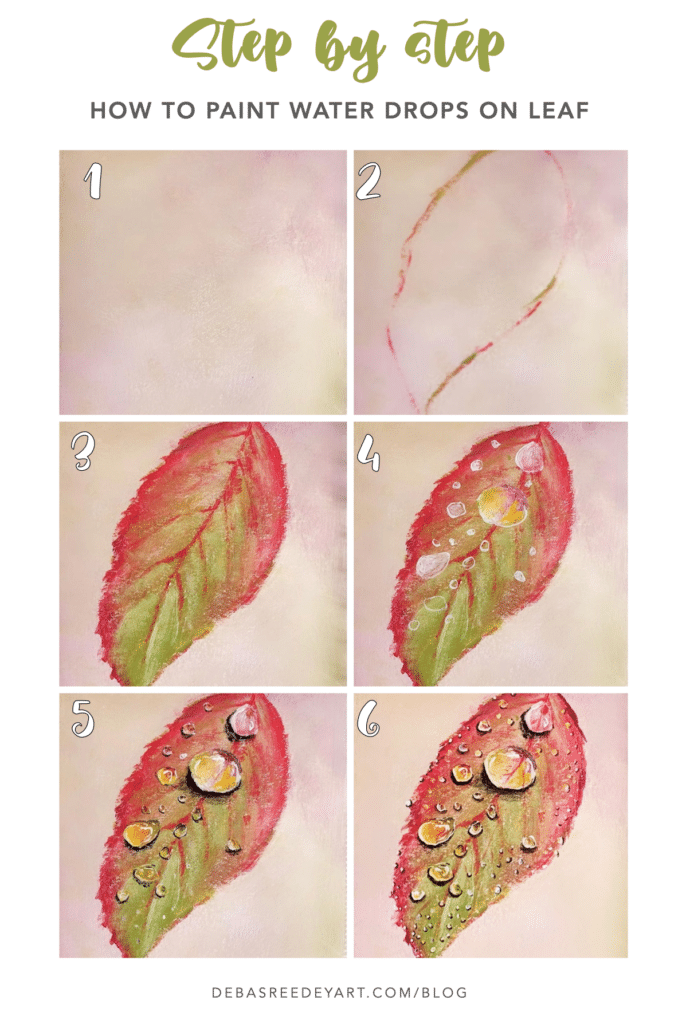
Now I want to challenge you with some more step-by-step water drop paintings to try out on your own.
Some more ideas for you to try:
The art of painting water drops on a leaf is a testament to your artistic growth and dedication. Embrace the journey of continuous learning and refinement, allowing your creativity to soar as you explore new techniques and subject matters.
Let the quest for mastery fuel your passion and lead you to create artworks that mesmerize, inspire, and evoke a profound emotional connection.
Question to reader:How might you incorporate the newfound knowledge and skills you have gained through this tutorial into future artworks? Can you envision painting water drops on different surfaces, experimenting with varied lighting conditions, or even exploring the interplay between water and other elements of nature?