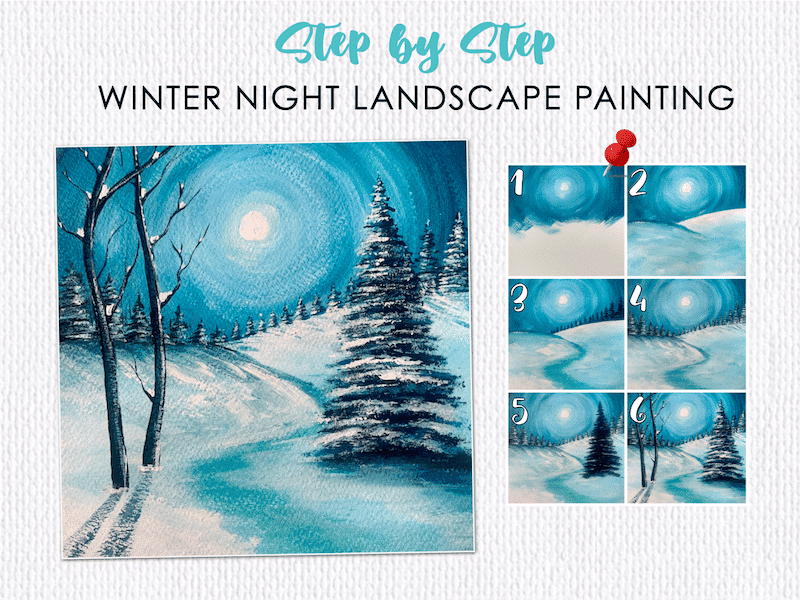
Pin the below image in your Pinterest board for future reference.
painting steps:
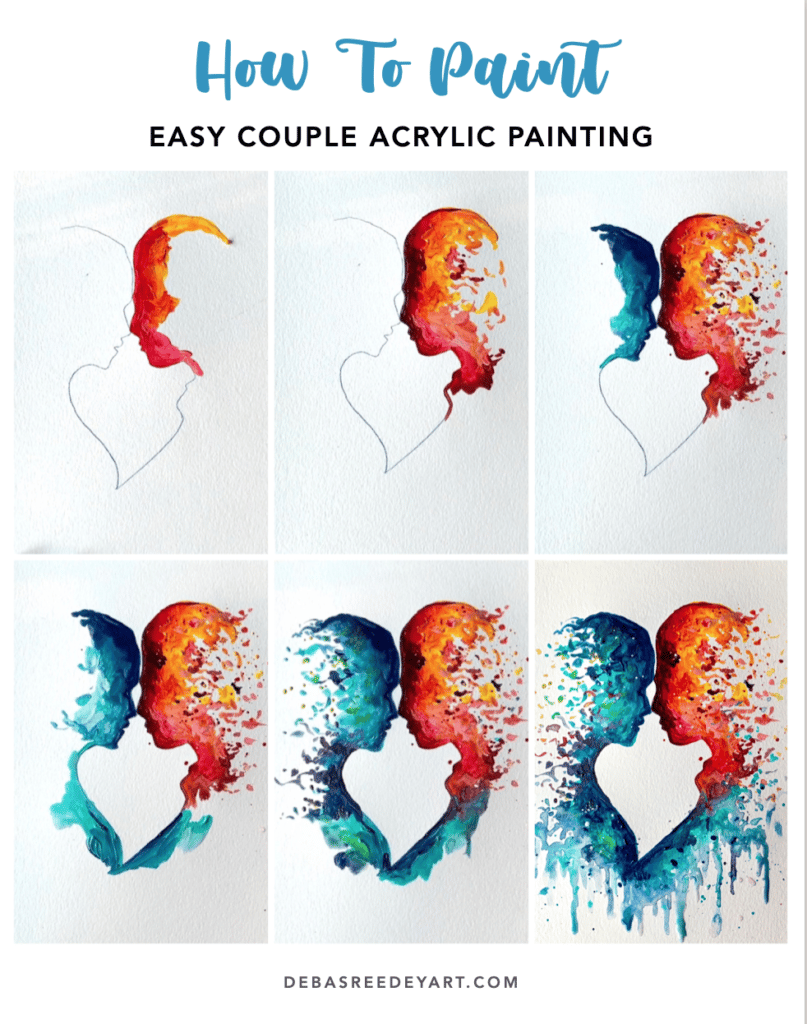
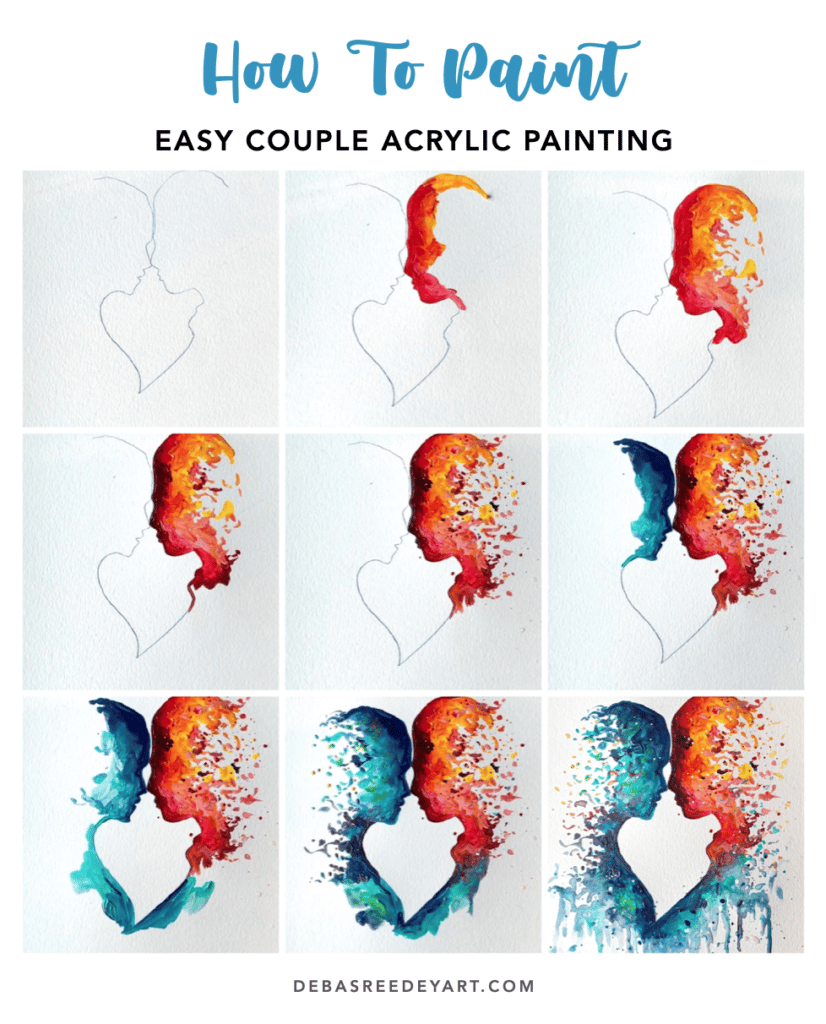
1. The outline
Draw out the couple outline on your paper. Trace it or draw with free hand. I placed a carbon paper on my acrylic paper and traced it out.
2. Red on right
Start with the red color on the right of the couple outline. I mixed a little white to make it pinkish towards the bottom. And then add some yellow and blend with the red. This painting is all about blending in colors with each other. So remember when blending colors of the same family, you dont have to wash the brush, simply wipe it off on a paper towel. But while mixing warm and cool colors, it is necessary to wash off the brush not to create mud.
3. Add loose strokes
Continue with the same 3 colors – red, white & yellow, and start creating small & loose strokes with your round brush to create the magical effect of the soul, moving away from the humanness.
4. red with black
Now its time to bring in the 4th color – black. Mix black and red and add to the outline to create a stark contrast.
5. loose strokes with black
Repeat step 3, this time with touches of black and red mix.
6. Blue on left
Now we repeat the same thing on the left couple outline with blue. Since Prussian blue already has a dark value, no need to mix black. I simply mixed prussian blue with aqua blue to create the blend.
7. connect the two
Mix some white with the aqua blue and drag it down along the couple outline and bring it close to the warm colors on the right. Notice I haven’t mixed the colors here because they will created mud.
8. bring in green
Now we have to create harmony between the 2 sides. So i added some green on the left by mixing yellow with the aqua blue, and added some short strokes.
9. blend both sides
Now it is time to blend both the side. Mix blue and red on your plate to create purple or take out purple directly from you paint tube. Now add that purple between the joining of blue and red, and also a few strokes on the left side.
10. Drip some paint
Now we will beautify this abstract piece by making some paint drip at the bottom. Add a bit more of water with your acrylic paints and make it drop to give a watercolor effect.
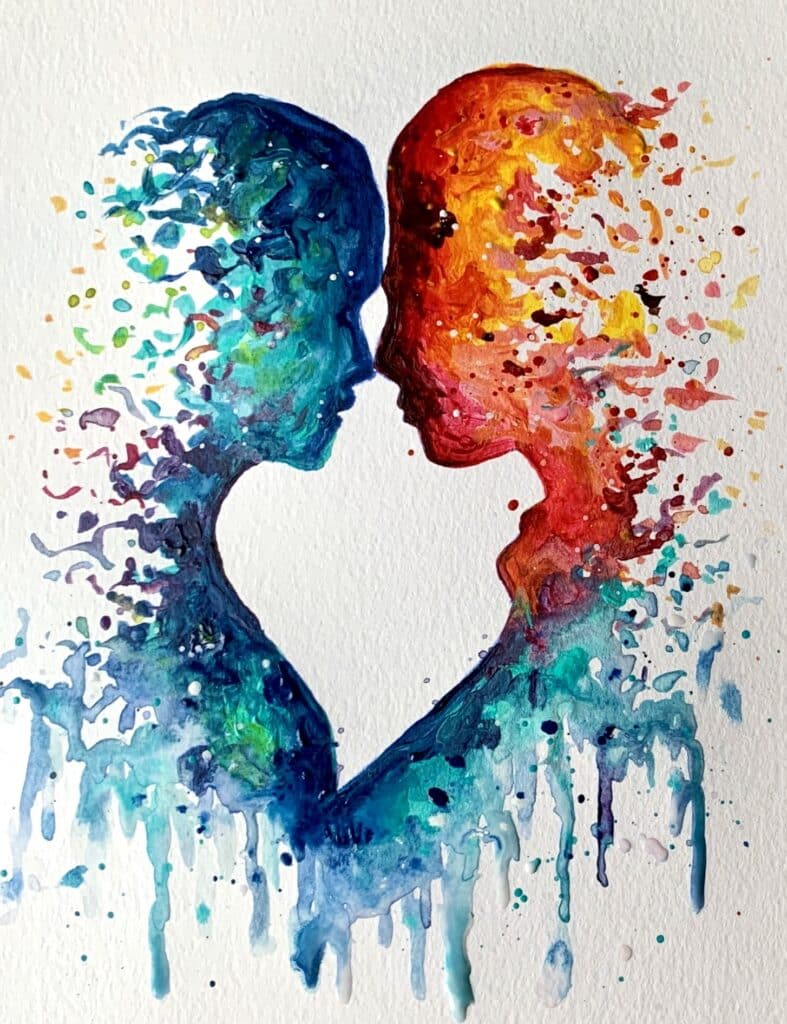
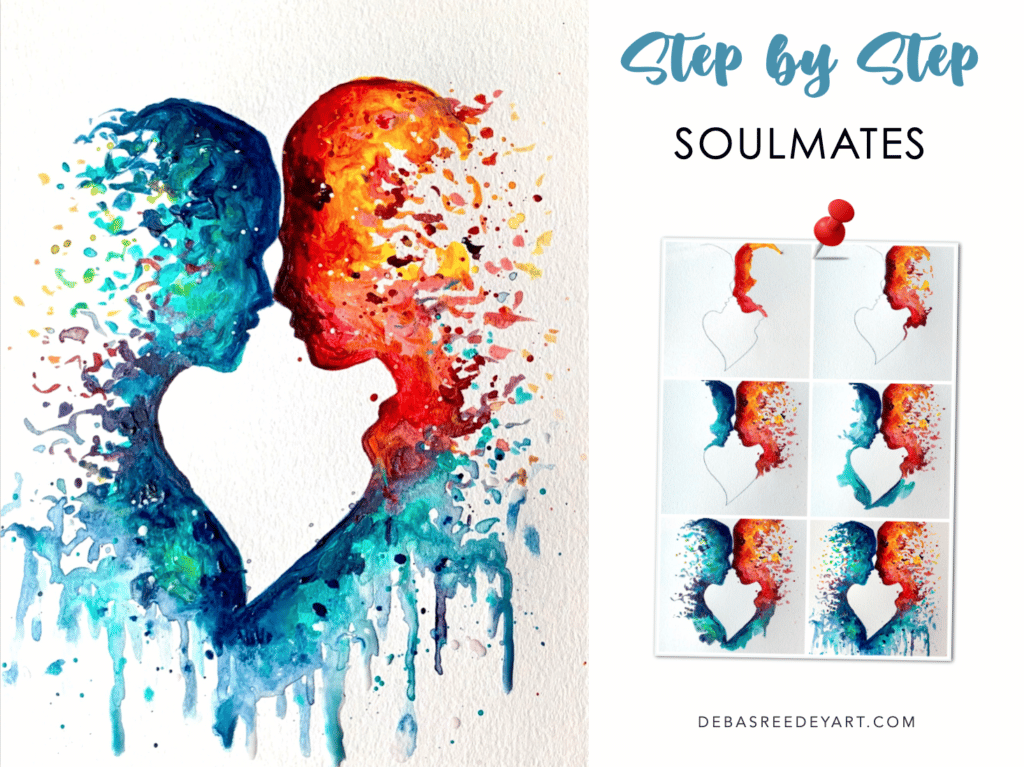
11. final outcome
Finally I added some more short strokes of paints on both sides – added some yellow and orange on the left, and some blue & purple on the right, to bring both the sides of this couple painting in harmony.
And that’s it… just by following these 11 steps, you can now created your very own abstract couple acrylic painting.
Did you enjoy following this tutorial? What is the next painting you want me to teach? Let me know how it turned out for you by commenting below!
Happy Painting!
Pin the below image in your Pinterest board for future reference.