In this blog, I’ll guide you step by step to create this easy moonlight seascape painting with acrylics.
This tutorial is perfect for beginners who want to follow and paint along with me. And if you are a pro, you can also paint along and create this seascape beauty!
If you want to watch the process of my creation, there is a video available at the end of this post.
So grab your acrylic art supplies, and let’s jump right in.
Cut this Canson acrylic paper into 6 equal pieces and you’ll get the size I used.
Acrylic Brushes:
I used a size 4 flat brush from this flat brush set which is perfect for this canvas size. If you are painting bigger, then switch to a size that is proportionate with your painting surface.
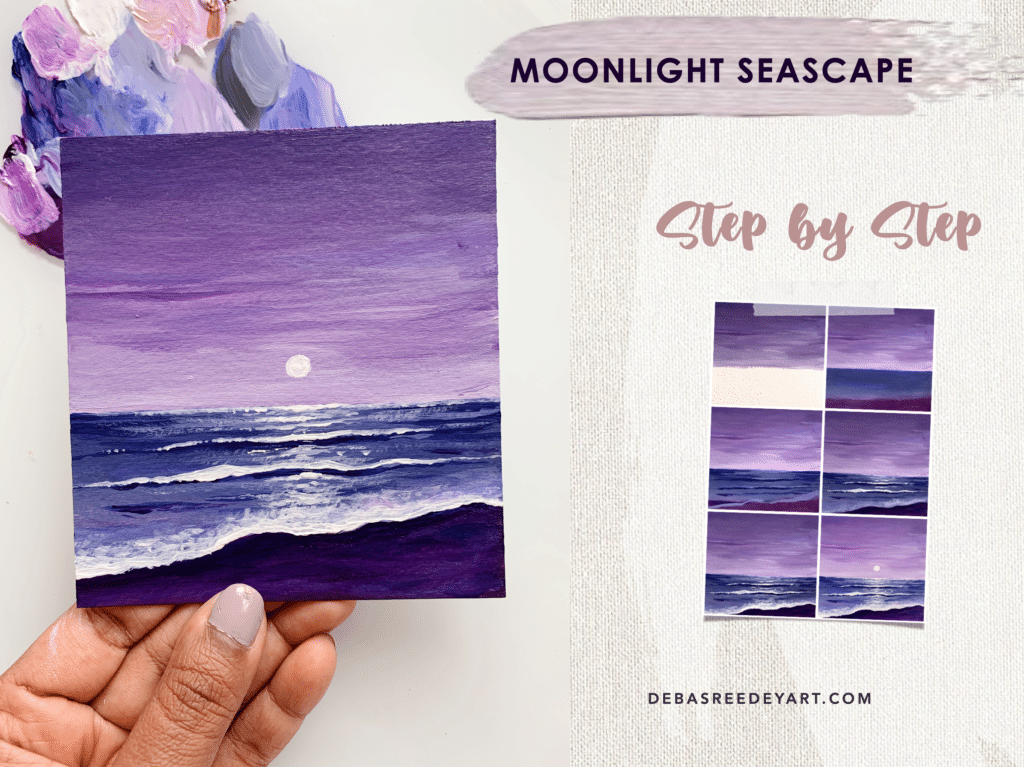
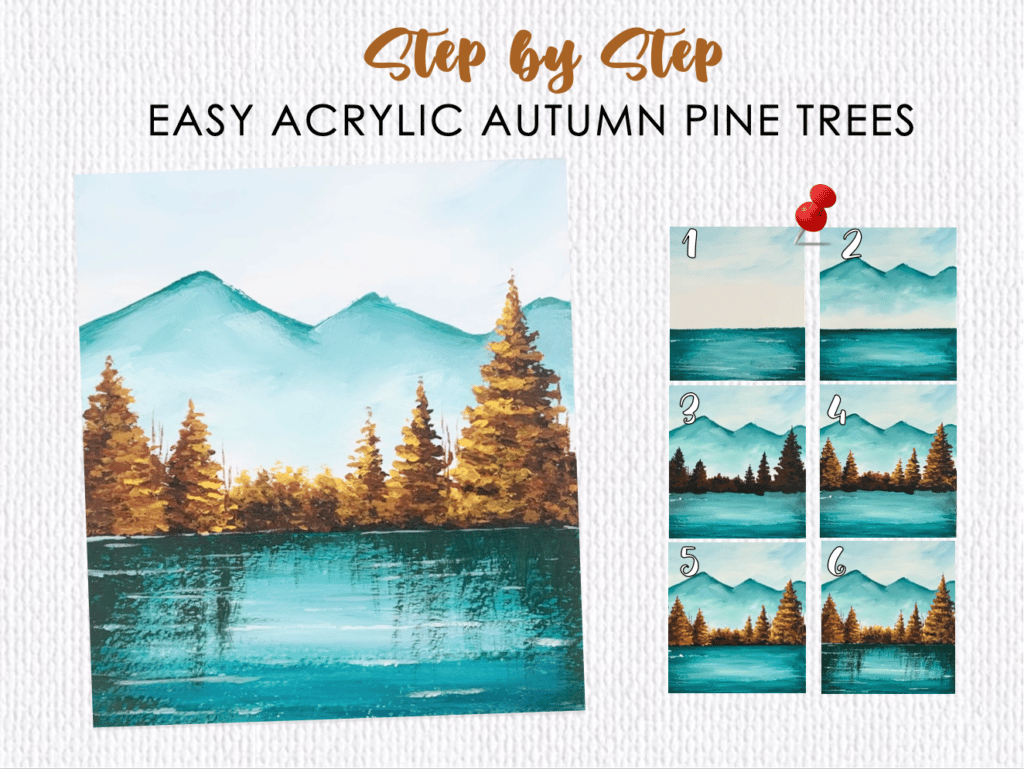
Pin the below image in your Pinterest board for future reference.
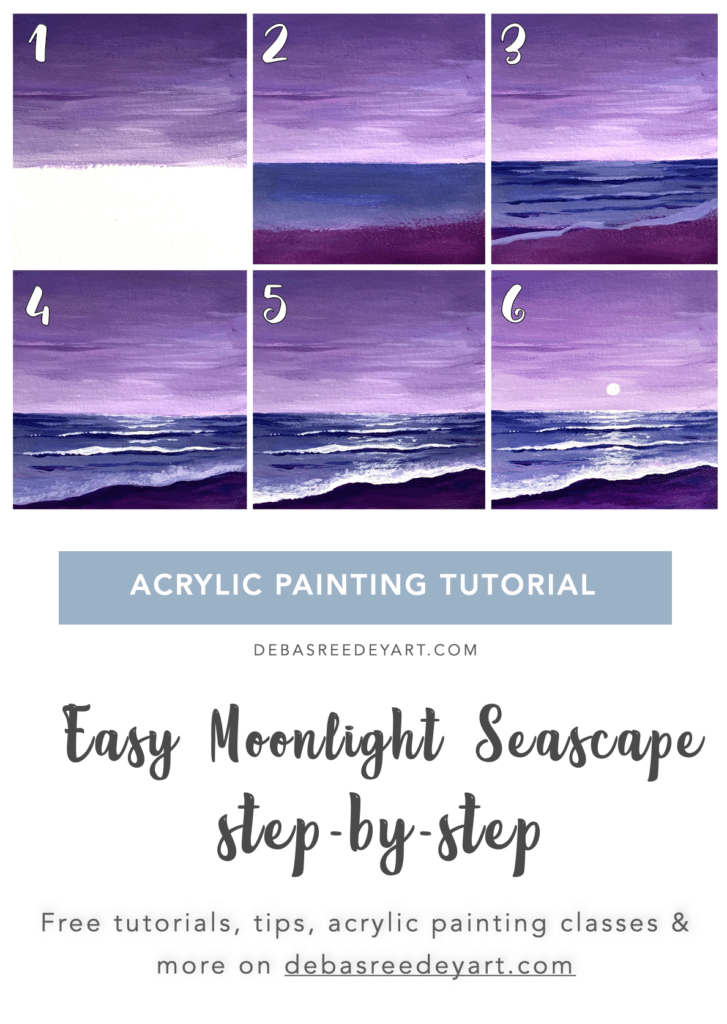
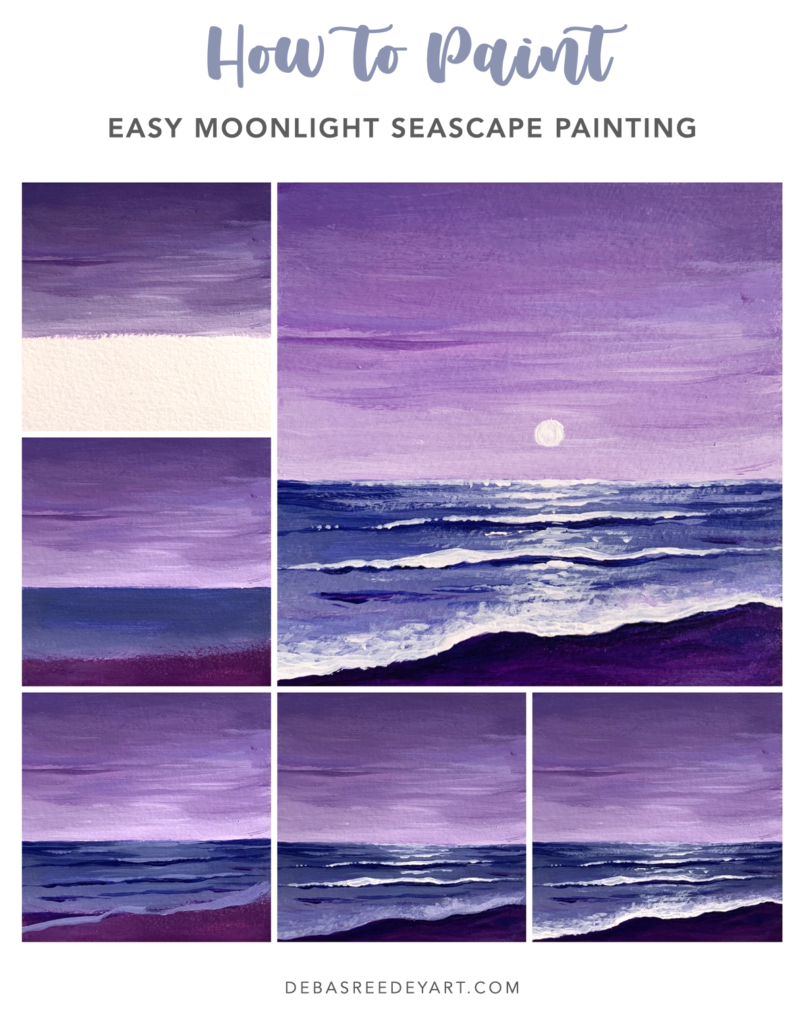
painting steps:
1. paint the sky
To paint the sky of this moonlight seascape painting, I started with violet and white, and slowly started mixing little ultramarine blue. But the focus is to keep it more towards violet. Keep the sky dark towards the top and as you approach the horizon, start mixing more white to reflect the lit up sky from the moon.
Also keep adding some bold strokes of white showing through that will act as the clouds. So instead of blending it all together, leave some of the brushstrokes as it is.
Note: I added a touch of burnt sienna with the other 3 colors, to desaturate the colors a bit.. but if you are someone who loves the bright colors, you need not do it!
2. ocean & beach background
The first layer of the ocean water is pretty simple – add more of blue towards the top, and violet on the bottom. We are separating the ocean water from the beach by this color combo.
3. ocean waves - layer 1
Now we start painting the waves in the ocean. Start with a lighter tint of blue – just mix it with white and lighten it and add horizontally in wave form. Try to break the horizontal lines in between to make it look realistic.
After adding all the lighter blues, repeat the same step with darker blue. Add the darker shade below the white lines just painted, to show the shadows of the waves.
4. The beach
Add a really darker version of violet where the beach line starts. I did not use black to darken it, but mixed ultramarine and violet together, which created this bright dark shade which looks almost like black. Lighten the color from the beach line to the bottom of the canvas.
5. ocean waves - layer 2
Ok now let us go over the ocean water once again and add some brighter white, which is just plain white. Painting in multiple layers creates the illusion of depth in a painting.
6. Ocean Waves - Layer 3
In the previous step, we just created some lines. In this step we are going to blend some of it with the background, and also create some frothy waters near the beach.
This step will ensure the beauty of this painting.
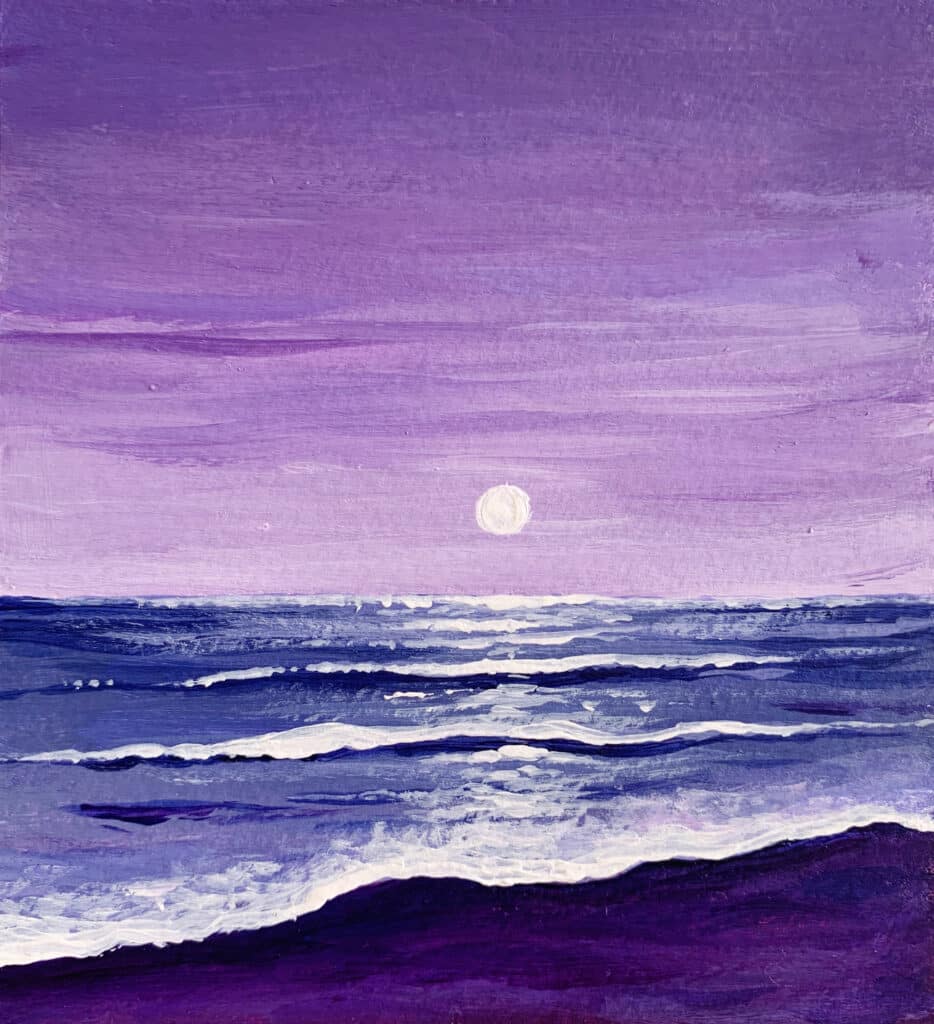
7. paint the moon
In the last and final step, add the moon. With a small round brush, carefully add a circle with white. And add some final waves just below the moon to enhance the reflection of the moon in the ocean water.
And that’s it… just by following these 10 steps, you can now created your very own moonlight seascape painting.
Did you enjoy following this tutorial? What is the next painting you want me to teach? Let me know how it turned out for you by commenting below!
Happy Painting!
Pin the below image in your Pinterest board for future reference.
Pin the below image in your Pinterest board for future reference.