Cut this Canson acrylic paper into 6 equal pieces and you’ll get the size I used.
Acrylic Brushes:
I used a size 4 flat brush from this flat brush set which is perfect for this canvas size. If you are painting bigger, then switch to a size that is proportionate with your painting surface.
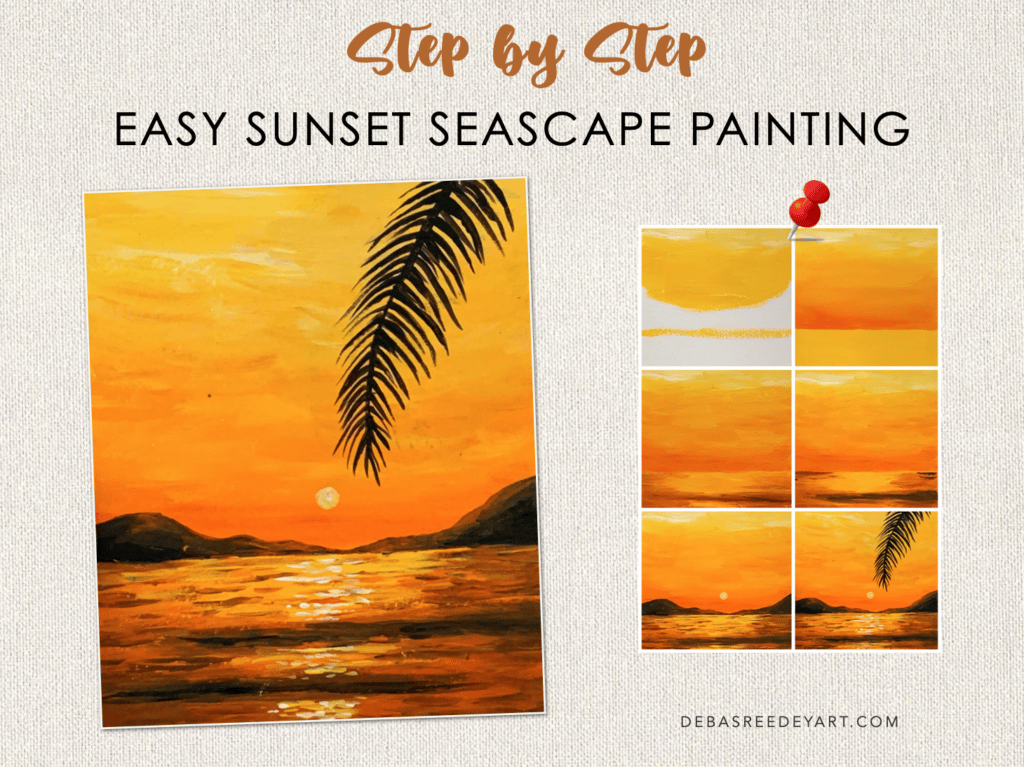
Pin the below image in your Pinterest board for future reference.
painting steps:
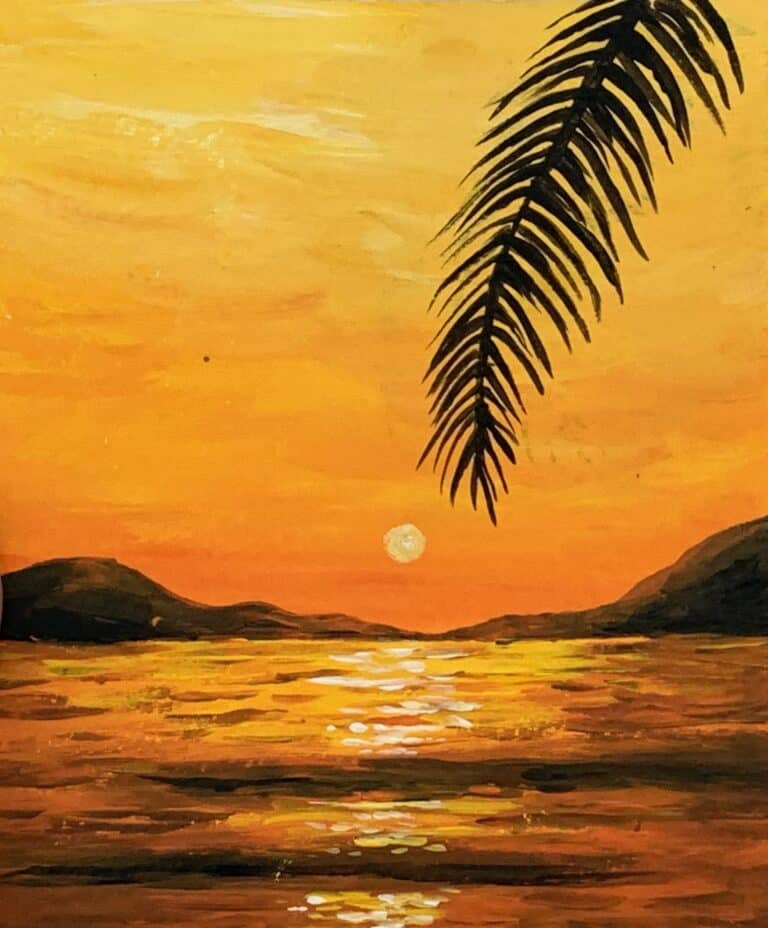
1. Sky
This is a sunset painting, so the sun is at the bottom of the horizon. And the color of the sky is also darker towards the bottom.
Start with some simple strokes with your flat brush and cadmium yellow to paint the sunset sky. Add a few strokes of white also and blend it in to keep the top part of the sky lighter than the bottom.
2. Ocean
We need to do 2 things in this step – with yellow in your brush from the previous step, add it in the bottom ocean area. Then pick up some orange and blend it in with the yellow in the sky.
3. Ocean Textures Layer 1
Now add some yellowish orange in the centre of the ocean. From this step onwards, we start working on the several layering of the ocean to bring in the sunset reflection.
4. Ocean Textures Layer 2
Add in some orange from the side, keeping the center of the ocean lighter. And then mix some burnt sienna with the orange to create darker shadows. I’ve also added a tiny bit of black with the burnt sienna to create a darker contrast.
5. Waves
Start with burnt sienna and create the darker wave lines towards both the sides. And then add the small wave lines with yellow towards the centre.
6. Sun & land
In this step, the sunset painting starts appearing to be so. We first add the sun in the bottom centre of the sky. And then add the distant land. First paint the entire land with black. Then add a few strokes with orange in the centre to highlight the sunlight falling on it.
7. Some more waves
Paint some more waves with short lines just below the sun. Use mostly white, with a touch of yellow in it. This will create the sparkling of the sun in the ocean.
8. Palm leaf
Finally add the palm leaf from the corner. You can add more than one also. Or you can add one from each side. I’m just giving you ideas to play with!
And that’s it… just by following these 8 steps, you can now created your very own sunset painting with sparkling ocean waves.
Did you enjoy following this tutorial? What is the next painting you want me to teach? Let me know how it turned out for you by commenting below!
Happy Painting!
Pin the below image in your Pinterest board for future reference.