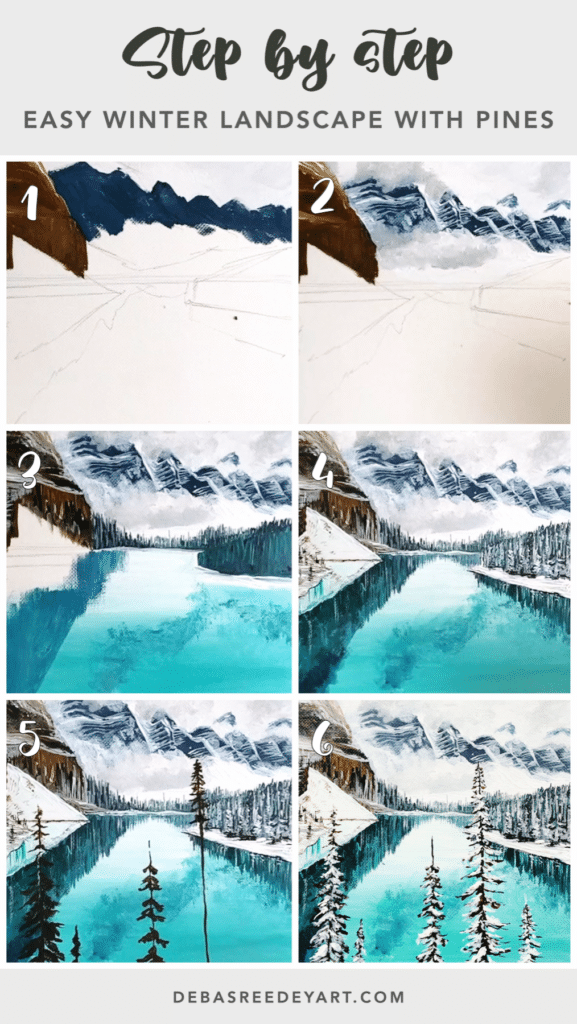
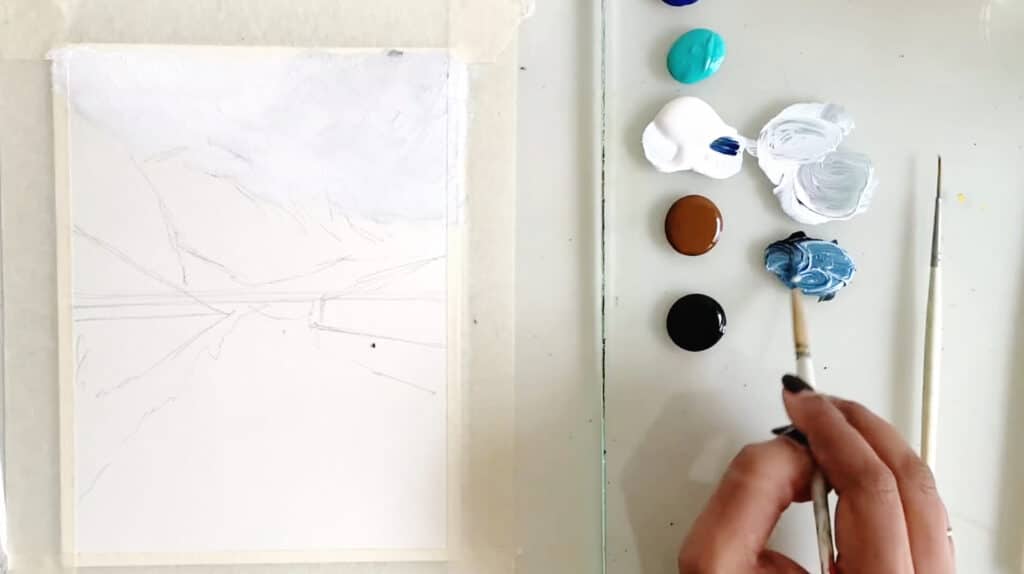
fbpx

Easy Winter Landscape – Snowy Pine Trees with Mountains

Welcome! If you’re looking for easy winter landscape painting ideas, this step-by-step tutorial will guide you through creating a stunning snowy mountain scene. Inspired by the breathtaking Moraine Lake in Banff National Park, this painting captures the beauty of majestic peaksdrifting clouds, and snow-covered pine trees reflected in a tranquil lake.

One of the best things about this painting is its simple yet effective color palette. We’ll be using just a few core colors—teal blue, Prussian blue, brown (along with black, and white)—to create depth and atmosphere. By blending these hues, you’ll achieve a harmonious winter landscape with ease.

To make the process beginner-friendly, I’ve broken it down into eight manageable steps. We’ll start with the sky and mountains, add texture and clouds, then move on to the lake and trees, working from background to foreground. Whether you’re new to painting or looking to refine your skills, these clear steps will help you paint with confidence.

Let’s pick up our brushes and bring this winter wonderland to life!

If you want to learn more, check out my Snowy Pines Masterclass.

Snowy Pines Masterclass

Master the Art of Snowy Pine Trees & capture Winter landscapes with ease

The Snowy Pines Masterclass is your complete guide to mastering snowy pine trees and creating breathtaking winter scenes, covering 11+ hours of instruction and inspiration!

  • Master snowy pine trees: Learn to paint 9 unique styles using 4 different brushes
  • Perfect your winter landscapes: Create 10 stunning projects
  • Bring your winter vision to life

“This class has been a game-changer for me. I’ve tried painting pine trees before, but they never turned out right. Now, thanks to Debasree’s tips, I can finally create the winter scenes I’ve always wanted.” — Priya S.

Pin for later

MATERIALS YOU NEED

Acrylic Colors:  

  1. Purple
  2. Crimson red
  3. Cadmium red
  4. Black
  5. White

Surface:

  • I painted on an A5 acrylic paper.

Brushes:

  • I used a size 4 filbert brush which is perfect for this canvas size. If you are painting bigger, then switch to a size that is proportionate with your painting surface.
  • Size 1 & 2 round brush
 
PS. If you need some advice on acrylic painting supplies, check out this article: 3 Basic Acrylic Painting Supplies – The Minimalist List.
 

Get my exact supply list for acrylic paintings, with helpful color mixing tips that you can start implementing right away!

Painting Steps:

1. Painting the Sky

Start by blending teal blue and white to create a soft winter sky. Keep your brushstrokes light and smooth, fading the color toward the horizon for a natural gradient. Add a touch of Prussian blue at the top for depth.

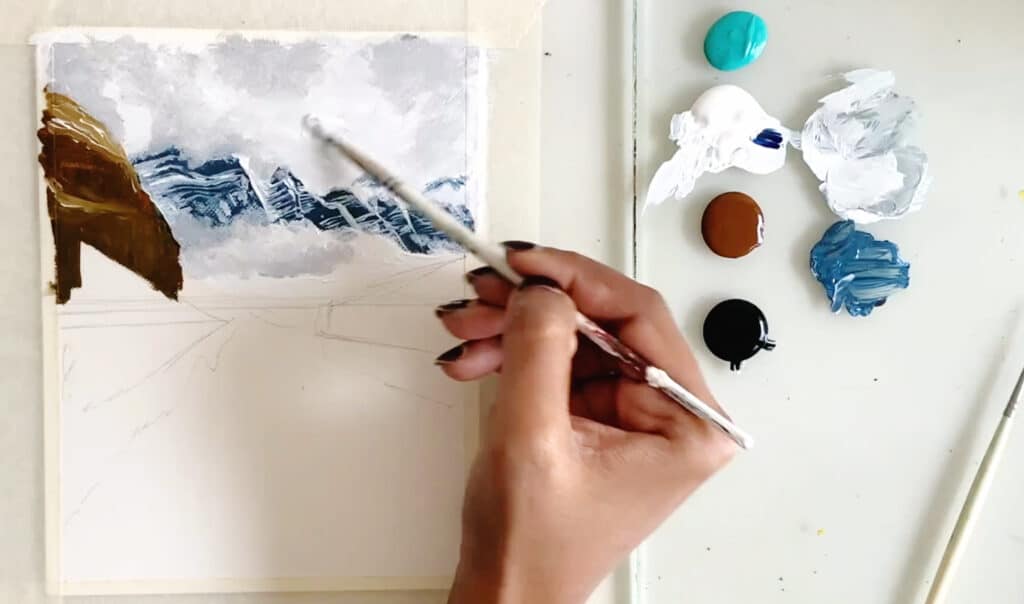
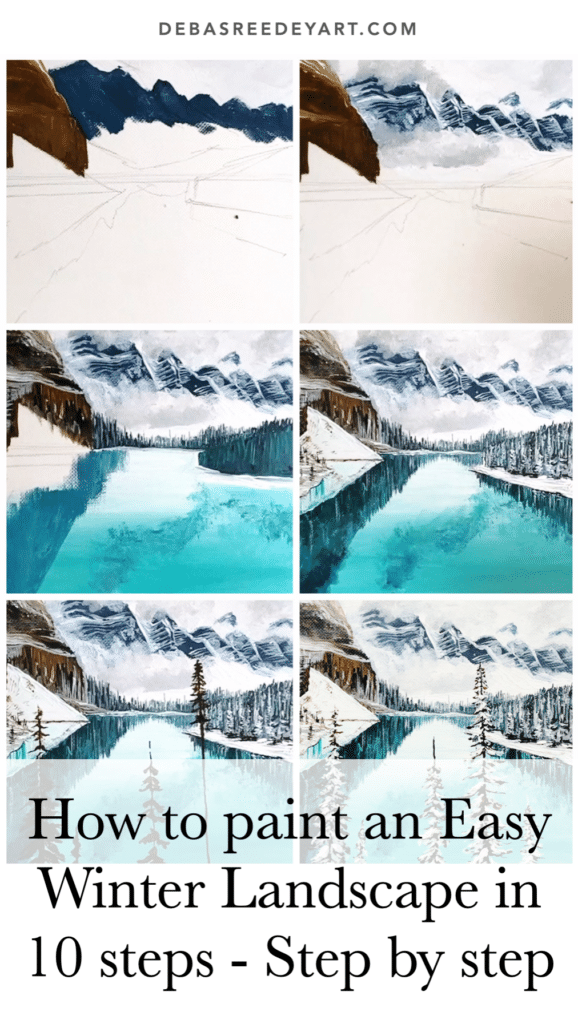
2. Shaping the Mountains

Using a mix of Prussian blue and brown, sketch the basic shape of the majestic peaks. These don’t need to be perfect—mountains have organic, irregular forms. Block in the base colors while leaving some areas lighter to suggest highlights.

3. Adding Mountain Textures

With a dry brush or palette knife, use white and a hint of black to create snowy ridges and shadows. Keep your strokes directional to mimic the natural slopes of the mountains.

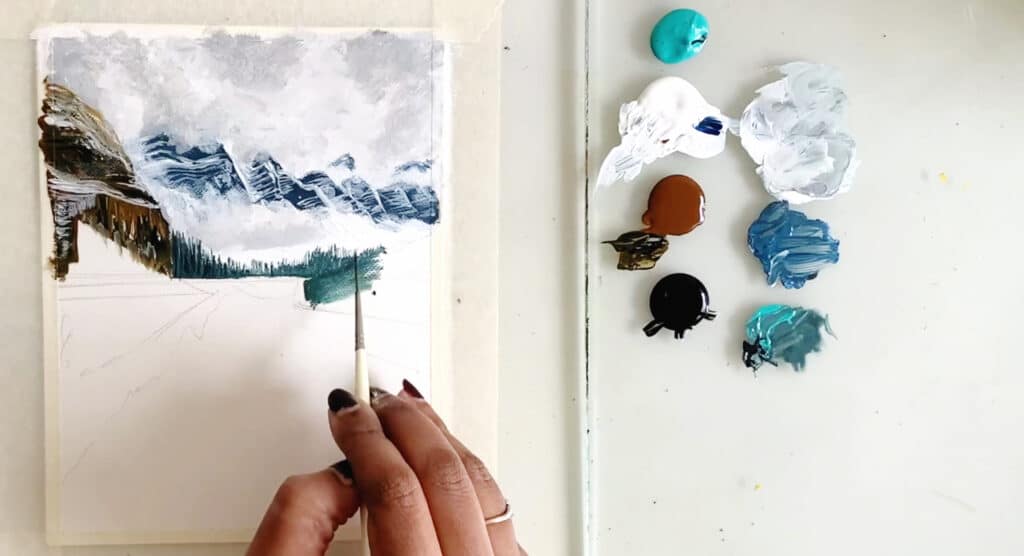
4. Softening with Clouds

Using a light touch, dab white and diluted teal blue to create soft, wispy clouds around the peaks. This helps add atmosphere and depth to the painting.

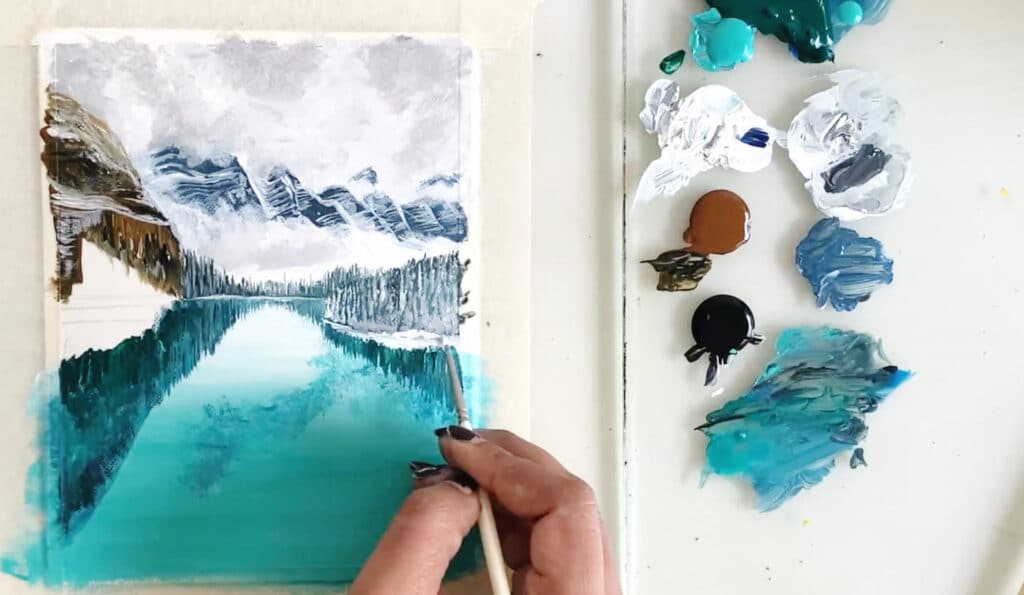
5. Defining the Distant Trees

In the midground, use a mix of Prussian blue and black to paint small, distant trees. These should be subtle and slightly blurred to create the illusion of depth.

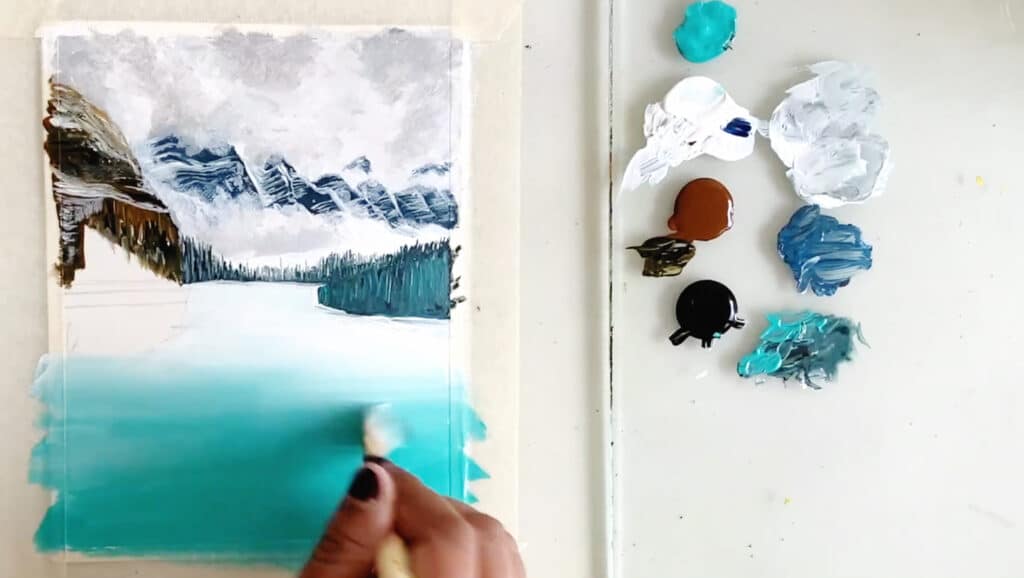
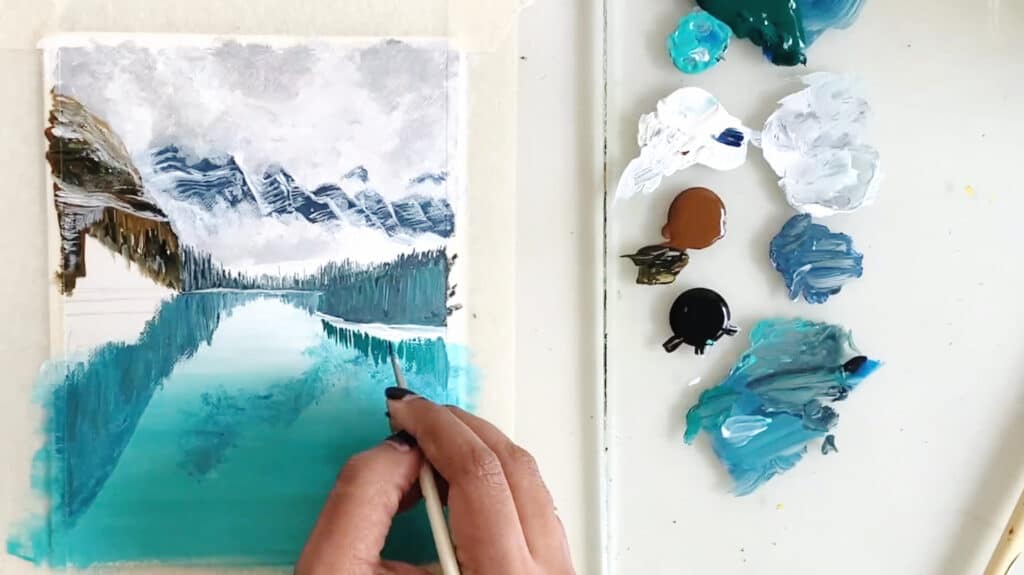
6. Painting the Lake

For a peaceful, reflective lake, blend teal blue and white, keeping your strokes horizontal. Add a darker blue near the bottom for a more realistic effect. A few soft, vertical strokes in Prussian blue can suggest tree reflections.

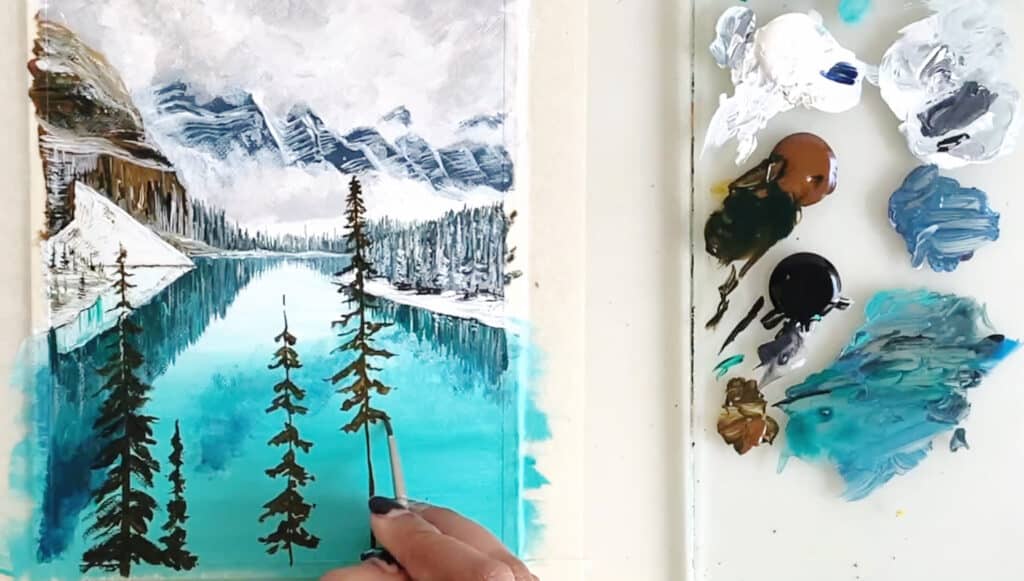
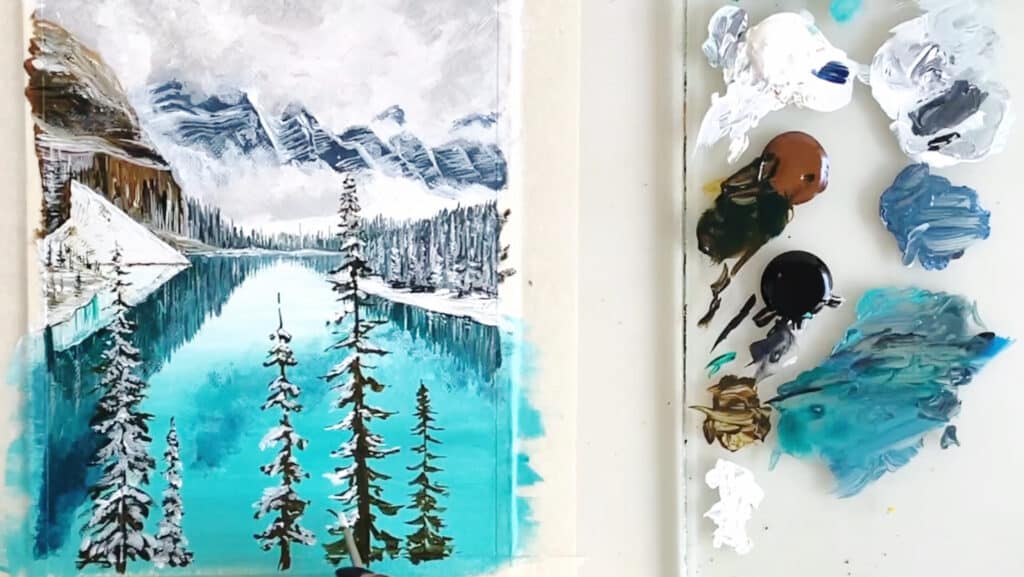
7. Creating the Snowy Pine Trees

Now for the snow-dusted pine trees! Using a fan brush or a fine liner brush, start with a dark base of Prussian blue and black for the tree trunks and branches. Then, lightly layer white on top to create the look of snow resting on the branches.

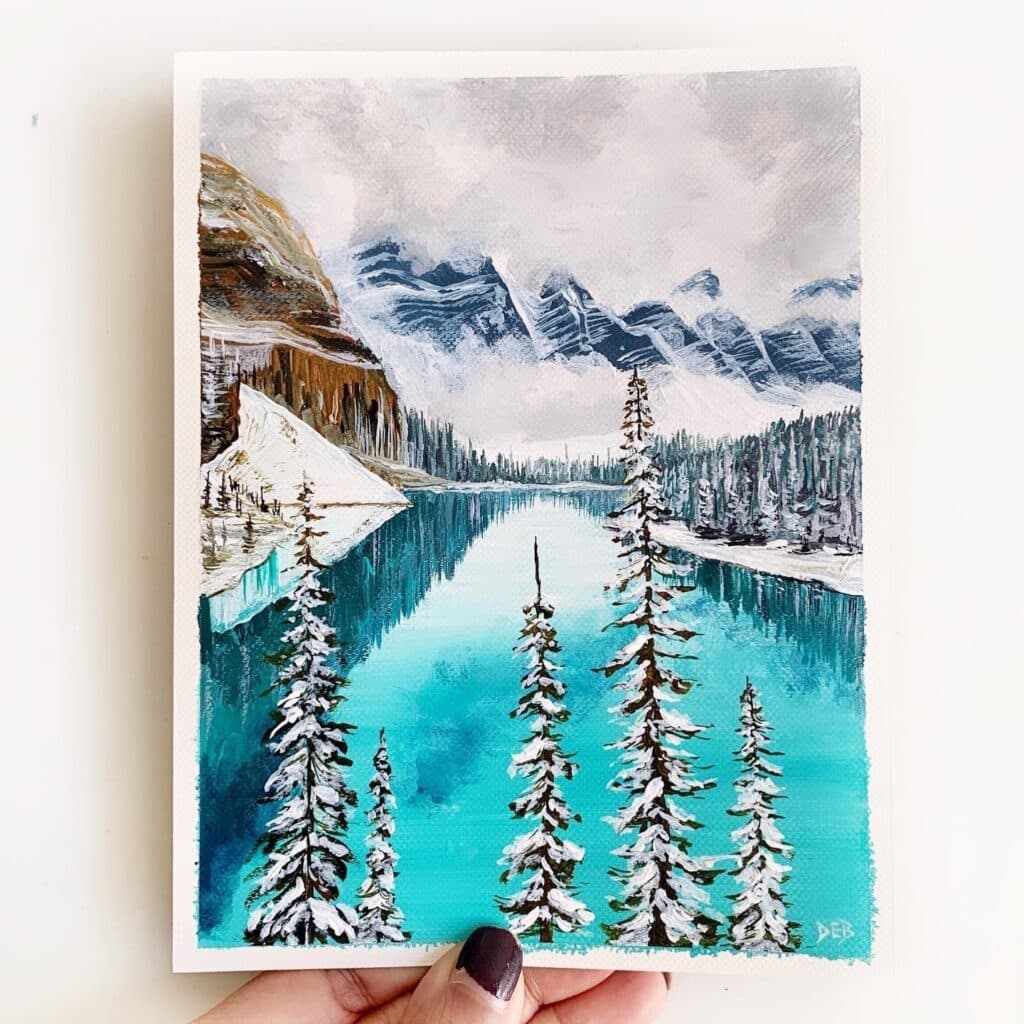
8. Final Touches and Highlights

Step back and assess your painting. Adjust any shadows or highlights using a mix of white and blue to enhance contrast. If needed, add more soft clouds or subtle reflections to bring everything together.

Step 1

Step 2

Step 3

Step 4

Step 5

Step 6

Step 7

Step 8

Step 9

Step 10

And there you have it—your very own snowy pine mountain landscape! Whether you’re a beginner or an experienced painter, this tutorial offers a simple yet rewarding way to explore acrylic painting for beginners.

If you enjoyed this tutorial, you’ll love my Snowy Pines Masterclass, where I teach you how to paint stunning snowy pine trees using a variety of brushes and techniques. In the class, you’ll explore creating vibrant winter landscapes, learn the art of acrylic blending, and even craft unique resin coasters and handmade greeting cards. 

It’s a complete, hands-on course designed to boost your confidence and skills while creating breathtaking winter-inspired art. Join me and discover how fun and rewarding painting snowy scenes can be!

Video:

Watch my process here:

Thank you!

Pin for later

Leave a Comment

Your email address will not be published. Required fields are marked *