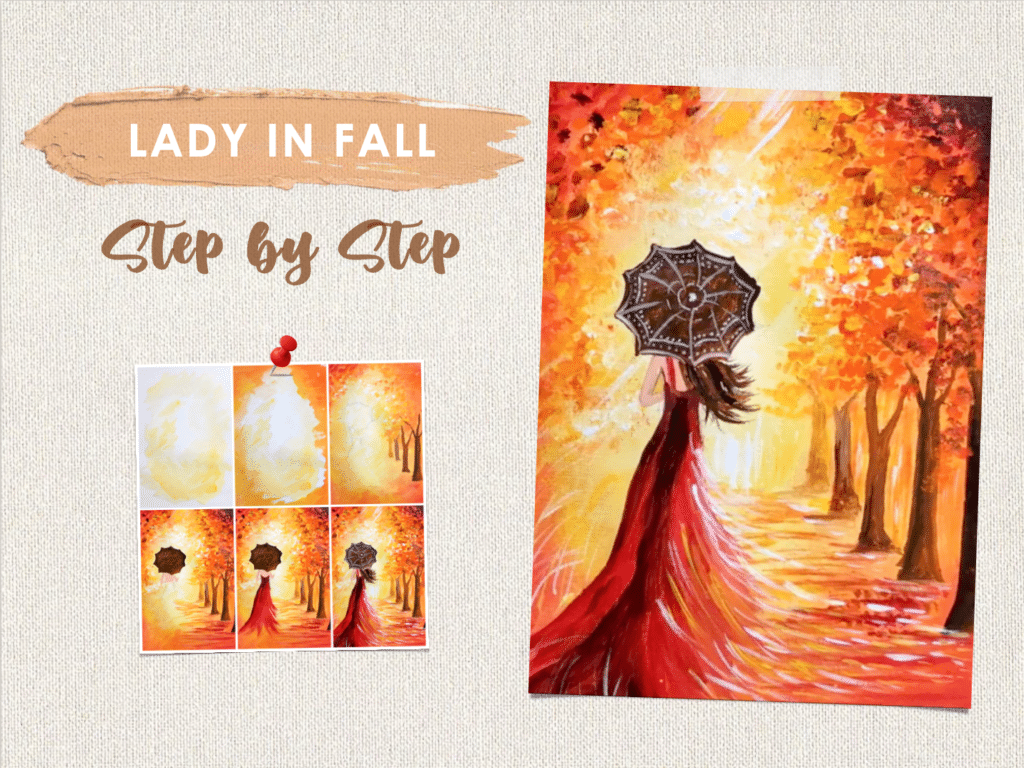
Hello and welcome to another easy acrylic painting tutorial where we learn to create an easy fall painting using acrylics. In this step by step tutorial, we are going to learn to create this beautiful lady in fall painting with a lady walking through the autumn forest with an umbrella.
Even though it looks complicated, once broken down into simpler steps, you can easily follow along and create this painting on your own. This tutorial is perfect for beginners who want to follow and paint along with me. And if you are a pro, you can also paint along and create this autumn beauty!
MATERIALS YOU NEED
Acrylic Colors:
Surface:
- I painted on a A4 acrylic paper
Acrylic Brushes:
- I used a size 4 flat brush from this flat brush set which is perfect for this canvas size. If you are painting bigger, then switch to a size that is proportionate with your painting surface.
- Size 4 liner brush from my favorite miniature brush set
Pin the below image in your Pinterest board for future reference.

painting steps:
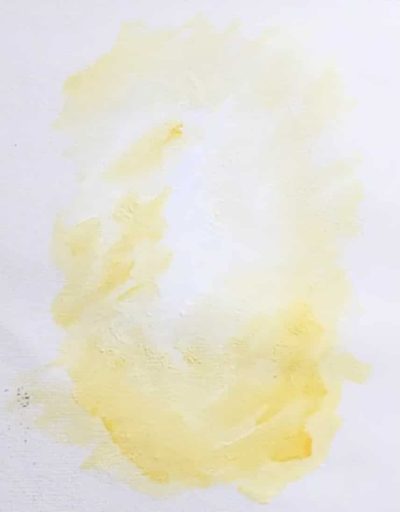
1. the background
Start by adding some white mixed with cadmium yellow in the centre of the canvas to create the background of the fall forest. Keep the centre white and add yellow around it, while blending it in.
2. background layer 2
Bring in cadmium orange and blend it in with the previous layer. Add orange from the sides keeping the centre untouched.

3. background layer 3
Now it’s time to introduce red to the background. To create the dreamy autumn background colors in this “lady in fall” painting, blend in some red with the orange and yellow while they are still wet. So these 3 background layer steps need to be done immediately one after the other.

4. Leaf textures - layer 1
Let the background colors dry. Once it is dried, start adding the leaf textures with your dry flat brush. These textures are going to create the fall trees of the painting.
Start the textures in the similar way as we did with the background – with light colors towards the centre. So in the first texture layer, we start with white and yellow strokes. Create small strokes with the tip of your flat brush.

5. Leaf Textures Layer 2 + tree trunks
Continue texturing with orange, red and add some black to the mixture towards the edge of the painting. Adding some dark strokes towards the edge of the painting, helps keep the eye towards the centre of the painting. Also add some tree trunks under the leaf textures.
In this step, roughly draw the outline of the umbrella and the lady with a pencil.

6. Umbrealla
Paint the umbrella using red + black mix, or you can use brown straight out. I’ve also painted the skin color of the lady by mixing a lot of white with a little red and orange.

7. the dress - part 1
Start painting the dress of the lady from the top using red.

8. The Dress - Part 2
Bring down the red to the bottom edge and create some rough strokes. Then mix the red with a lil black to create the shadow on the upper part of the dress.

9. The Dress - Part 3
Continue the dark shade through the middle of the dress, and bring it all the way down to create the free flowing pattern of the dress.

10. umbrella patterns + white strokes
In the final step of the lady in fall painting, we play with only white. Add some patterns in the umbrella using white. And then add some white strokes all around the painting to create a magical effect in the painting.

And that’s it… just by following these 10 steps, you can now created your very own Lady in Fall landscape painting.
Did you enjoy following this tutorial? What is the next painting you want me to teach? Let me know how it turned out for you by commenting below!
Happy Painting!
Pin the below image in your Pinterest board for future reference.

Video:
If you need more guidance, watch my process here:
Thank you!

