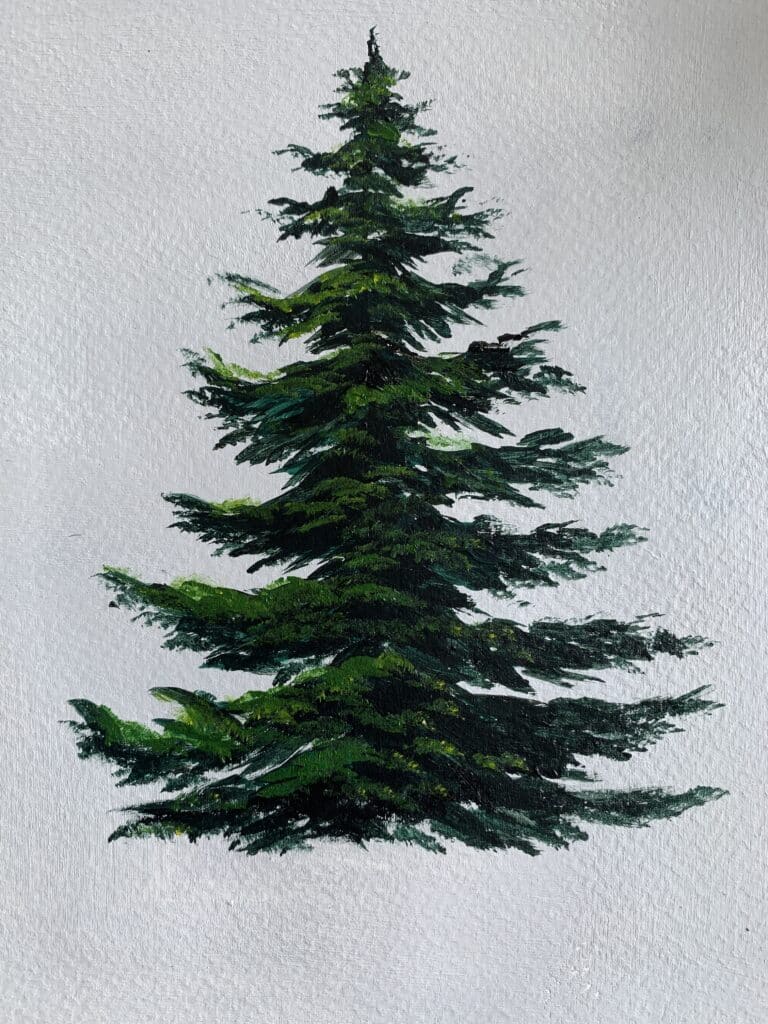
Ok so you have painted a snowy pine tree with a flat brush, round brush and may be also with a fan brush… but now you want to find out how to do a snowy tree painting with a filbert brush. That is what we are going to find out in this article.
I haven’t painted many trees with filbert brush in my painting experience of 10 years but over the last few months I started painting with filbert brush and I love it. Mostly because the rounded tip of a filbert brush created beautiful textures without much effort by the artist. And I think that is a really beneficial property of this brush and makes a snowy tree painting lot easierthan any other brush.
BEFORE LEARNING THE FILBERT BRUSH TECHNIQUES OF PAINTING SNOW TREES, CHECK OUT THIS BLOG ON THE6 EASY STEPS OF PAINTING A SNOW PINE TREE.
Snowy Pines Masterclass
Master the Art of Snowy Pine Trees & capture Winter landscapes with ease
The Snowy Pines Masterclassis your complete guide to mastering snowy pine trees and creating breathtaking winter landscapes, covering 11+ hours of instruction and inspiration!
Master snowy pine trees: Learn to paint 9 unique styles using 4 different brushes
Perfect your winter landscapes: Create 10 stunning projects
“This class has been a game-changer for me. I’ve tried painting pine trees before, but they never turned out right. Now, thanks to Debasree’s tips, I can finally create the winter scenes I’ve always wanted.” — Priya S.
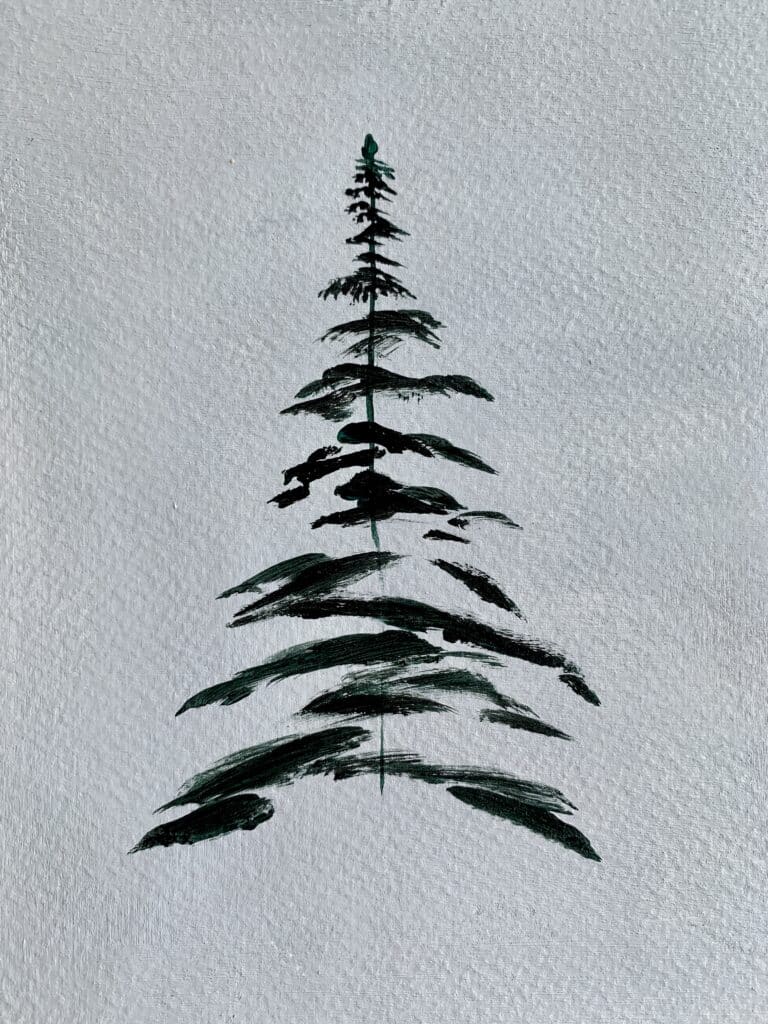
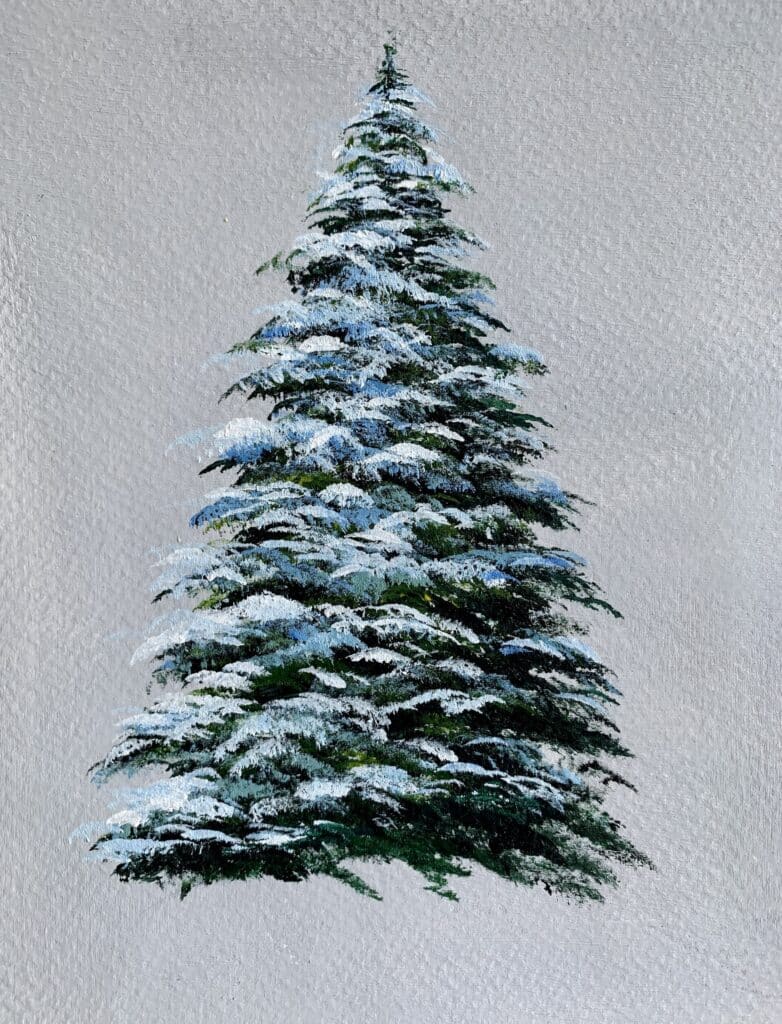
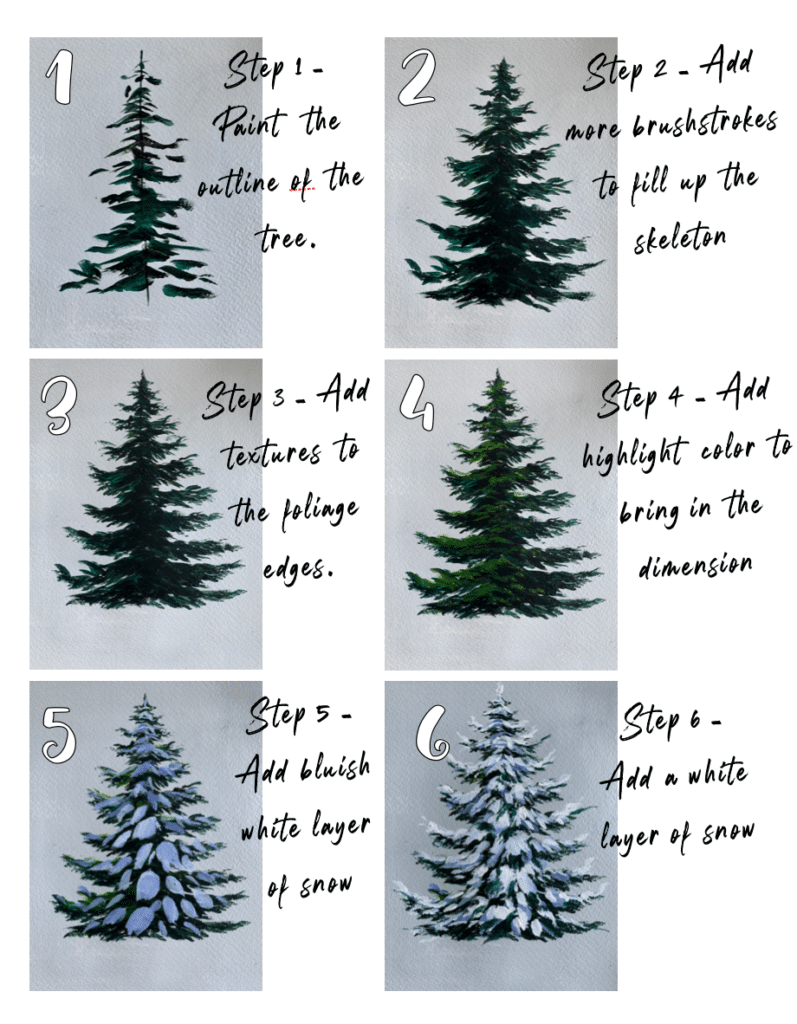
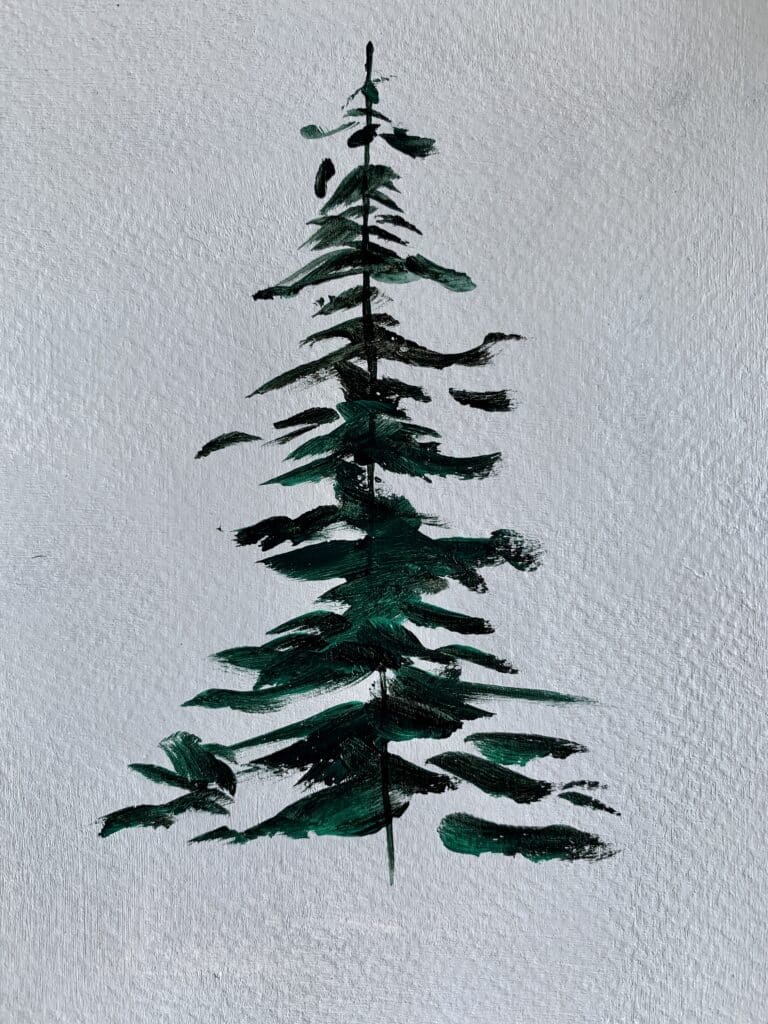
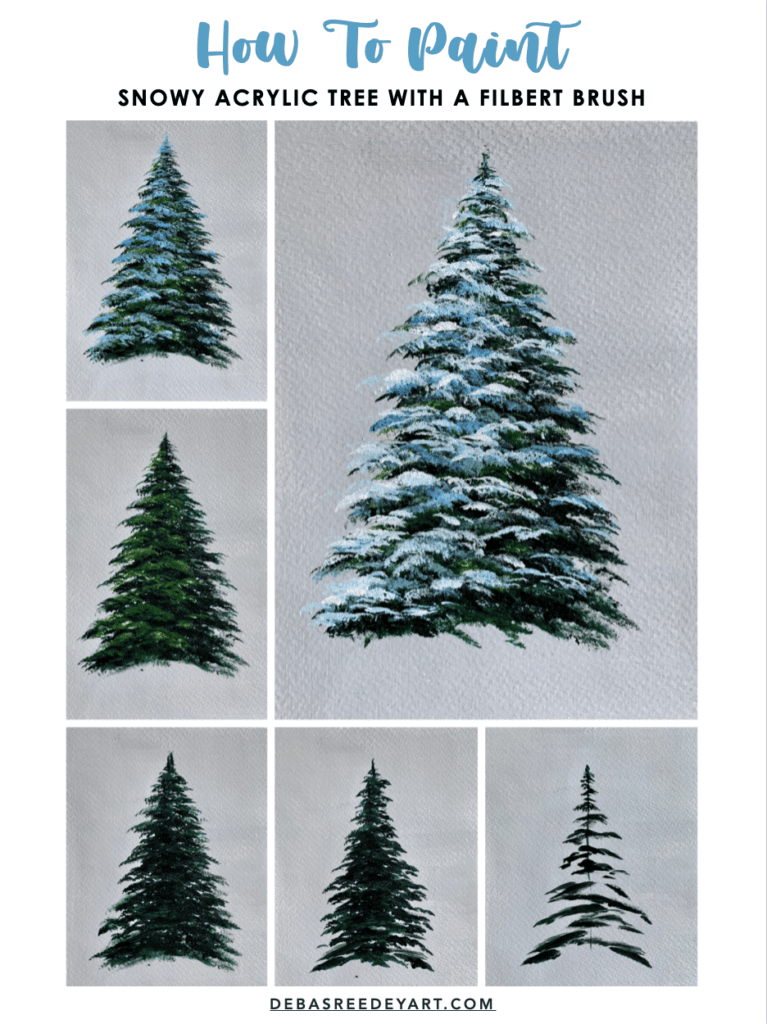
In the first step of painting your snowy winter tree, just outline the shape of your tree with the roundish tip of the filbert brush. Start by creating a straight middle line and and then go in zigzag direction from the top down. This is to mark out the entire triangular shape of the pine tree and also helps in staying within the space intended.
step 2 – Branch Skeleton
Colors used: Black and Viridian hue mix
Now go over the structure once again in the similar zigzag patter and add more brushstrokes with the tip of the filbert brush to fill up the skeleton and make it look like a tree. Dab the tip of the brush with good amount of paint over the structure created in the previous step.
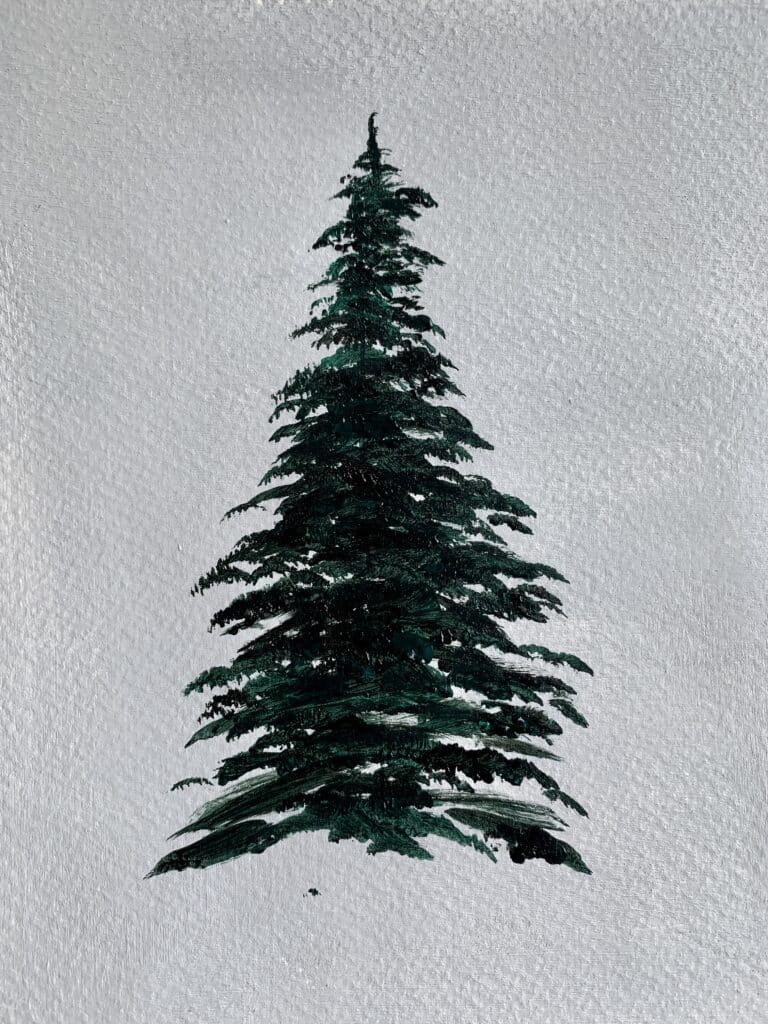
step 3 – textures
Colors used: Black and Viridian hue mix
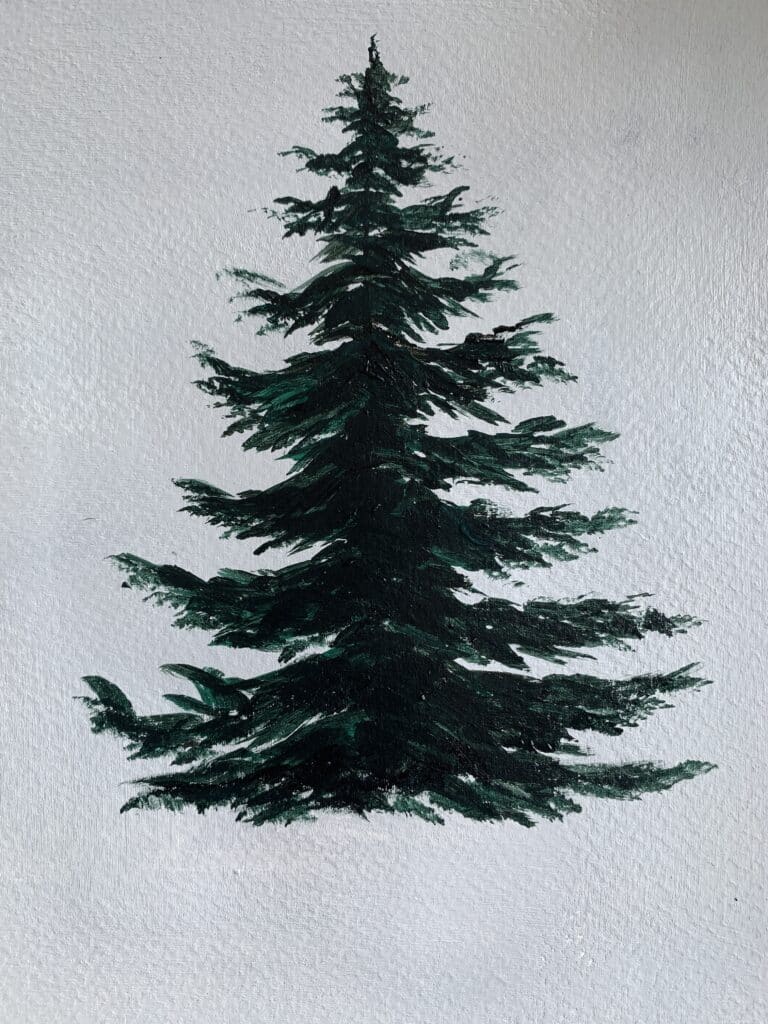
It’s time to add textures to the foliage edges. Repeat the previous step of dabbing with the tip of the filbert brush but this time go a bit gently and with less pressure. Gently touch your canvas with the tip of the filbert brush and the round tip of your brush will naturally create a semi-circular mark and create textures.
step 4 – dimensions
Colors used: Cadmium yellow mixed with viridian hue
This is the step to turn your tree look realistic. Add a highlight color, preferably with light green or yellow or burnt Sienna depending on the landscape, towards the direction of the light source. If the light source is on the right, add more highlight color on the right, and very less on the left. This way you will create a 3-dimensional effect of the tree and make it look pretty!
Use the similar brush strokes as in the previous step with the tip of the filbert brush and create semi-circular strokes on the tree foliages.
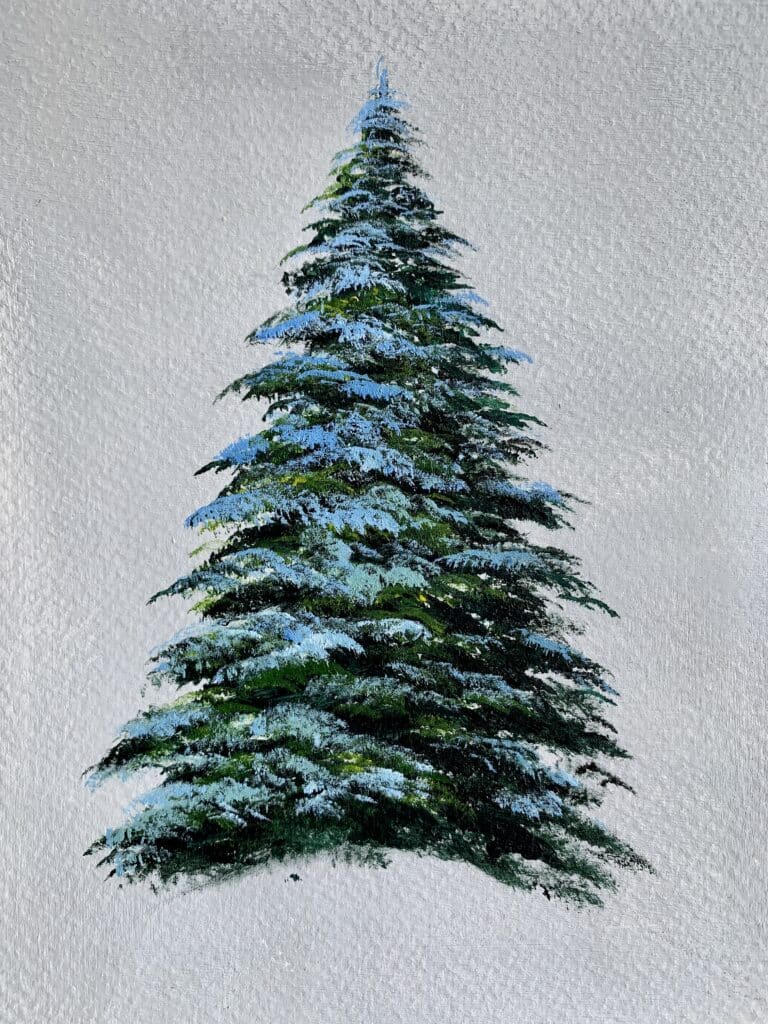
STEP 5 – blue snow highlight
Colors used: Prussian blue + Viridian hue + White
Add bluish white highlight on top of the previous highlight layer. It’s a repetition of step 4, just with the shade of the snow color. I used prussian blue in this step, but you can use any blue you have – cobalt blue, ultramarine blue, cerulean blue or teal blue, etc
You can clearly see the brush marks created by the tip of the filbert brush in this step.
Pro tip – apply less pressure to get better textures.
STEP 6 – white SNOW HIGHLIGHT
Colors used: Prussian blue + White
Repeat step 5 with a lighter shade of blue, which looks almost white. The more layers you add, the better the texture of your tree, and more realistic it will start appearing on your canvas.
There it is – our first snowy tree painting is done with a filbert brush.
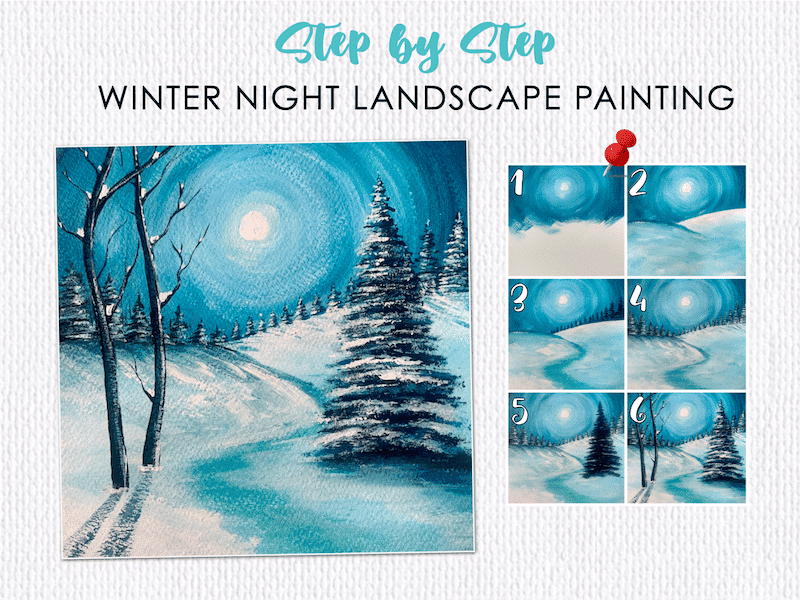
Now paint this tree in a landscape. Or just add a white land underneath the tree and add the shrubs to complete the painting!
SNOWY TREE PAINTING - 2
Overview of all the steps
If you like this snowy tree painting with filbert brush, please pin the below image on Pinterest
Ok now let’s get into the individual steps.
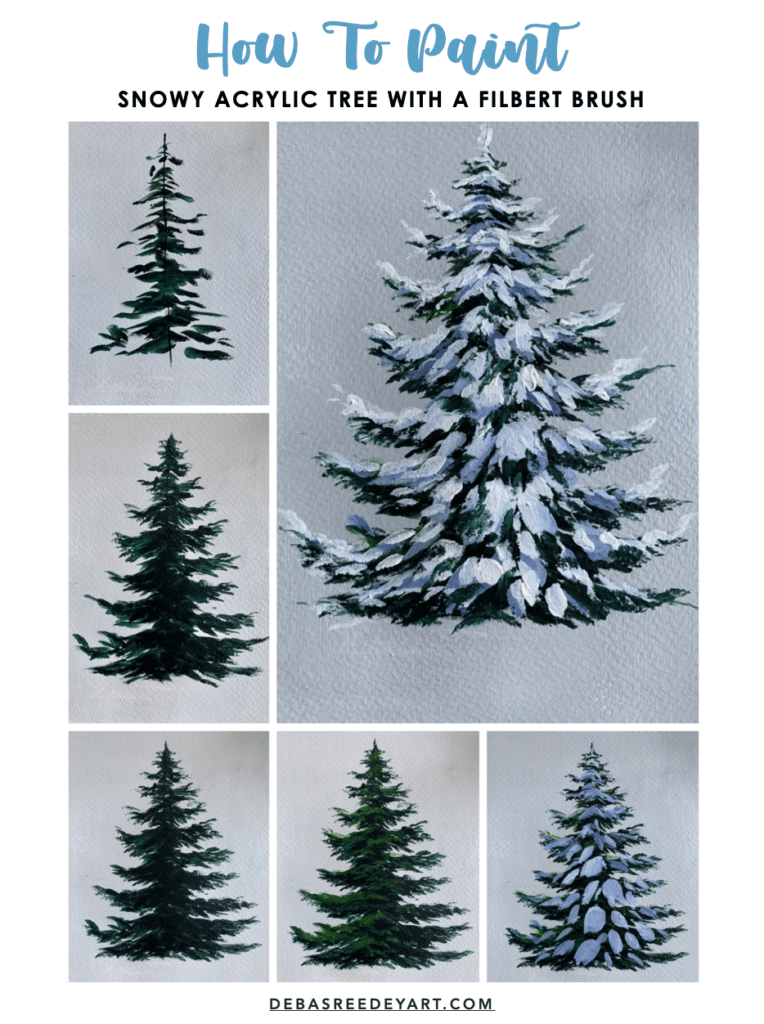
Step 1 – Outline
Colors used: Black and Viridian hue mix
In the first step of painting your snowy winter tree, just outline the shape of your tree with the tip of the filbert brush, or use a small round brush. Start with creating a straight middle line and and then go in zigzag direction from the top down. This is to mark out the entire triangular shape of the pine tree and also helps in staying within the space intended.
step 2 – Branch Skeleton
Colors used: Black and Viridian hue mix
Now go over the structure once again in the similar zigzag patter and add more brushstrokes with the tip of the filbert brush to fill up the skeleton and make it look like a tree. Use the tip of the brush to drag and create the branch strokes.
step 3 – textures
Colors used: Black and Viridian hue mix
It’s time to add textures to the foliage edges. Unlike the previous tree, in this one we will drag the brush tip instead of dabbing, to create the foliage textures.
Move towards right to create the textures of the right branches, and move left for the left branches. Keep doing this throughout to create the perfect textures for your tree.
step 4 – dimensions
Colors used: Cadmium yellow mixed with viridian hue
This is the step to turn your tree look realistic. Add a highlight color, preferably with light green or yellow or burnt Sienna depending on the landscape, towards the direction of the light source. If the light source is on the right, add more highlight color on the right, and very less on the left. This way you will create a 3-dimensional effect of the tree and make it look pretty!
Use the similar brush strokes as in the previous step with the tip of the filbert brush and create the dragging strokes on the tree foliages.
STEP 5 – blue snow highlight
Colors used: Prussian blue + Viridian hue + White
Add bluish white highlight on top of the previous highlight layer. It’s a repetition of step 4, just with the shade of the snow color. I used prussian blue in this step, but you can use any blue you have – cobalt blue, ultramarine blue, cerulean blue or teal blue, etc
Filbert brush has such a beautiful bristle shape thatt with just a touch of the brush, it can create beautiful round strokes.
STEP 6 – white SNOW HIGHLIGHT
Colors used: Prussian blue + White
Repeat step 5 with a lighter shade of blue, which looks almost white. The more layers you add, the better the texture of your tree, and more realistic it will start appearing on your canvas.
There you got it – 2 different types of snowy pine tree, painted using filbert brush and acrylics.
Which one do you like more, and which one are you gonna try first?
Let me know how it turned out for you by commenting below!
If you like this snowy tree painting with filbert brush, please pin the below images on Pinterest
Video:
If you need more guidance, watch my process of painting both the trees with filbert brush .
I’ve colored the A4 acrylic paper grey so that the white snow stands out on the paper. You can ignore this grey background step!


Love how you paint! Pine trees are my favorite! I’m going to give it a whirl with your tutorial. Thank you!