fbpx
snowy pine trees with acrylics fan brush

Snowy Acrylic Pine Tree With A fan Brush

If you are painting a winter landscape where the pine tree is the hero of your project, you need to be able to paint a big, tall and gorgeous snowy pine tree. In this blog, I’ll teach you in very easy steps, how you can create an absolutely attractive and realistic looking snowy acrylic pine tree with fan brush techniques.

From my experience of teaching art for over a decade, I’ve come to understand why people find it so difficult to paint a snow pine tree, and also found out the techniques of teaching it in the most simplest way, that any novice can also confidently paint.

Basically you need to understand 2 things:

  1. The Technique
  2. The Brush

You can paint a snowy pine tree with multiple brushes, and each brush has its own techniques to be learnt. In this blog, we will focus on learning snowy pine tree with a fan brush, and here you can look at the other methods of painting with a flat brushfilbert brush and a round brush.

2 Different Types Of Snowy Pine Tree:

  1. Foxtail Pine Tree which looks like Christmas tree with pointed edges and almost equal foliages on each side.

  2. Scotch Pine Tree which is more dense with irregular foliages on the sides.
Before learning the fan brush techniques of painting snow pines, check out this article on the basic structure of a snow pine tree, which will give you a clear idea on the 6 easy steps of painting a snow pine tree.
 
* If you need to watch the process of creating these 2 snowy pine trees, I’ve a video at the end of this blog post.


Want my private coaching on how to create these trees?

Join thousands of online students in my online art academy, and get almost in-person guided coaching from me, in this comprehensive acrylic masterclass – “How To Paint Snowy Pine Trees with 4 different brushes” covering 9.5 hours of instruction and inspiration!

how to paint snowy pine trees with acrylics

MATERIALS YOU NEED

Acrylic Colors:  

  1. Aqua Green
  2. Prussian Blue
  3. Cadmium yellow.
  4. White
  5. Black

Surface:

Acrylic Brushes:

  • Size 6 Fan brush
 
PS. If you need some advice on acrylic painting supplies, check out this article – 3 Basic Acrylic Painting Supplies – The Minimalist List.

Tree 1 - foxtail pine tree

Foxtail Pine Tree looks just like a Christmas tree with pointed edges and almost equal foliages on each side. It also has more gaps in between the foliages.

Overview of all the steps:

snowy pine trees with acrylics fan brush technique

Ok now let’s get into the individual steps.

Step 1 – Outline

Colors used: Black and Viridian hue mix

In the first step of painting your snowy pine tree, just outline the shape of your tree with the corner of the fan brush, or use a small round brush. Start with creating a straight middle line and and then go in zigzag direction from the top down. This is to mark out the entire triangular shape of the pine tree and also helps in staying within the space intended.

snowy pine trees with acrylics fan brush step 1

step 2 – Branch Skeleton

Colors used: Black and Viridian hue mix

Now go over the structure once again in the similar zigzag patter and add more brushstrokes with the tip of the fan brush to fill up the skeleton and make it look like a tree. In this step also I used the same black and viridian hue.

snowy pine trees with acrylics fan brush step 2

step 3 – textures

Colors used: Black and Viridian hue mix

It’s time to add textures to the foliage edges. Hold your fan brush a little slanted on each of the branches and drag it gently to create the foliage textures. Move towards right to create the textures of the right branches, and move left for the left branches. Keep doing this throughout to create the perfect textures for your tree.

snowy pine trees with acrylics fan brush step 3

step 4 – dimensions

Colors used: Cadmium yellow mixed with viridian hue

This is the step to turn your tree look realistic. Add a highlight color, preferably with light green or yellow or burnt Sienna depending on the landscape, towards the direction of the light source. If the light source is on the right, add more highlight color on the right, and very less on the left. This way you will create a 3-dimensional effect of the tree and make it look pretty!

Pro tip – You can repeat step 4 with more layers of lighter shades of green and yellow to create a beautiful green pine tree

snowy pine trees with acrylics fan brush step 4

STEP 5 – blue snow highlight

Colors used: Prussian blue + Viridian hue + White

Add bluish white highlight on top of the previous highlight layer. It’s a repetition of step 4, just with the shade of the snow color. I used prussian blue in this step, but you can use any blue you have – cobalt blue, ultramarine blue, cerulean blue or teal blue, etc

Pro tip – apply less pressure to get better textures.

snowy pine trees with acrylics fan brush step 5

STEP 6 – white SNOW HIGHLIGHT

Colors used: Prussian blue + White

Repeat step 5 with a lighter shade of blue, which looks almost white. The more layers you add, the better the texture of your tree, and more realistic it will start appearing on your canvas.

snowy pine trees with acrylics fan brush step 6

There its – our first snow pine tree is done with a fan brush.

Now paint this tree in a landscape. Or just add a white land underneath the tree and add the shrubs to complete the painting!

tree 2 - scotch pine tree:

Scotch Pine Tree has more dense leaves with irregular foliages on the sides.

The painting techniques of each of the 6 steps remains the same as we learnt with the previous tree, but just the structure of the tree changes by tweaking the fan brush.

Overview of all the steps:

Step 1 – Paint the irregular structure of the pine tree.

snowy pine trees with acrylics fan brush tree 1 step 1

Step 2 – Add more brushstrokes to fill up the skeleton and add textures on the foliages

snowy pine trees with acrylics fan brush tree 1 step 2

Step 3 – Add dimension to the tree foliages by adding a highlight color with green.

snowy pine trees with acrylics fan brush tree 1 step 3

Step 4 – Add a highlight layer of blue on top of green.

snowy pine trees with acrylics fan brush tree 1 step 4

Step 5 – Repeat step 4 with a bluish white layer of highlight.

snowy pine trees with acrylics fan brush tree 1 step 5

Step 6 – Repeat step 5 with pure white, but add less than in the previous layer and also add few strokes for the ground. 

snowy pine trees with acrylics fan brush tree 1 step 7

There you got it – 2 different types of snowy pine tree, painted with fan brush and acrylics.

Which one do you like more, and which one are you gonna try first?

Let me know how it turned out for you by commenting below!

If you liked this tutorial of acrylic snowy pine tree with fan brush, please pin the below images on Pinterest !

Video:

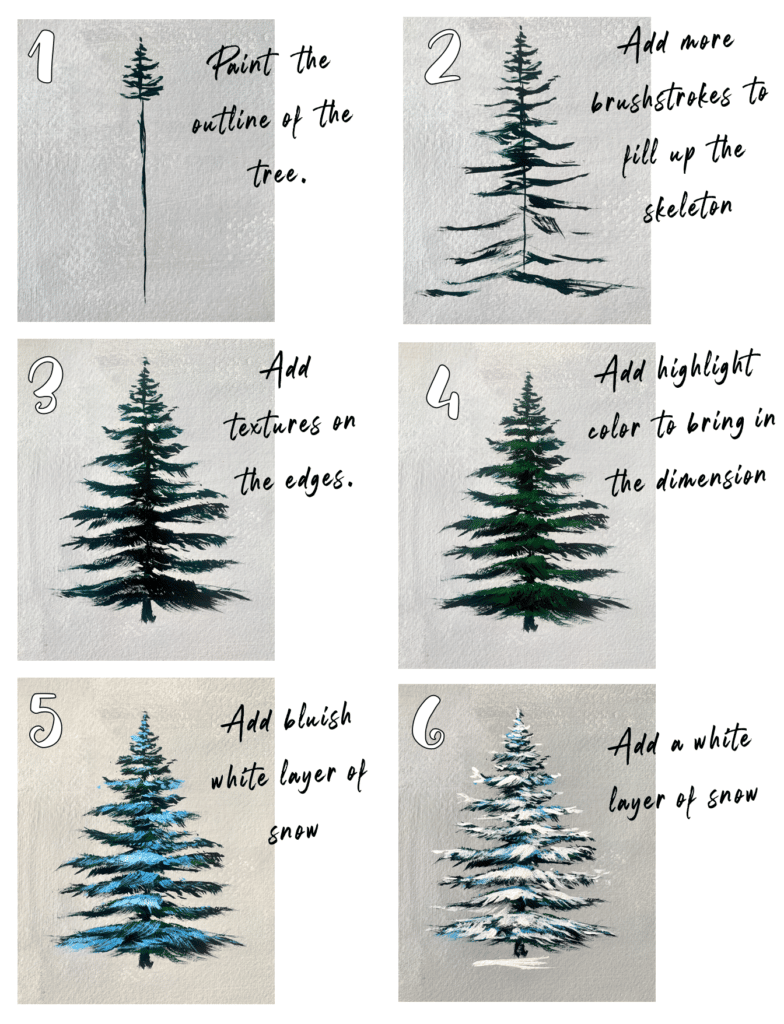
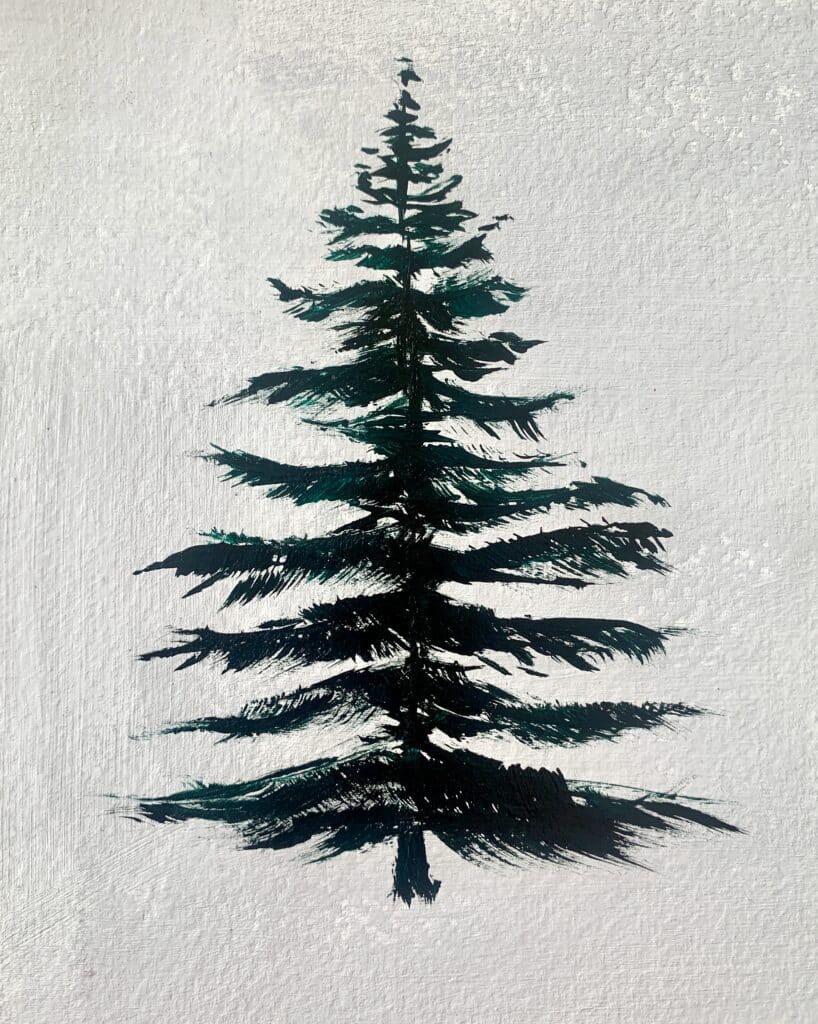
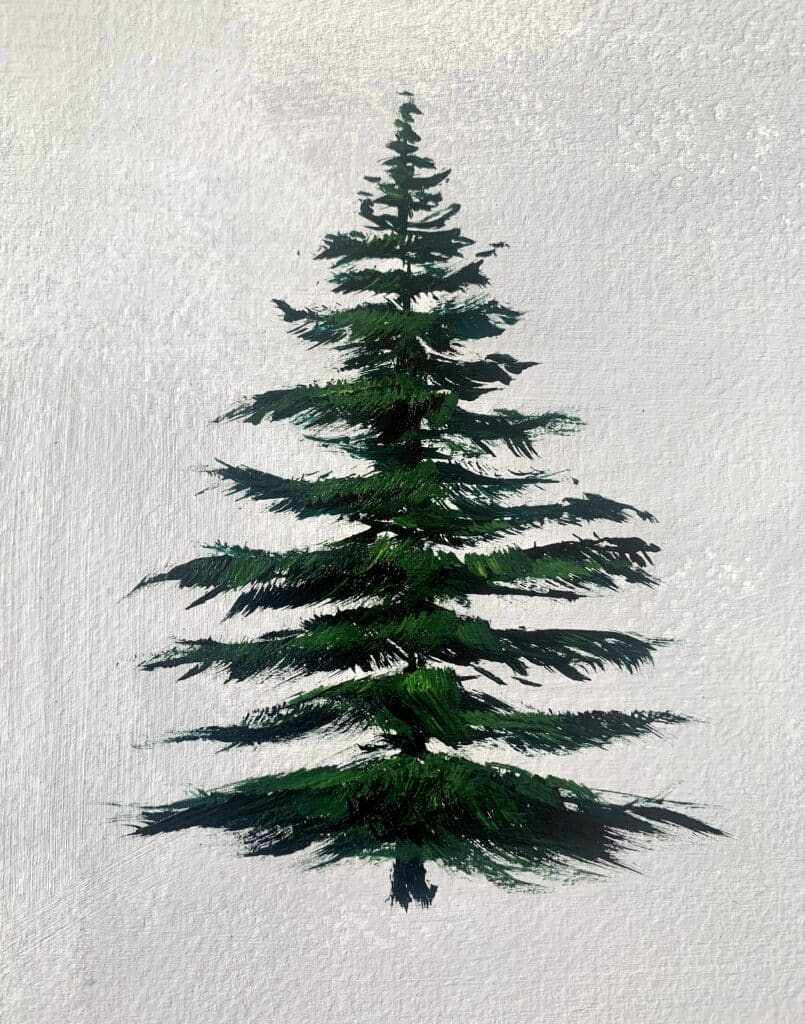
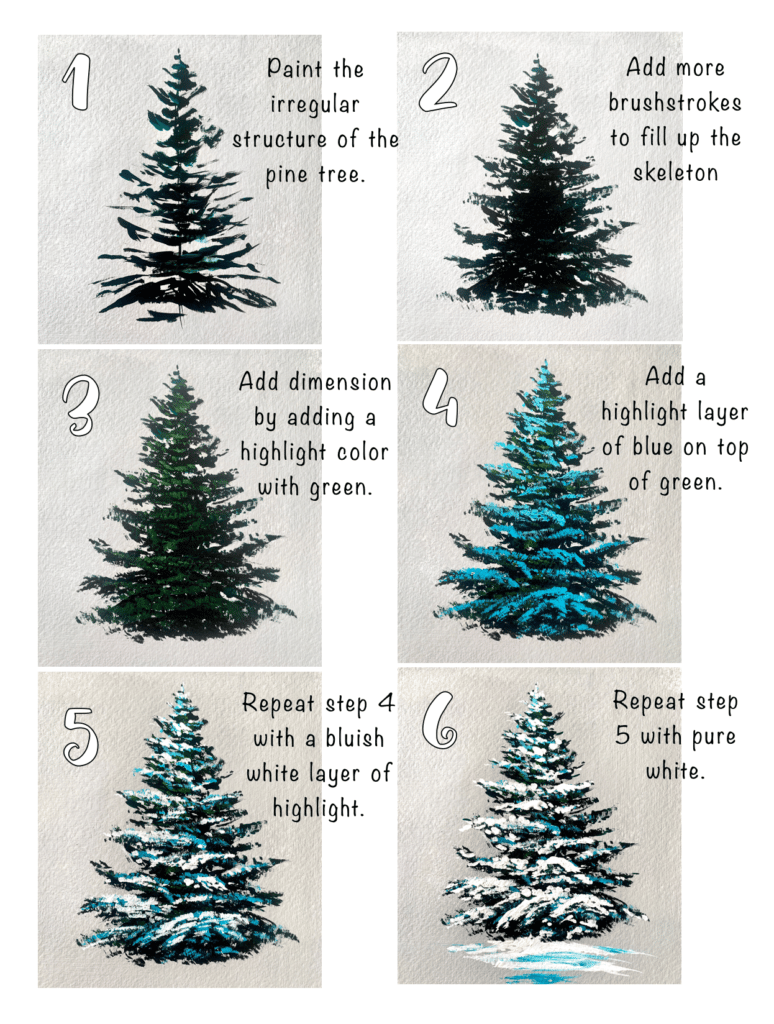
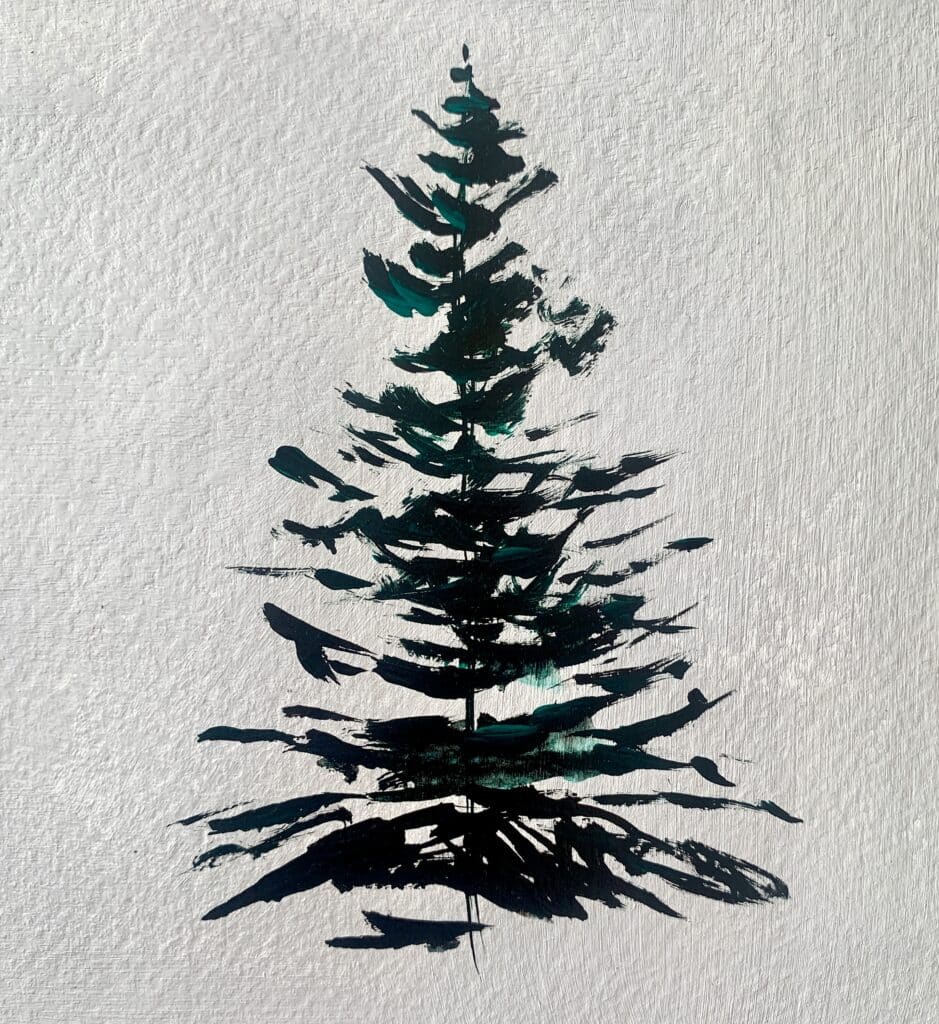
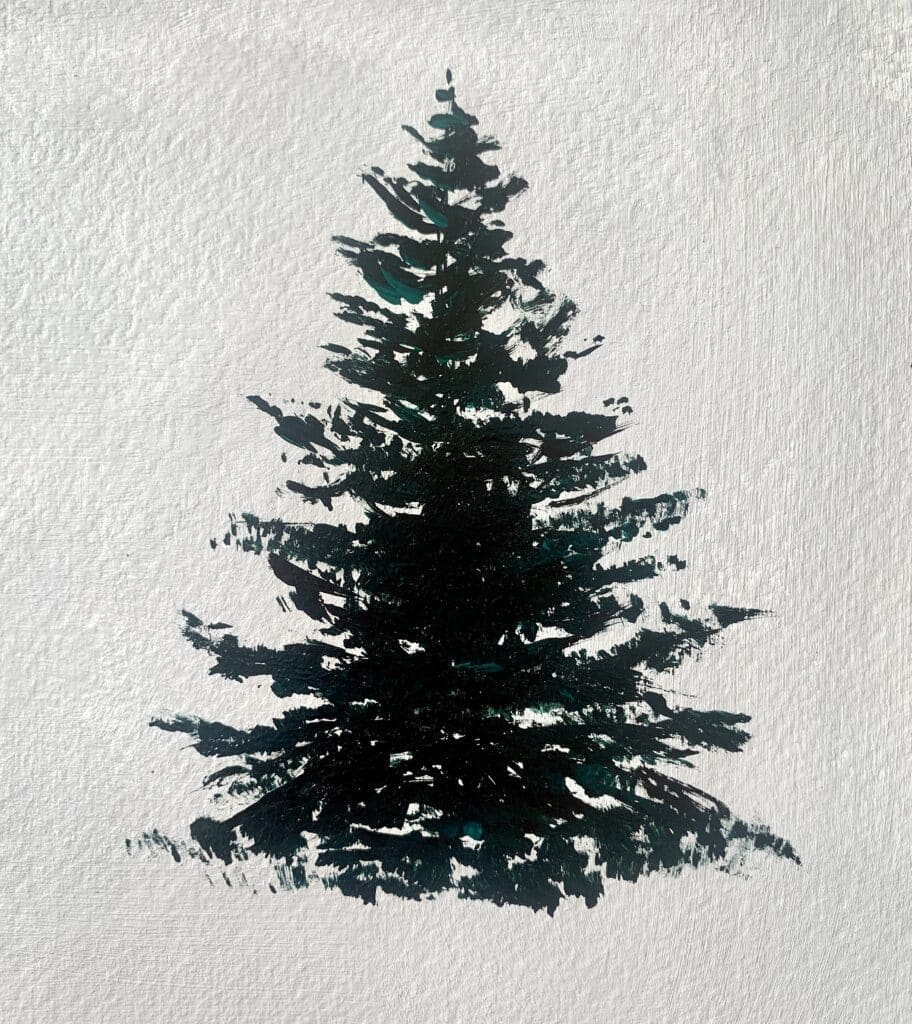
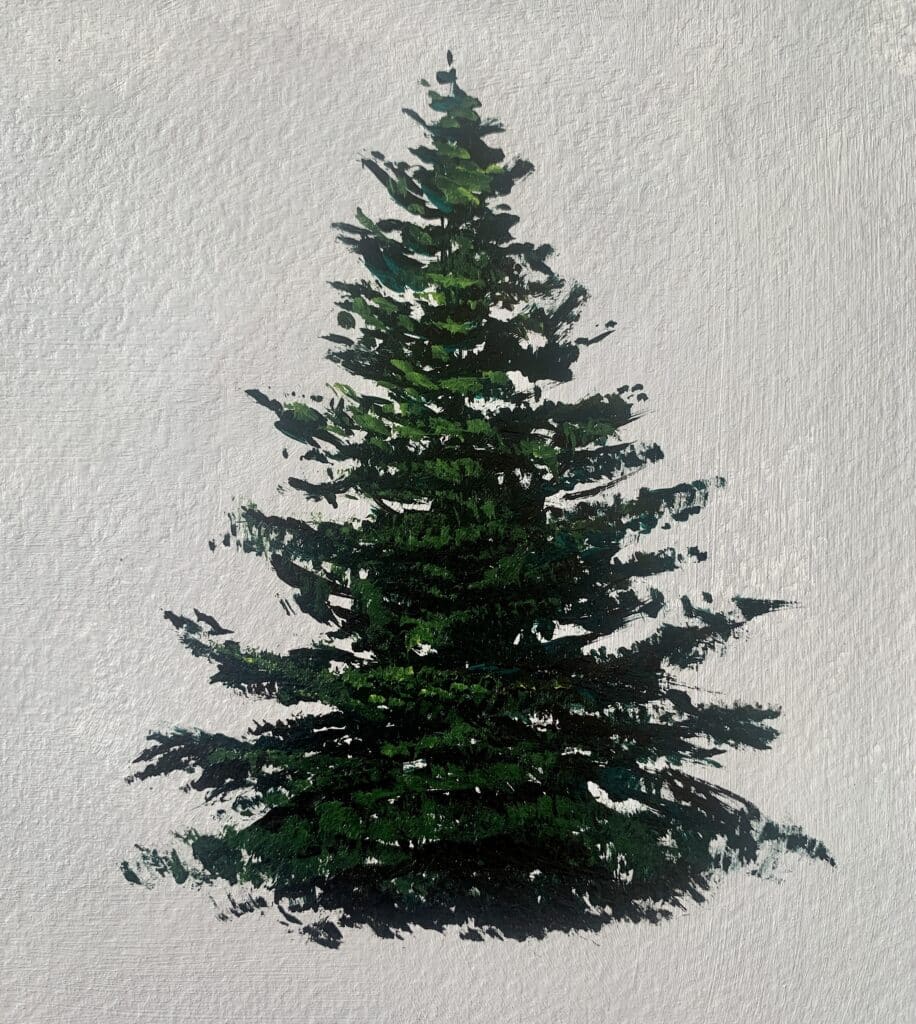
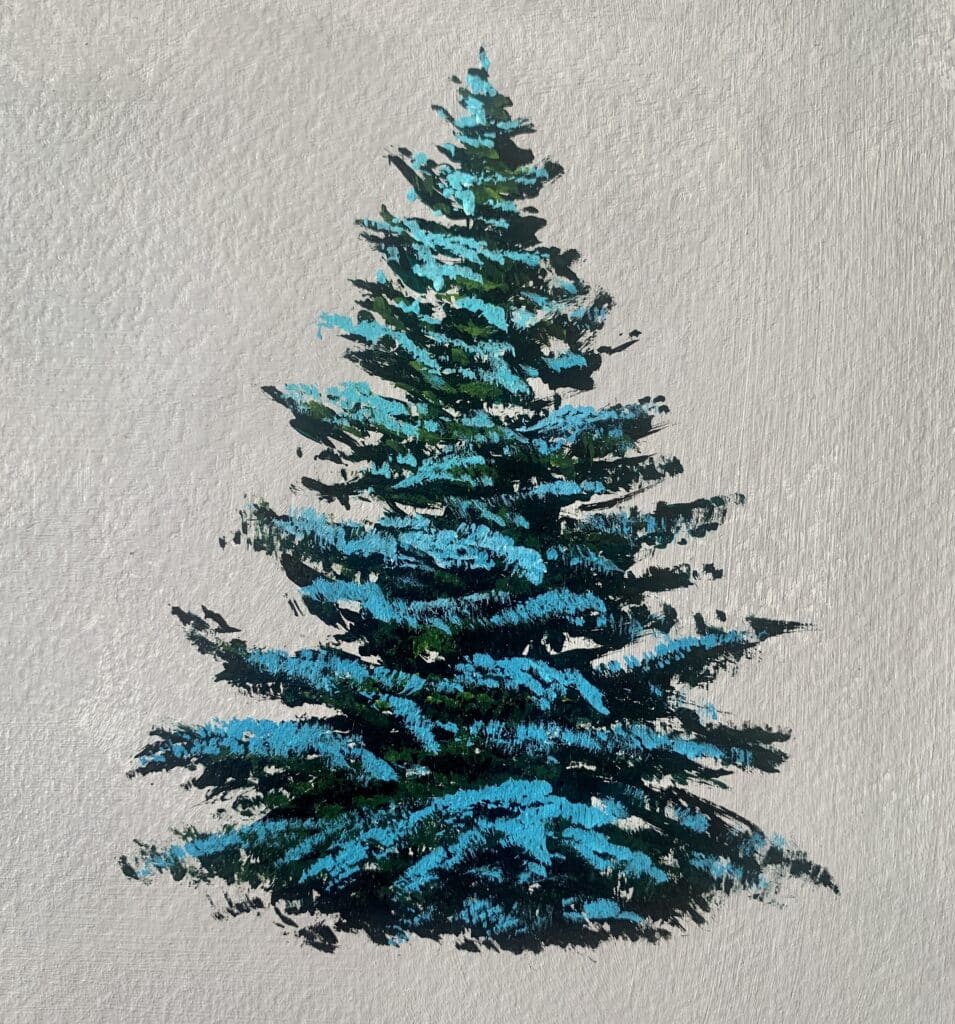
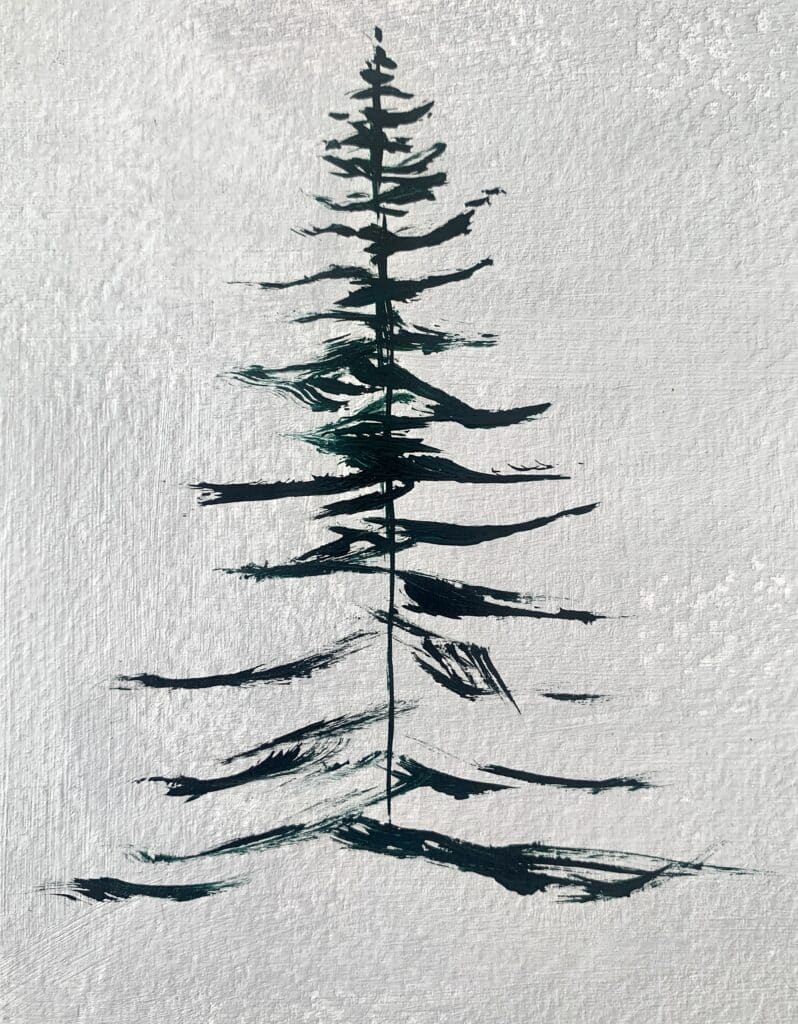
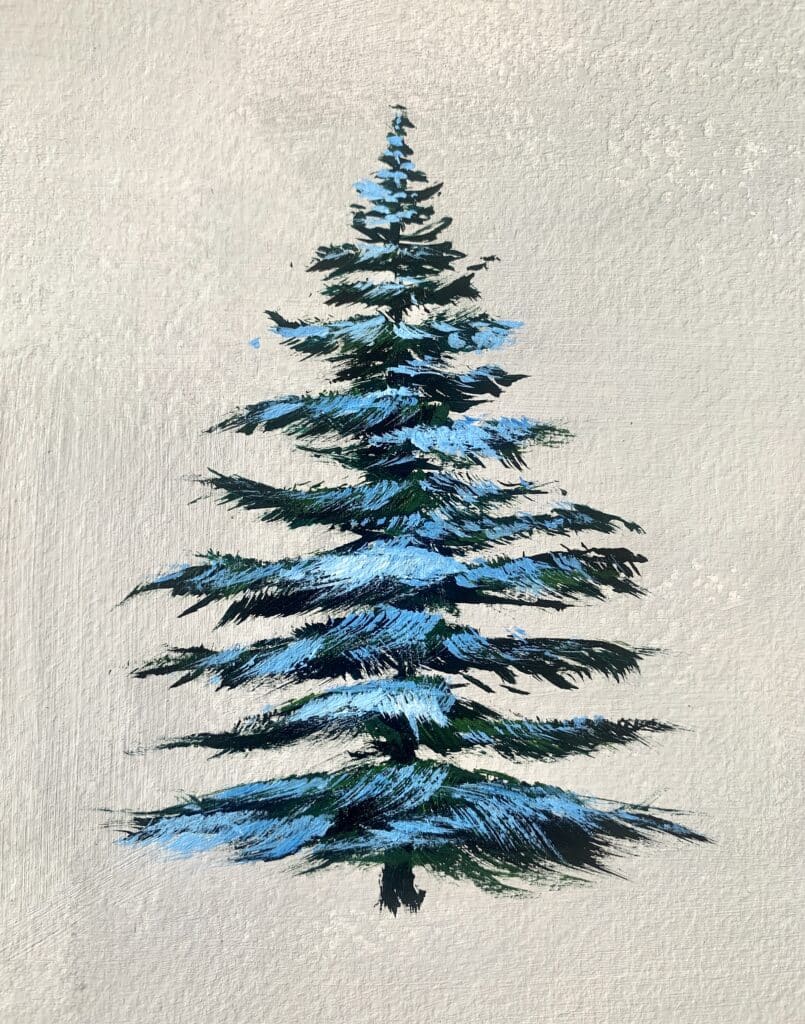
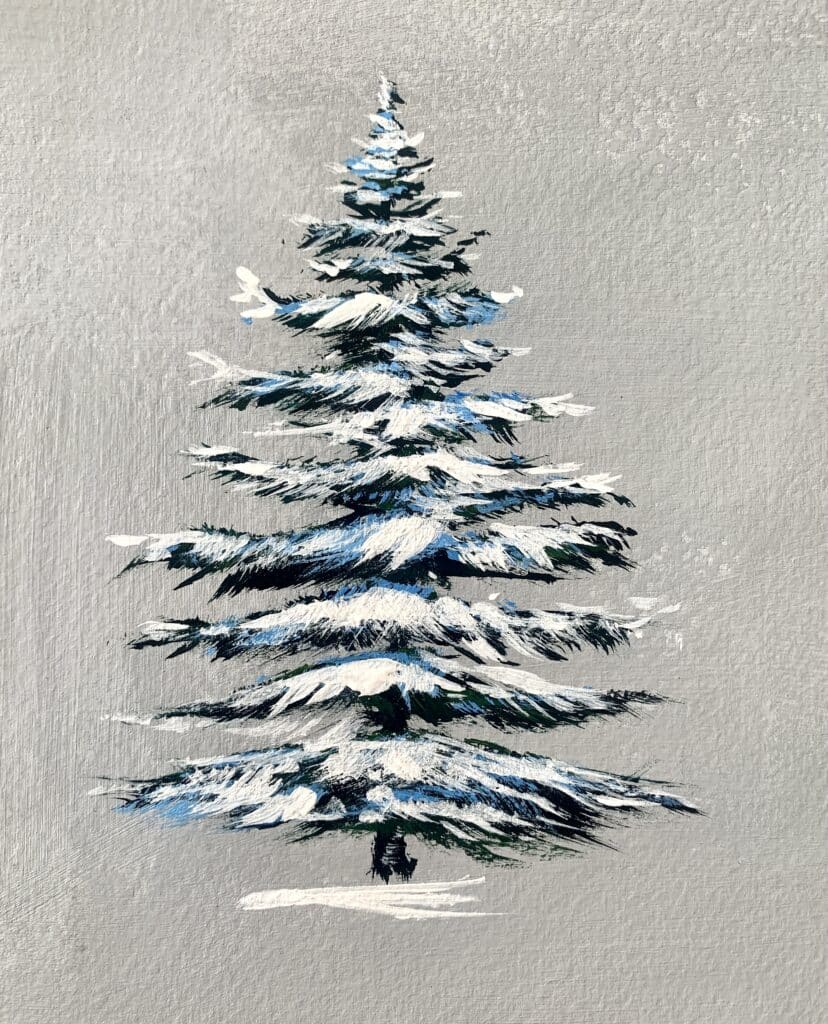
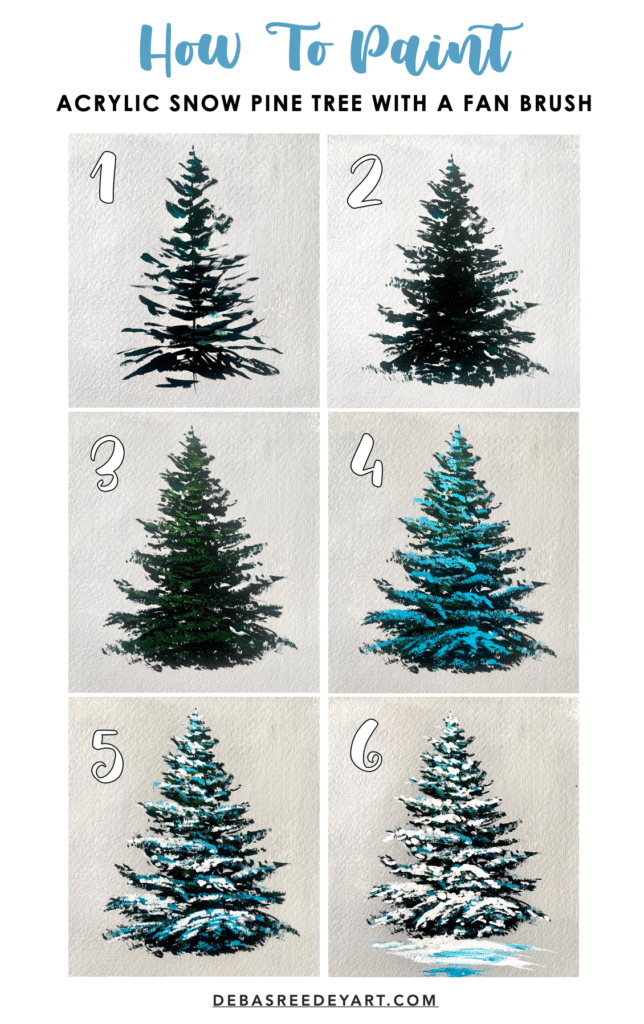
Here is a time-lapse process of me painting both the trees with fan brush 👇 

I’ve colored the A4 acrylic paper grey so that the white snow stands out on the paper. You can ignore this grey background step!

Want my private coaching on how to create these trees?

Join thousands of online students in my online art academy, and get almost in-person guided coaching from me, in this comprehensive acrylic masterclass – “How To Paint Snowy Pine Trees” covering 9.5 hours of instruction and inspiration!

Leave a Comment

Your email address will not be published. Required fields are marked *