Looking for easy ways on how to paint Christmas tree?
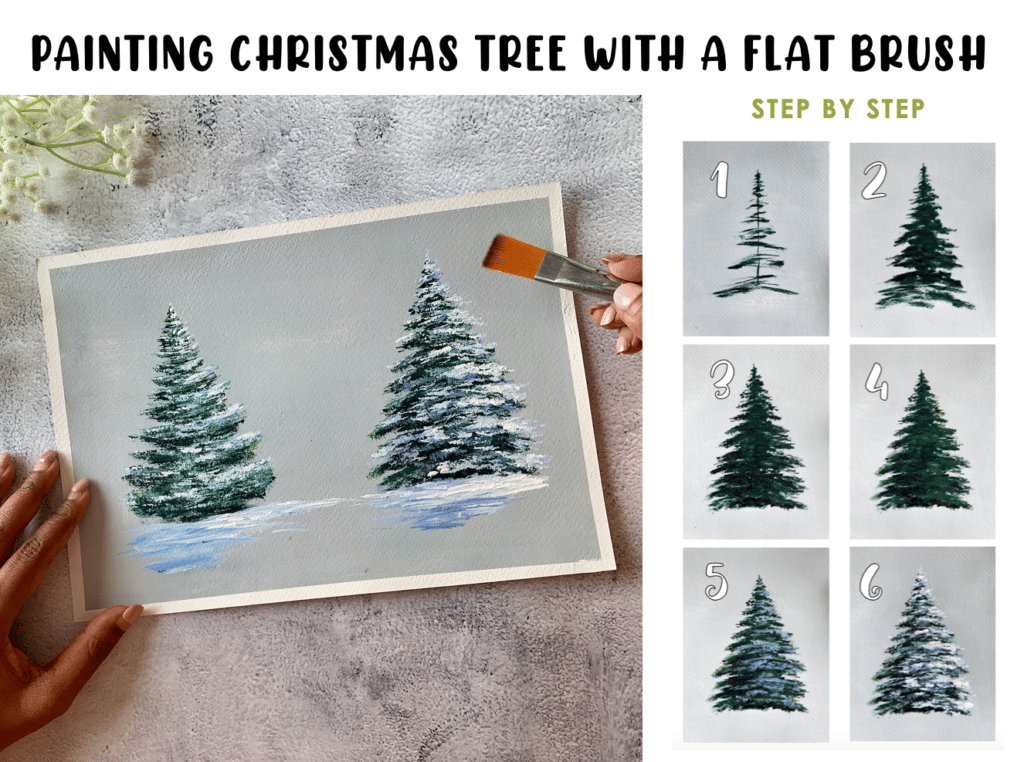
Christmas is fast approaching and it is just a perfect time to learn to paint a beautiful Christmas tree. A Christmas tree or a snowy pine tree can be painted using acrylics and any of these 4 types of acrylic brushes – flat brush, filbert brush, fan brush and a round brush. In this blog post, I’m going to teach you how to paint 2 different Christmas trees with a flat brush.
Painting snowy pine trees with a flat brush is probably the easiest.
How do I know that for sure?
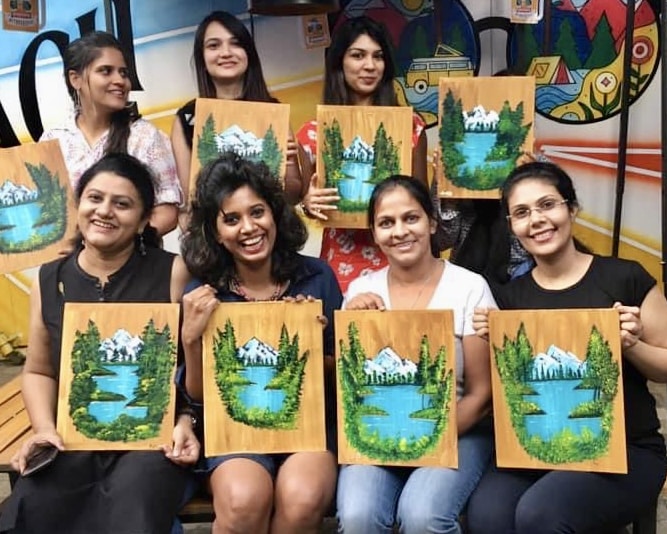
Well I’ve taught painting snowy pine trees with a flat brush, to hundreds of beginners who had never lifted a paint brush their entire life, and dared to paint first time in my painting workshops. And the results will speak for themselves!
So I can say with certainty that painting a Christmas tree or a snowy pine tree with a flat brush is the easiest, and also because I’ve practiced them most with a flat brush! And whatever you practice the most becomes the easiest over a period of time!
But I do not want to influence you with my choice of brush. Try painting snowy pine trees with all the different acrylic brushes possible – flat brush, filbert brush, fan brush and a round brush – and then make an informed decision for yourself, based on how comfortable you felt while painting with each of them!
In this blog, we are going to learn 2 different types of Christmas trees:
with upward foliages
with downward foliages
You can create a 3rd type with straight foliages.
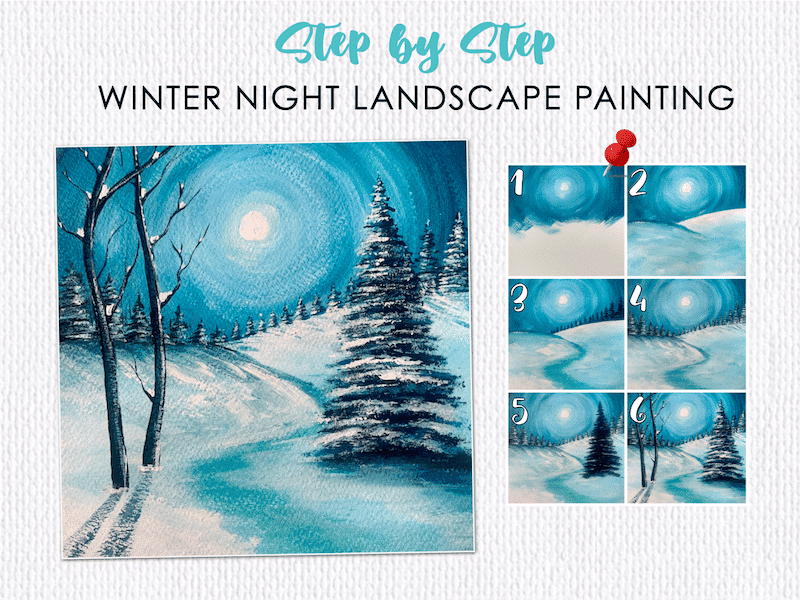
Once you learn the techniques, you will be able to create any winter landscape and paint beautiful Christmas trees in them!
* If you need to watch the process of creating these 2 Christmas trees, I’ve a video at the end of this blog post.
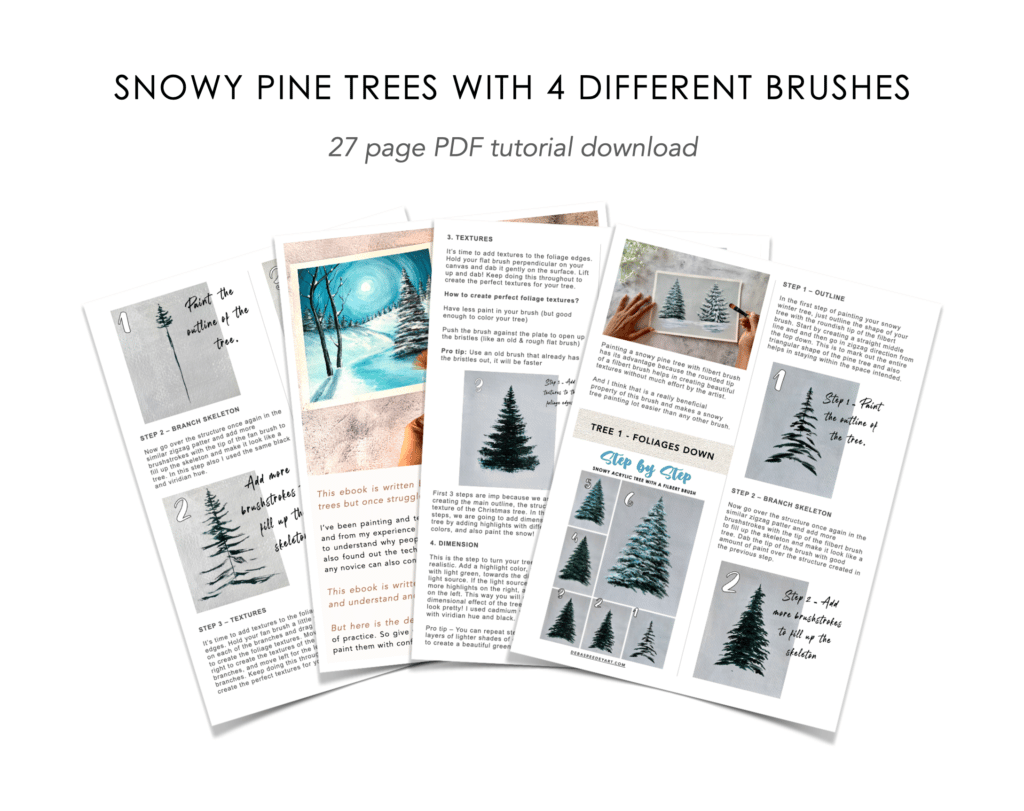
PS. I’ve taught these trees in detail in the class – How to paint snowy pine trees. So in case you wana learn first hand from me, join me in this class,covering 9.5 hours of instruction and inspiration!
Snowy Pines Masterclass
Master the Art of Snowy Pine Trees & capture Winter landscapes with ease
The Snowy Pines Masterclassis your complete guide to mastering snowy pine trees and creating breathtaking winter landscapes, covering 11+ hours of instruction and inspiration!
Master snowy pine trees: Learn to paint 9 unique styles using 4 different brushes
Perfect your winter landscapes: Create 10 stunning projects
“This class has been a game-changer for me. I’ve tried painting pine trees before, but they never turned out right. Now, thanks to Debasree’s tips, I can finally create the winter scenes I’ve always wanted.” — Priya S.
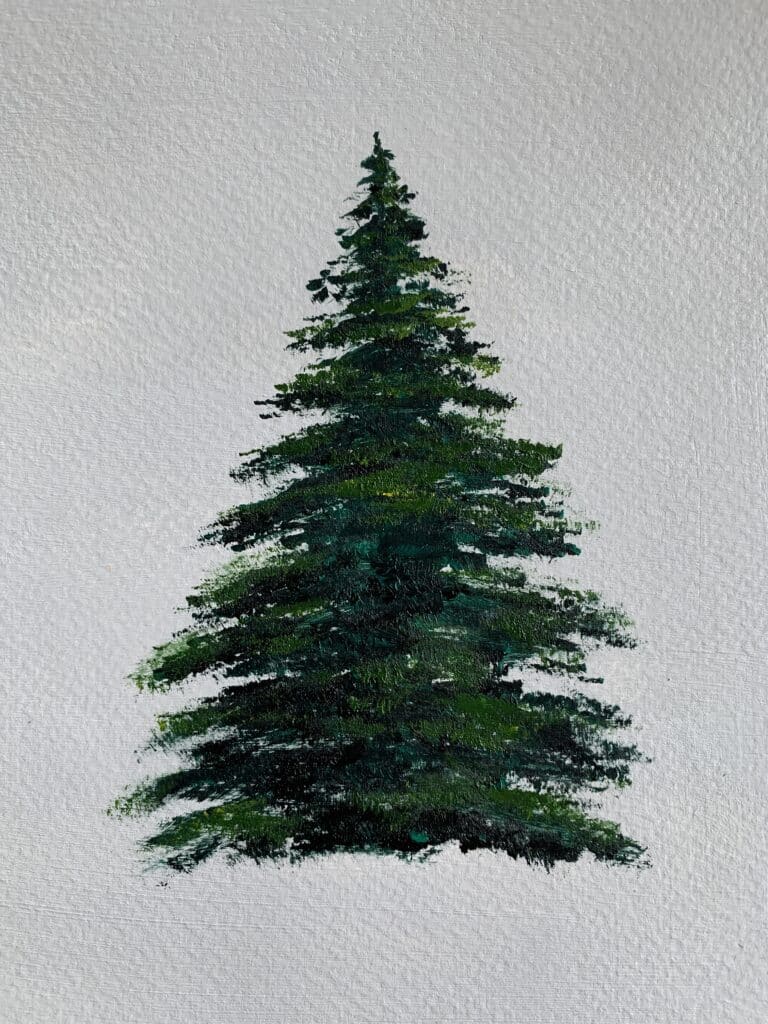
In the first tree, we will try to paint the foliages with an upward curve. This comes easy to me – moving my flat brush in the upward direction. But if yours come in a straight line, that’s fine too. Let yourself loose while painting and see what comes naturally to you!
Overview of all the steps:
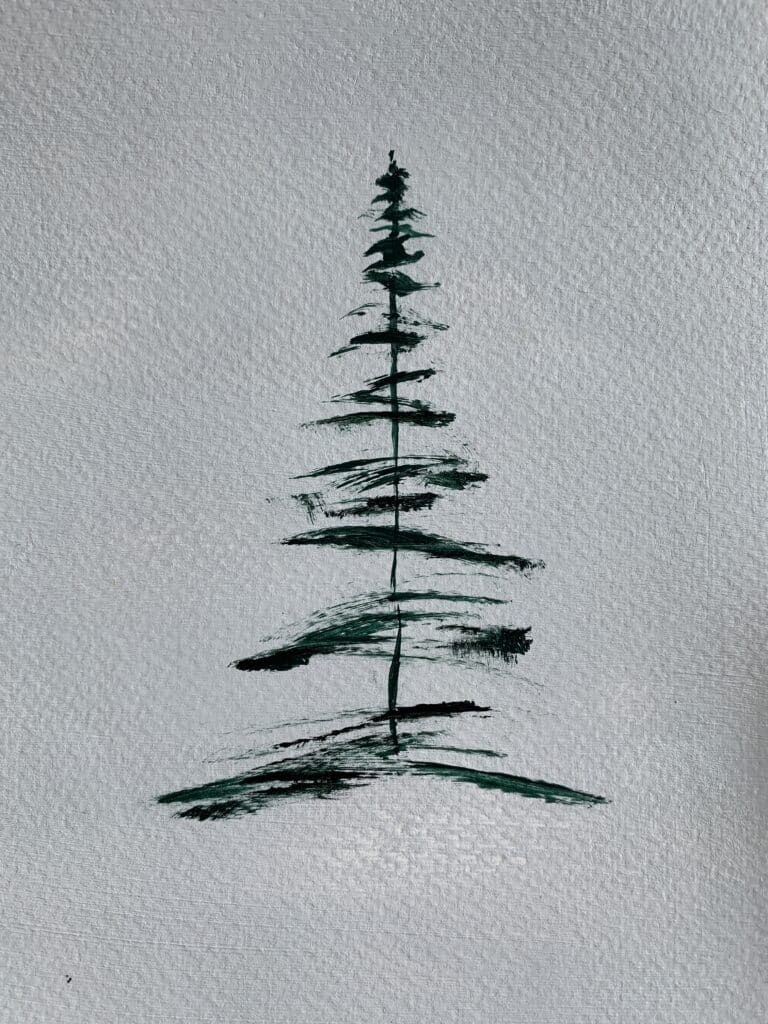
1. Outline
In the first step of painting your Christmas tree, just outline the shape of your tree with the corner of the flat brush, or use a small round brush. I used a mix of black and viridian hue acrylic colors. Start with creating a straight middle line and and then go in zigzag direction from the top down. This is to mark out the entire triangular shape of the Christmas tree and also helps in staying within the space intended, otherwise you may extend it broader towards the base.
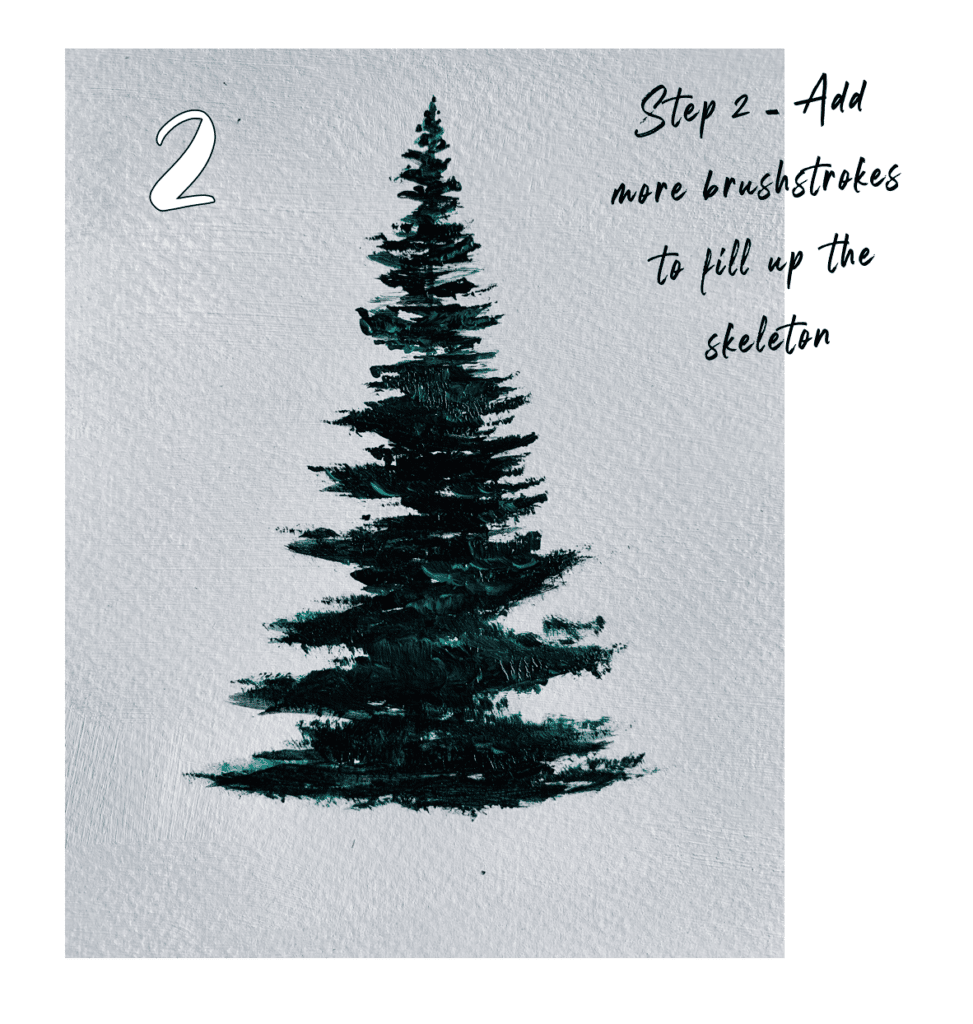
2. Brushstrokes
Now go over the structure once again in the similar zigzag patter and add more brushstrokes to fill up the skeleton and make it look like a tree. Use more paint in this step because the focus is on fleshing up the skeleton of the tree. In this step also, I stayed with the same black and dark green colors. Use the entire tip of the flat brush to create the foliage lines.
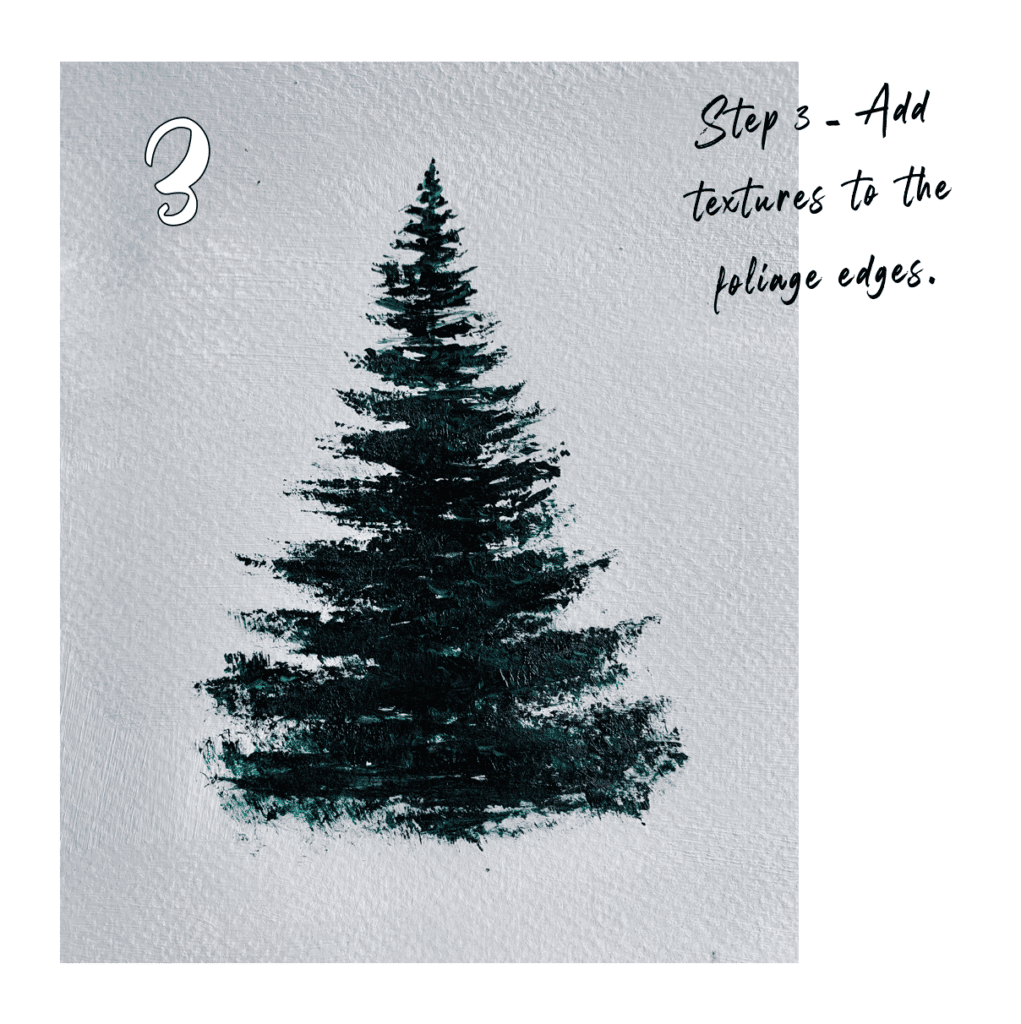
3. Textures
It’s time to add textures to the foliage edges. Hold your flat brush perpendicular on your canvas and dab it gently on the surface. Lift up and dab! Keep doing this throughout to create the perfect textures for your tree.
How to create perfect foliage textures?
Have less paint in your brush (but good enough to color your tree)
Push the brush against the plate to open up the bristles (like an old & rough flat brush)
Pro tip: Use an old brush that already has the bristles out, it will be faster 😉
First 3 steps are imp because we are creating the main outline, the structure & the texture of the Christmas tree. In the last 3 steps, we are going to add dimension to the tree by adding highlights with different colors, and also paint the snow!
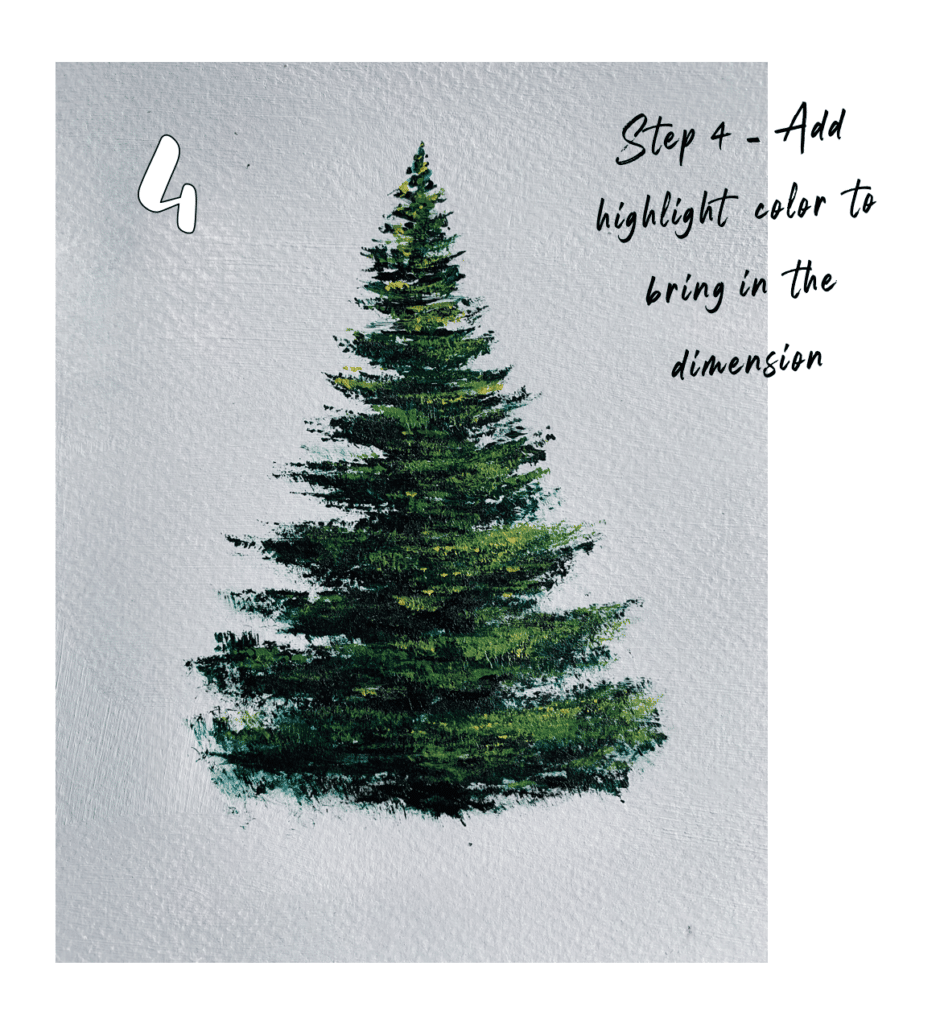
4. Dimension
This is the step to turn your tree look realistic. Add a highlight color, preferably with light green, towards the direction of the light source. If the light source is right, add more highlights on the right, and very less on the left. This way you will create a 3-dimensional effect of the tree and make it look pretty! I used cadmium yellow mixed with viridian hue and black.
Pro tip – You can repeat step 4 with more layers of lighter shades of green and yellow to create a beautiful green Christmas tree.
PS. You can stop painting your Christmas tree at step 4 if you want to keep it green.
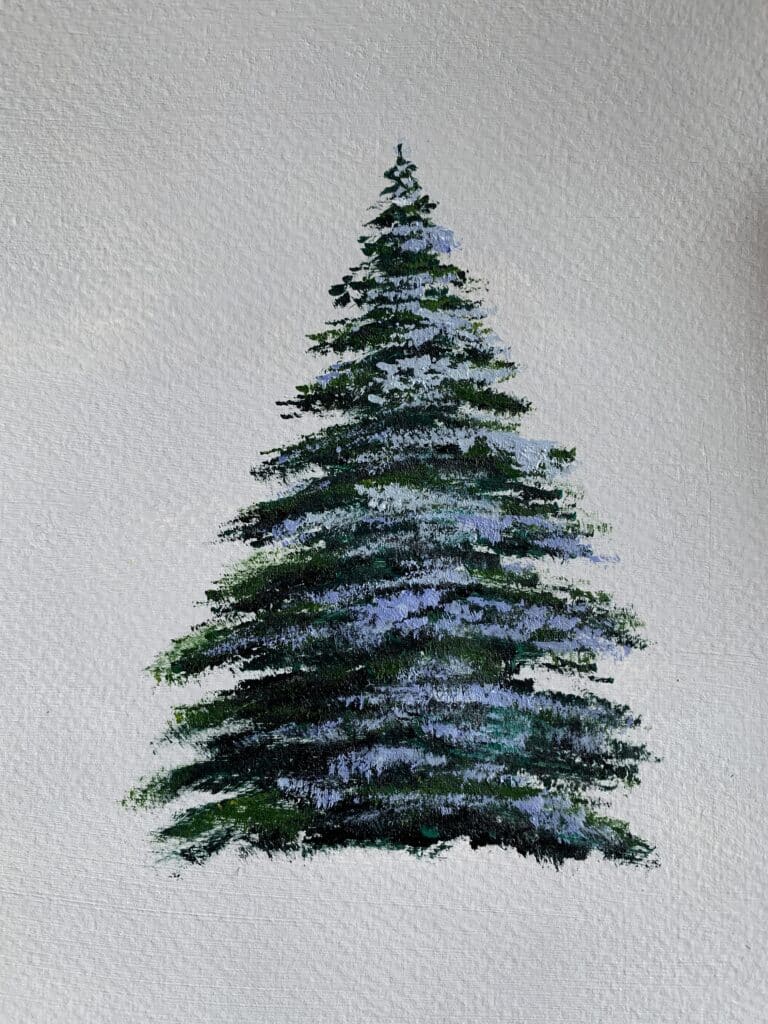
5. Snow layer 1
Add bluish white highlight on top of the previous highlight layer. It’s a repetition of step 4, just with the shade of the snow color. I used cobalt blue in this step, but you can use blue you have – prussian blue, or cerulean blue or teal blue, etc
Pro tip – apply less pressure to get better textures.
6. Snow layer 2 + Land
Repeat step 5 with a lighter shade of blue, which looks almost white. The more layers you add, the better the texture of your tree, and more realistic it will start appearing on your canvas.
And finally add some land to the tree to give it a base and make it look like a real Christmas tree.
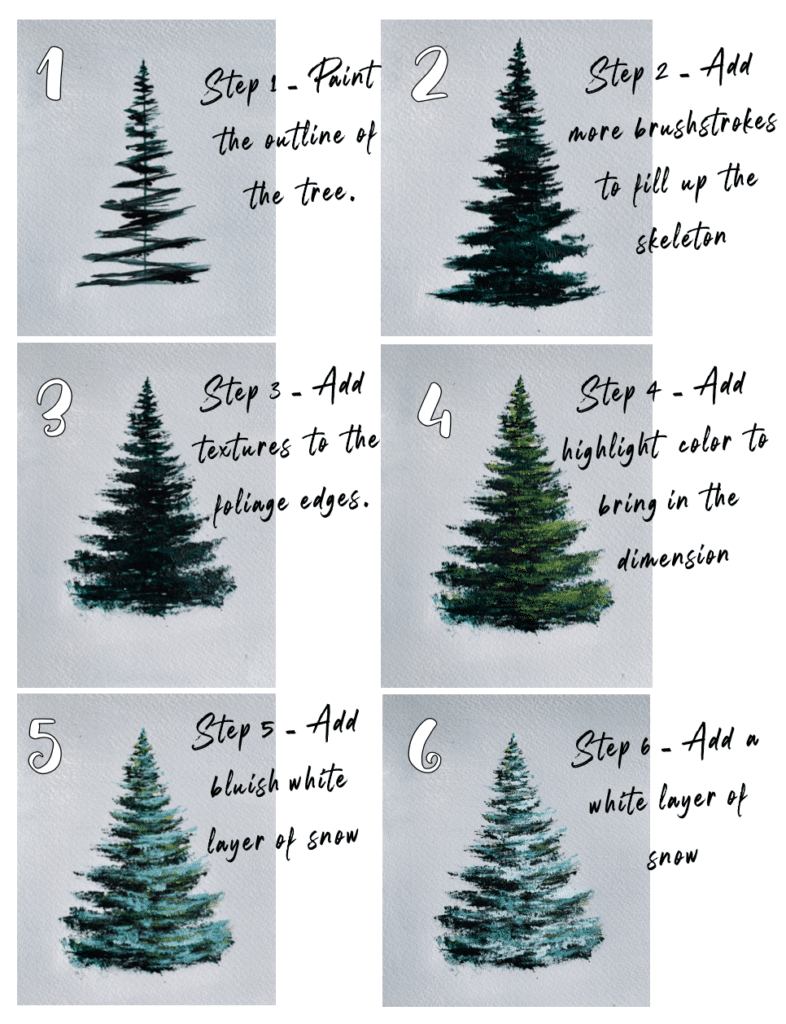
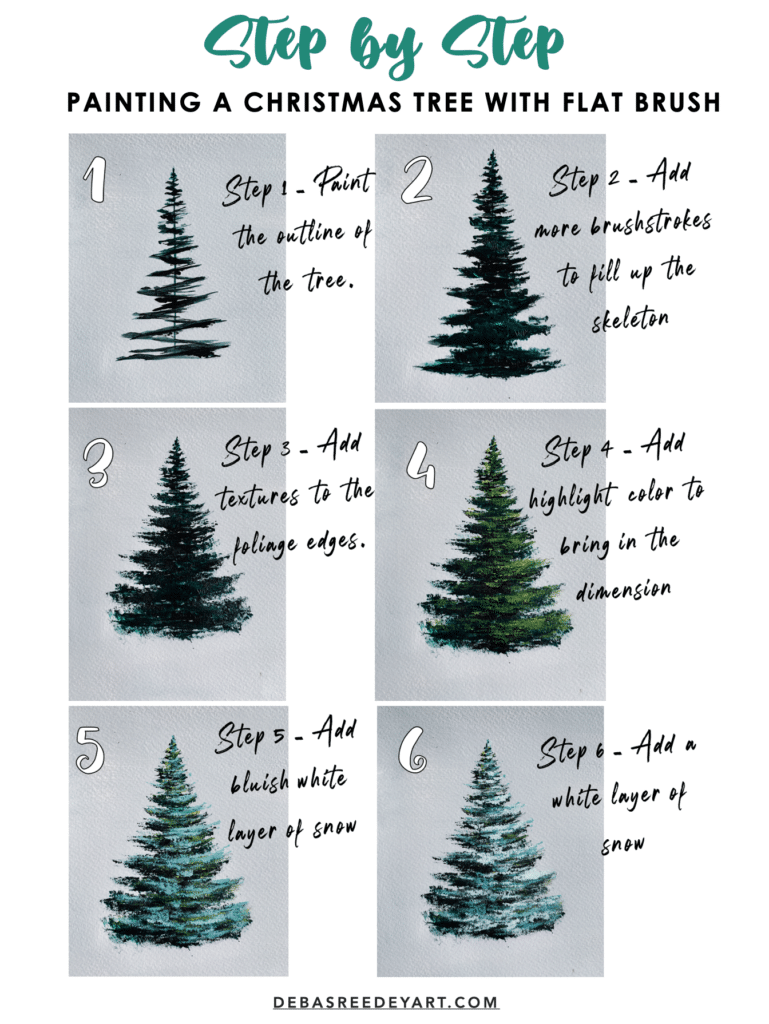
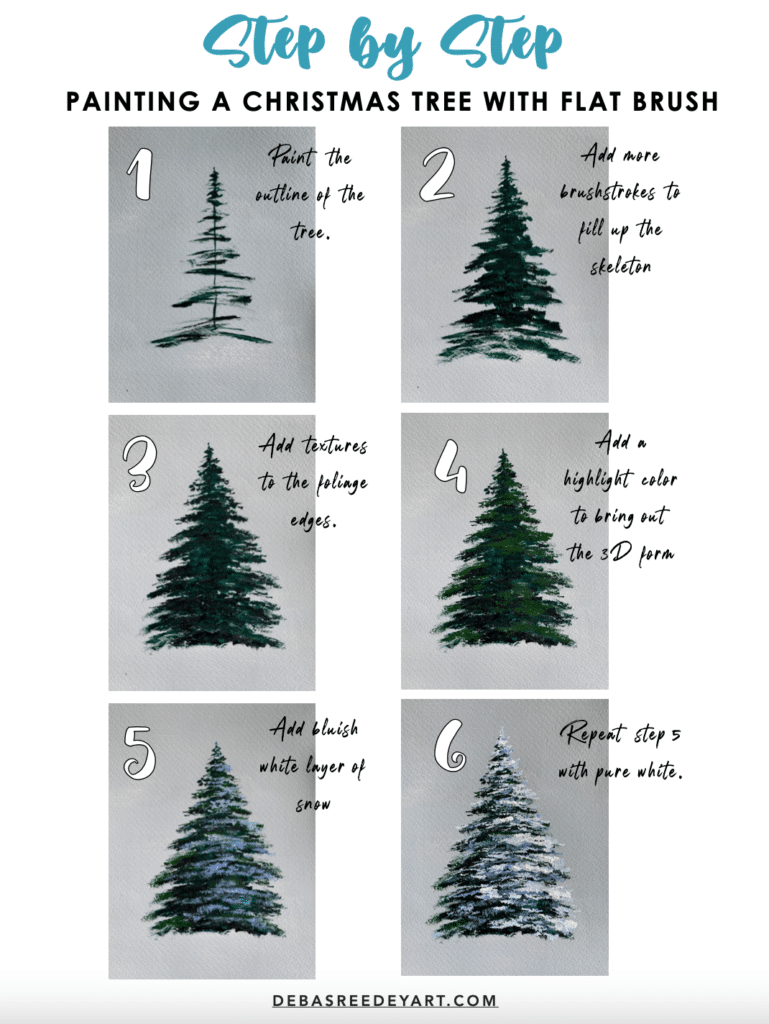
Tree 2 - Foliages down
The painting techniques of the 6 steps remains the same as we learnt with the previous tree, but just the structure of the tree changes by changing the foliage curve downward.
This is more for practicing. The more you practice, the better your tree becomes.
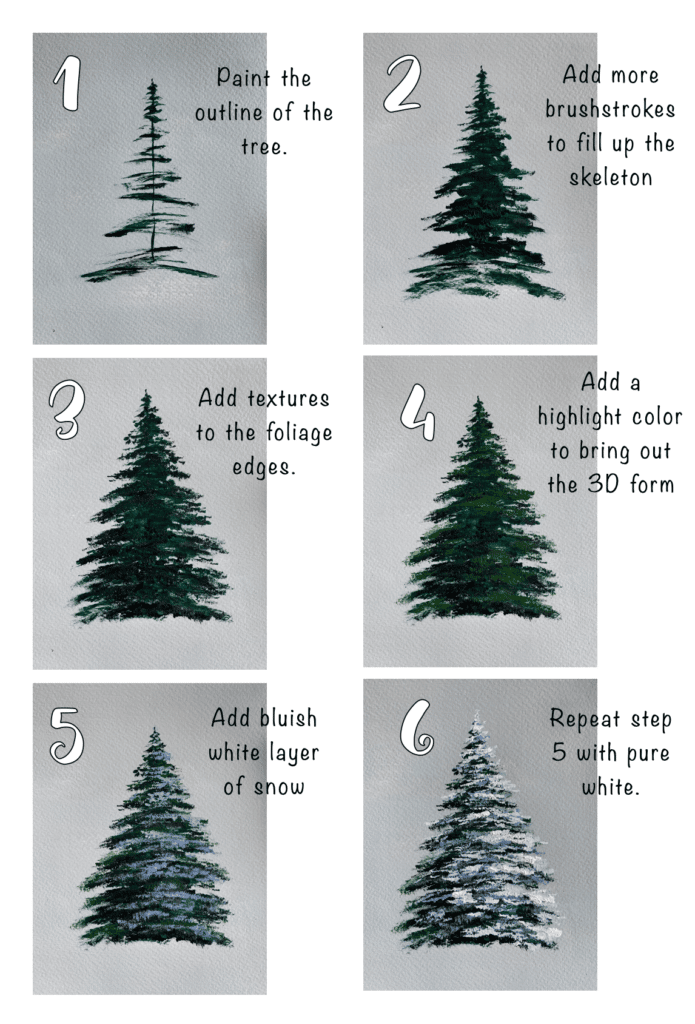
Overview of all the steps:
Step 1 – Paint the outline of the Christmas tree
Step 2 – Add more brushstrokes to fill up the skeleton
Step 3 – Add textures to the foliage edges.
Step 4 – Add a highlight color to bring out the 3D form
Step 5 – Add bluish white layer of snow
Step 6 – Repeat step 5 with pure white.
There you got it. I hope you are able to paint your very own Christmas tree! Paint any winter landscape and you can add one of these trees as a hero of your painting.
I’m waiting to see what you create out of this tutorial, so do let me know by commenting below.
If you liked this tutorial of painting Christmas trees step by step, please pin the below images on Pinterest
Video:
If you need more guidance, watch my process of painting both the trees with flat brush .
I’ve colored the A4 acrylic paper grey so that the white snow stands out on the paper. You can ignore this grey background step!