Welcome to a creative journey dedicated entirely to mini abstract paintings.
In this tutorial, every brushstroke, collage piece, and unexpected mark is designed to build layered, compact works of art bursting with personality. Instead of a single large canvas, we’ll explore how to transform bold, textured layers into a series of small, expressive masterpieces.
This project is designed to take you on a journey of expression, layering, and refinement, all while allowing yourself to let go of perfection and embrace the process.
Through this step-by-step guide, we’ll create a large abstract painting filled with rich textures and dynamic marks, and then transform it into smaller, unique pieces of art.
Whether you’re new to abstract painting or looking to reignite your creativity, this is the perfect opportunity to play, explore, and discover.
MATERIALS YOU NEED
1. Surface Options
- A3 watercolor paper (300gsm or thicker)
- A3 sketchbook paper
- A3 Mixed media paper
2. Paints & Mediums
- Acrylic paints (various colors)
- Basic Watercolor set
- White gesso (for priming and texture)
- Matte medium (for layering)
3. Brushes & Tools
- Flat and round brushes (small to medium sizes)
- Palette knife (for texture and scraping)
- Sponge or rag (for blending)
4. Mark-Making Supplies
- Soft pastels or watercolor crayons
- Oil pastels or colored pencils
- Fine liner or ink pen (for details)
- Graphite or charcoal pencil (for sketching)
5. Additional Supplies
- Palette for mixing colors
- Water container and paper towels
- Masking tape (for clean edges)
- Hairdryer (for faster drying)
If you enjoy experimenting with mixed media techniques like me, I have a collection of creative projects for you! From abstract mark making to textured collages and art journaling, explore a variety of tutorials that will spark your creativity.
Step 1: The Foundation - Journaling and Collage
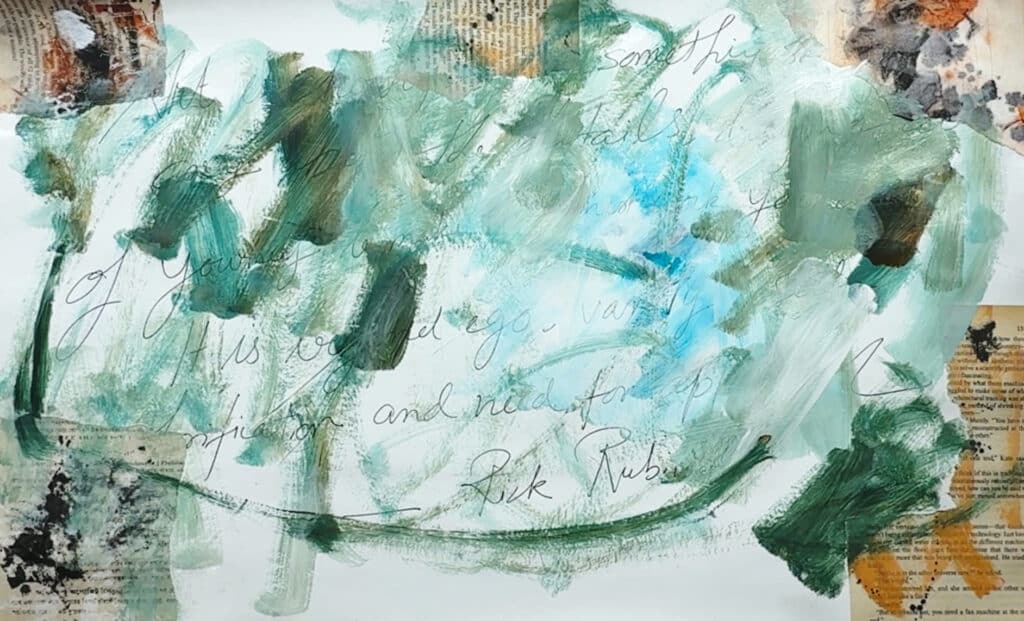
Begin with a blank sheet of A3 mixed media or watercolor paper (i used a 21×15 inch drawing paper). This will be your canvas for exploration. Start by journaling directly onto the paper—write down your thoughts, feelings, or even a favorite quote. For this project, I used a beautiful quote by Rick Rubin to ground my piece. Let your words flow across the page; they don’t have to be legible, just honest.
Next, add your first layer of texture with collage papers. For this project, I used a curated selection of papers that will be available as a free downloadable resource. Tear, layer, and glue them down intuitively—this is about building visual interest.
Next, add texture and depth by collaging torn pieces of paper. You can use vintage book pages, handmade papers, or scraps you already have. Glue them down intuitively—this is about creating a base filled with movement and texture.
Step 2: Mark-Making and Layering with Acrylics
Once the collage is dry, bring in acrylic paints to add bold strokes and marks.
For my palette, I chose phthalo turquoise, burnt sienna, black, and white. Use a dry brush to add spontaneous strokes and marks across the page.
Focus on contrast and movement but avoid overthinking—it’s all about energy at this stage.
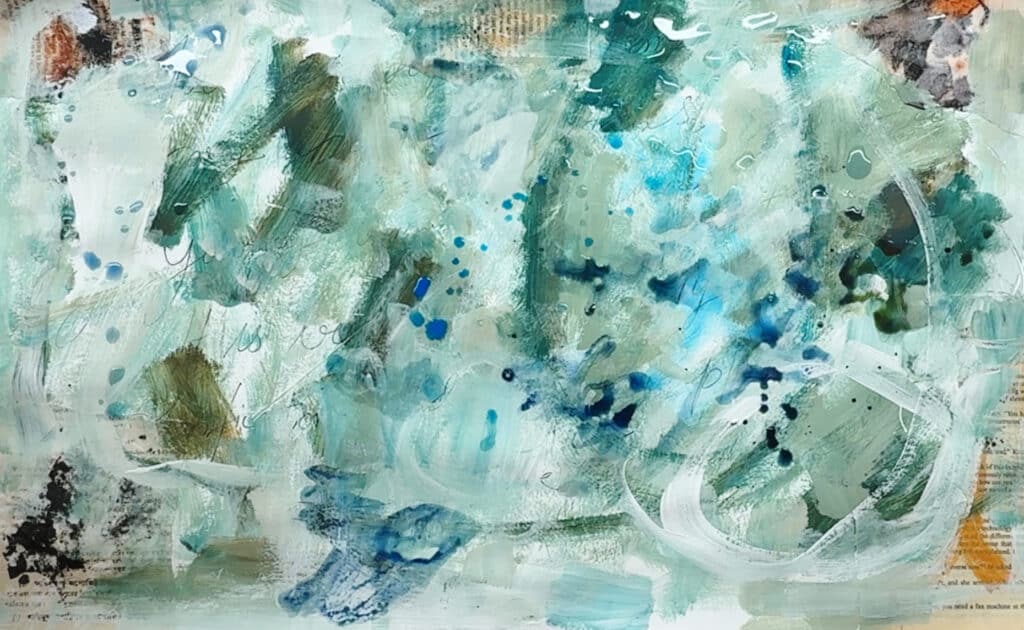
Step 3: Watercolor and Coffee Magic
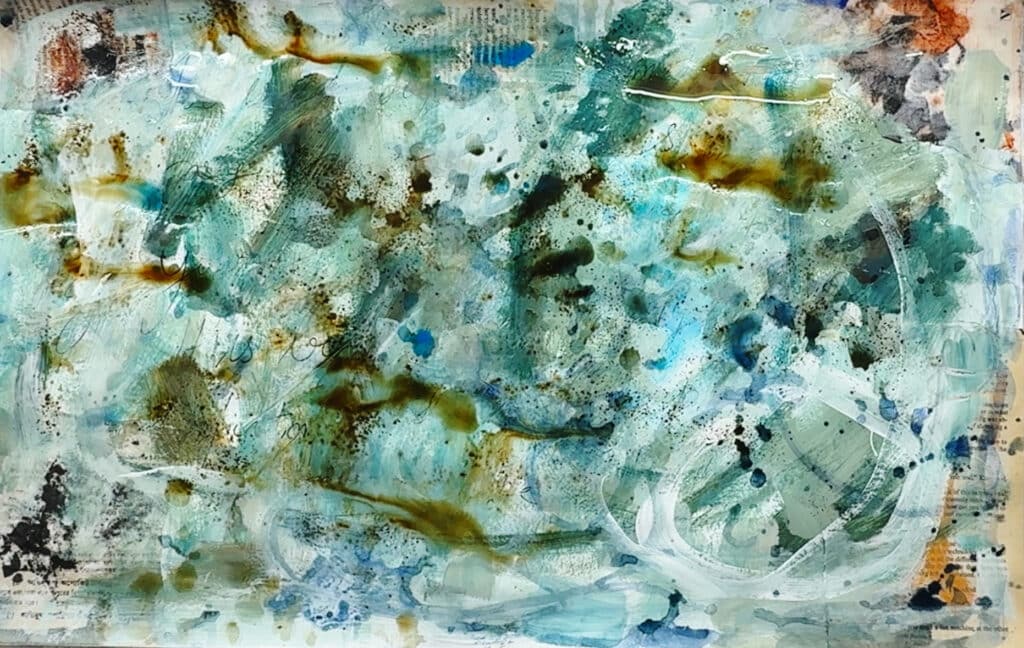
Watercolors are a beautiful way to soften the acrylic layer while introducing organic transitions. Apply watercolor across the page, letting it seep into the textures you’ve created.
Then, for an organic touch, I sprinkled coffee over the wet paint, allowing it to create unpredictable textures as it dried. This adds warmth and depth to the piece.
Step 4: Adding Complexity with Pastels and Pencils
After the initial layer dries, return to the piece with soft pastels and pencils. Make marks, shapes, or lines wherever your instincts guide you. This step is all about embracing the chaos and adding your unique touch to the composition.
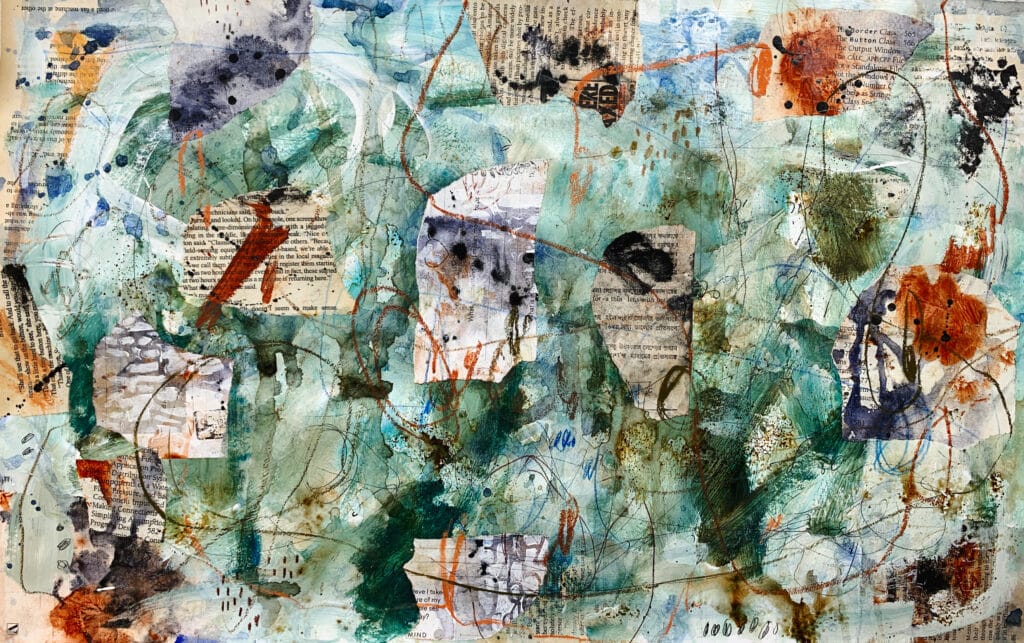
Step 5: Cutting the Chaos with Gesso and Light Tones

Now, it’s time to refine the composition. Using a silicone tool, I applied gesso and light acrylic shades to tone down chaotic areas. This step is about balancing boldness with softness. Think of it as finding clarity amidst the mess.
To add a final touch of contrast, I dipped a branch into India ink and made organic, gestural black marks across the surface. These create a dynamic focal point while maintaining the abstract spirit.
Step 6: Creating Mini Masterpieces
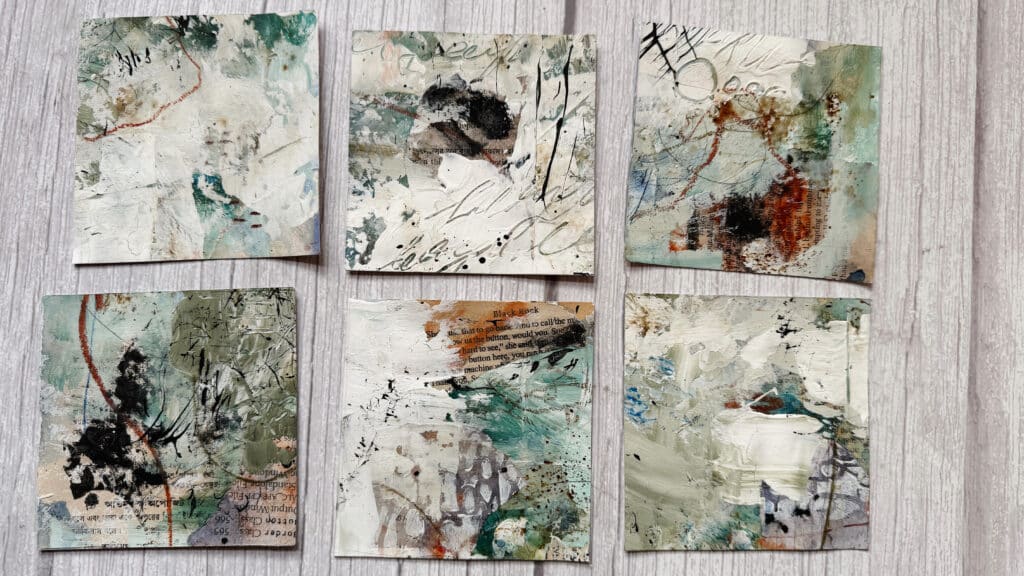
Once your layered abstract is complete and fully dry, it’s time to cut it into smaller pieces. I chose to create 4×4-inch mini artworks and tags, each one a unique expression of the larger piece. These can be used as standalone artworks, journal inserts, or even thoughtful gifts.
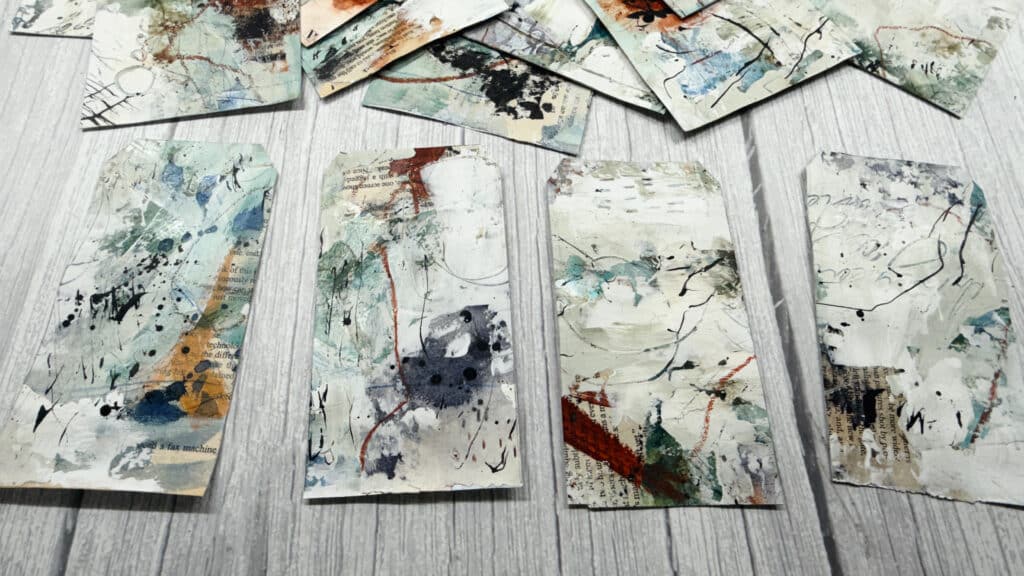
This project is a beautiful reminder that creativity isn’t always about precision or control. It’s about exploration, layering, and finding joy in the unexpected. By breaking down a larger chaotic piece into smaller, balanced works, you’ll discover the beauty of imperfection and the power of transformation.
I hope this inspires you to try your hand at creating layered abstracts. Let yourself play, experiment, and see where the process takes you. If you create something using this method, I’d love to see your work—feel free to share your creations with me!