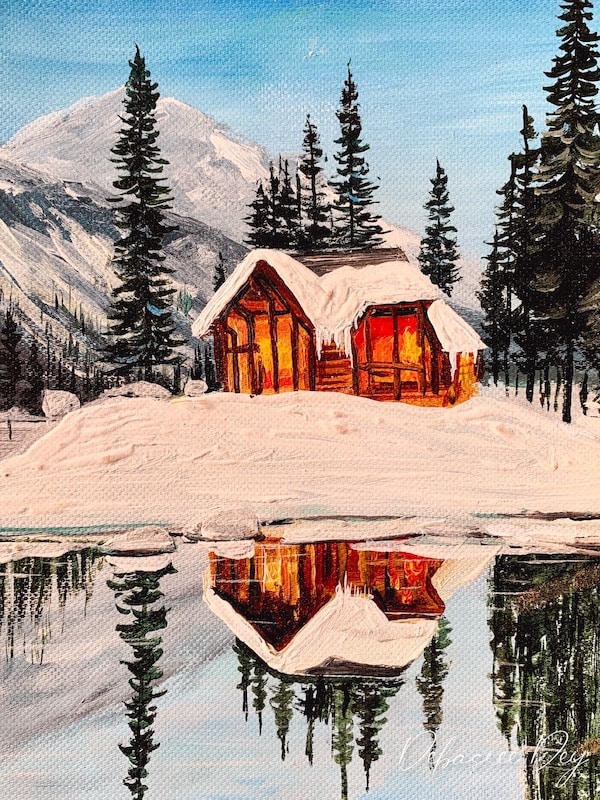
Let us learn to create this gorgeous snowy winter cabin reflection painting step by step with photos and a video.
I know this looks like a complicated painting, and I get this question a lot – “How to break down a complicated painting into simpler steps?” Keeping that in mind, let’s dive into learning this snowy winter cabin reflection painting, where you will learn how to start painting the different layers of a landscape, starting with the farthest layer first, and gradually progressing to the front.
Master the Art of Snowy Pine Trees & capture Winter landscapes with ease
The Snowy Pines Masterclassis your complete guide to mastering snowy pine trees and creating breathtaking winter landscapes, covering 11+ hours of instruction and inspiration!
Master snowy pine trees: Learn to paint 9 unique styles using 4 different brushes
Perfect your winter landscapes: Create 10 stunning projects
“This class has been a game-changer for me. I’ve tried painting pine trees before, but they never turned out right. Now, thanks to Debasree’s tips, I can finally create the winter scenes I’ve always wanted.” — Priya S.
I used a size 6 flat brush from this flat brush set which is perfect for this canvas size. If you are painting bigger, then switch to a size that is proportionate with your painting surface.
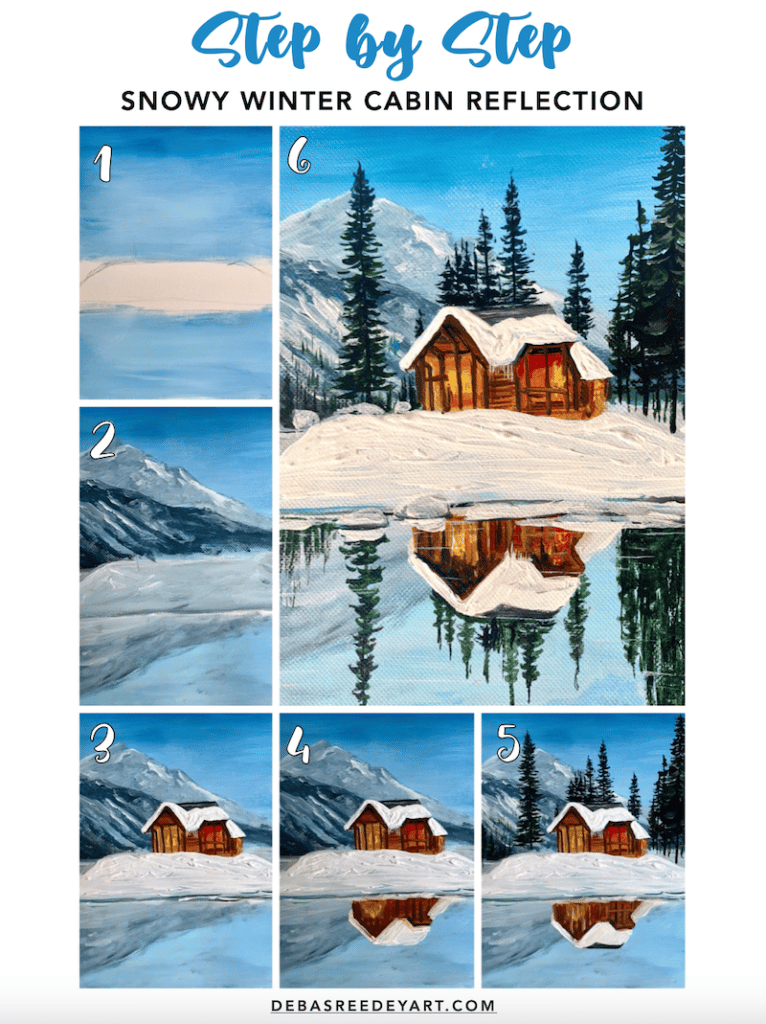
If you like this snowy winter cabin reflection painting, please pin the below image on Pinterest
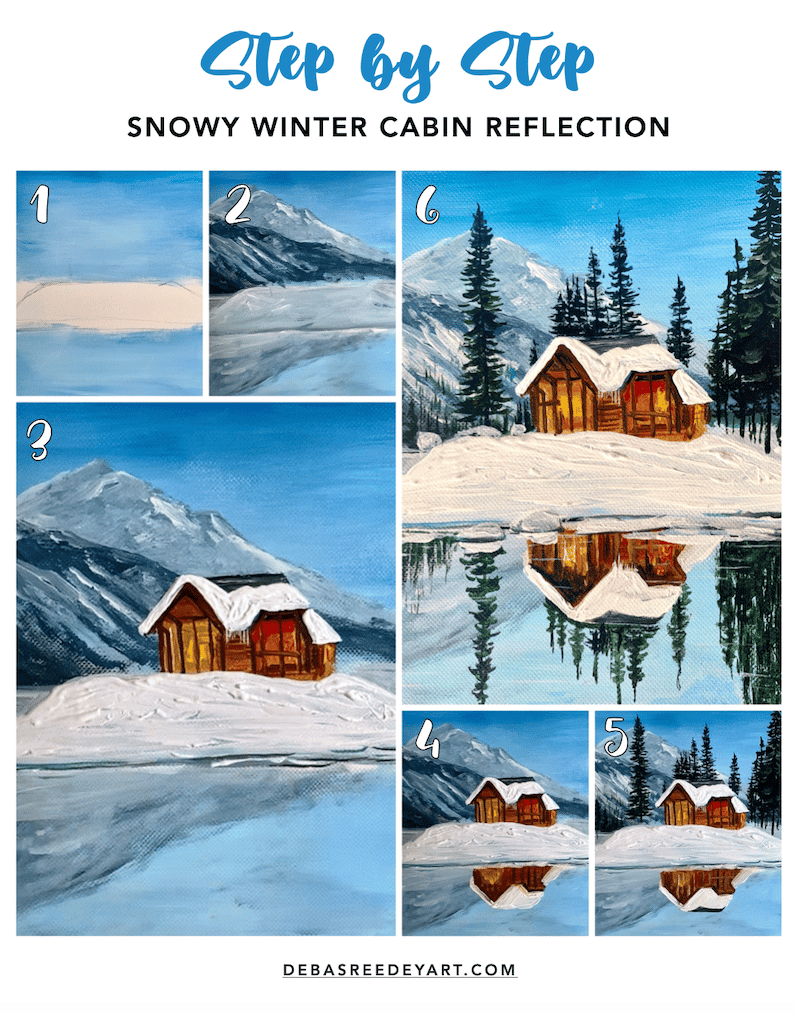
painting steps:
1. Paint The Sky and the water
Start with prussian blue and white and create horizontal strokes using the flat brush. Create a blend of the colors moving from dark on the top to a lighter shade towards the centre.
With the same colors leftover in your flat brush, add a few strokes to cover the lake area.
2. Add The mountains with textures
We will paint the background mountains in two layers using a small round brush. First create the darker one in the front with blue and black, and then added a lot of white to the same brush, to create the lighter one on the back.
Keep less paint in your brush and no water at all, because we want to have dry brushstrokes to create the mountain textures.
After coloring the complete mountains, take some white and using the side of the round brush, add textures to the mountain. Occasionally add some dark and light colors to create the contrast of the textures.
3. Snow Land & Mountain Reflection
Do not wash the brush from the previous step. Wipe it off, if necessary, and pick up a lot of white and lil teal blue to add the snow land in front of the mountains.
With the same colors, continue further down to create the mountain reflections in the lake.
With this, all the background layers are complete, and move onto painting the cabin now.
4. Paint The Cabin Walls
You can outline the cabin with a pencil first, if that’s what you prefer. I did the outlining with the liner brush and brown color. Then start filling it up using brown and white.
Once the first layer has dried, add a mix of yellow and red to create the fire colors, burning inside the cabin.
After the yellow-red layer has dried, add the vertical lines with brown to show the structure of the cabin.
5. Paint The Cabin Roof + Snow Land Textures
Let the previous step dry completely and then add the white roof with a lot of white paint. And similarly add a lot white on the land below. I love the visible brushstrokes while painting snow, and create a good texture.
6. Paint The Cabin Reflection
Painting the cabin reflection is the easiest. You just repeat the previous step, only in upside down motion. To make it easy, you can turn your canvas upside down, and paint the cabin reflection just the way you painted the actual cabin.
In this step, I’ve also added a few distant pine trees by creating small vertical lines using black and blue, between the mountain textures.
7. Add The Pine Trees
Now add the pine trees using a round brush and mixing green and black. I used technique 2 from the round brush techniques to create the pine trees.
Also check out how to paint perfect snowy pine tree with acrylics, that will just enhance your skills to paint snowy pine trees confidently in any winter landscape.
Again just the repeat the same step upside down. Or turn your canvas and repeat the previous step.
9. Final Touches
Before finishing off the painting, I added a few extra touches like
adding some highlights to the pine tree
made the snow dropping from the roof more prominent
added some broken snow land floating in the water
added few horizontal white strokes to show the water lines
added a dark line below the snow land to add contrast and create the shadow
And that’s it. You learned dividing this complicated looking painting into simpler steps.
If you focus on each step at a time and create it perfectly, very soon you will end up creating this gorgeous snowy winter cabin reflection painting, on your own.
Did you enjoy following this tutorial? What is the next painting you want me to teach? Let me know how it turned out for you by commenting below!
Happy Painting!
If you like this snowy winter cabin reflection painting, please pin the below image on Pinterest