
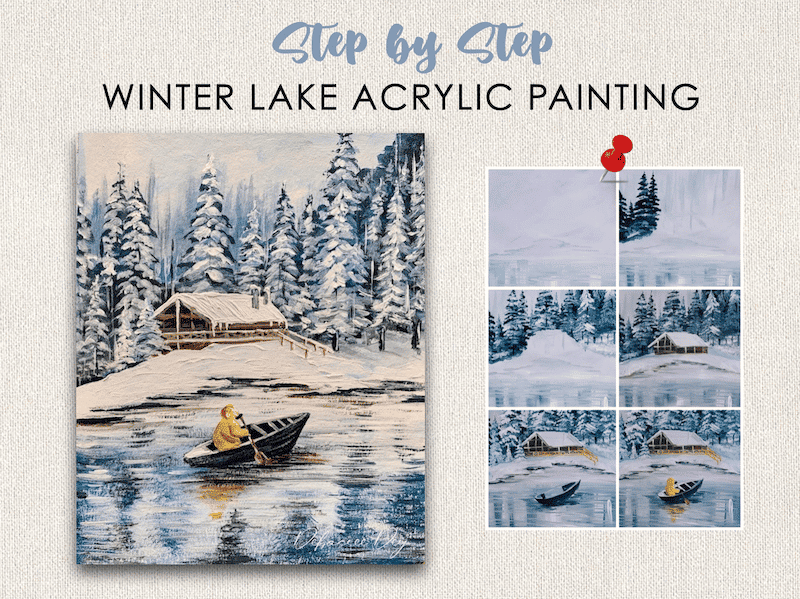
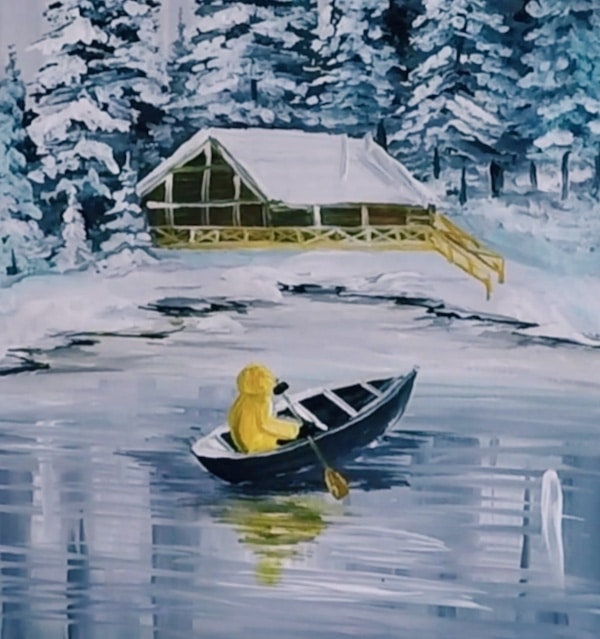
In this tutorial, you will learn to create this almost monochrome winter lake acrylic painting step by step with photos and a video.
I know this looks like a complicated painting, and I get this question a lot – “How to break down a complicated painting into simpler steps?” Keeping that in mind, let’s dive into learning this snowy winter cabin reflection painting, where you will learn how to start painting the different layers of a landscape, starting with the farthest layer first, and gradually progressing to the front.
P.S. You can see my entire collection of winter paintings here.
Snowy Pines Masterclass
Master the Art of Snowy Pine Trees & capture Winter landscapes with ease
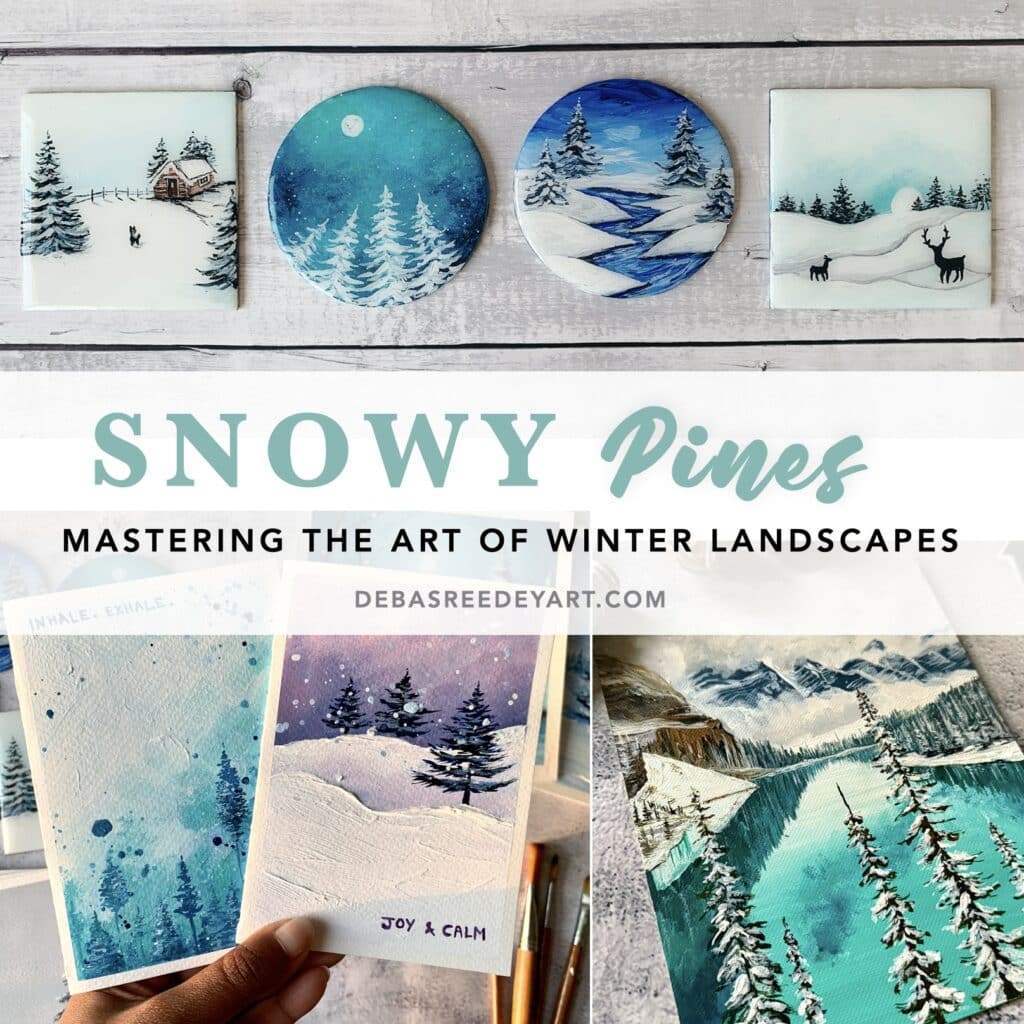
- Master snowy pine trees: Learn to paint 9 unique styles using 4 different brushes
- Perfect your winter landscapes: Create 10 stunning projects
- Bring your winter vision to life
“This class has been a game-changer for me. I’ve tried painting pine trees before, but they never turned out right. Now, thanks to Debasree’s tips, I can finally create the winter scenes I’ve always wanted.” — Priya S.
MATERIALS YOU NEED
Acrylic Colors:
Surface:
- I painted on a A5 acrylic paper.
Acrylic Brushes:
- I used a size 6 flat brush from this flat brush set which is perfect for this canvas size. If you are painting bigger, then switch to a size that is proportionate with your painting surface.
- Size 1 & 4 liner brush from my favorite miniature brush set
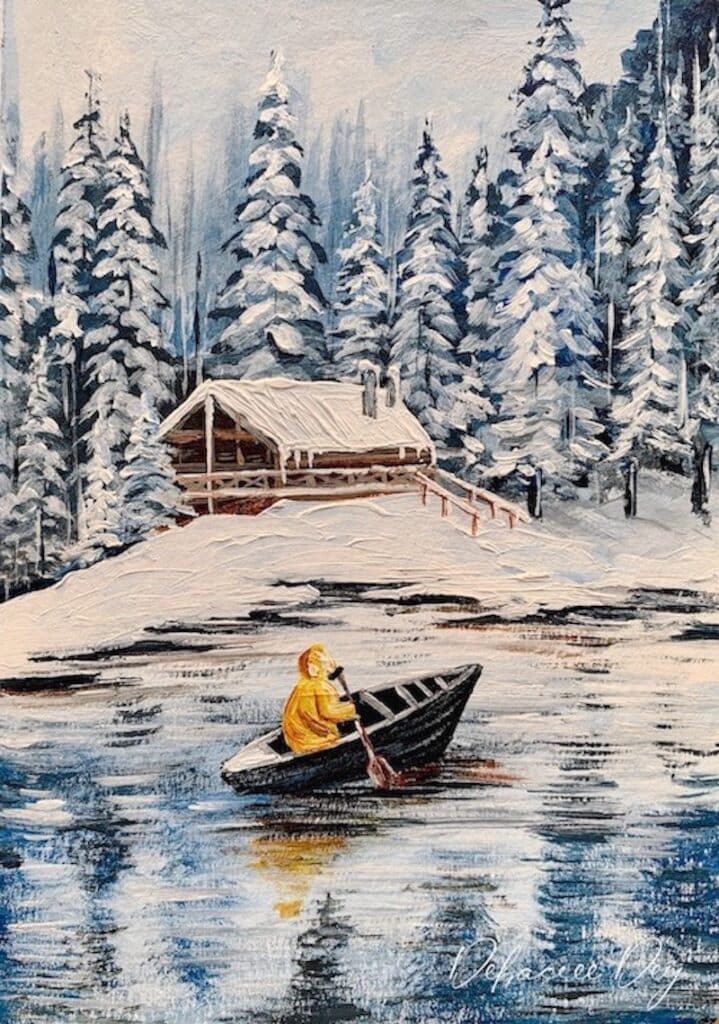
If you like this winter lake acrylic painting, please pin the below image on Pinterest
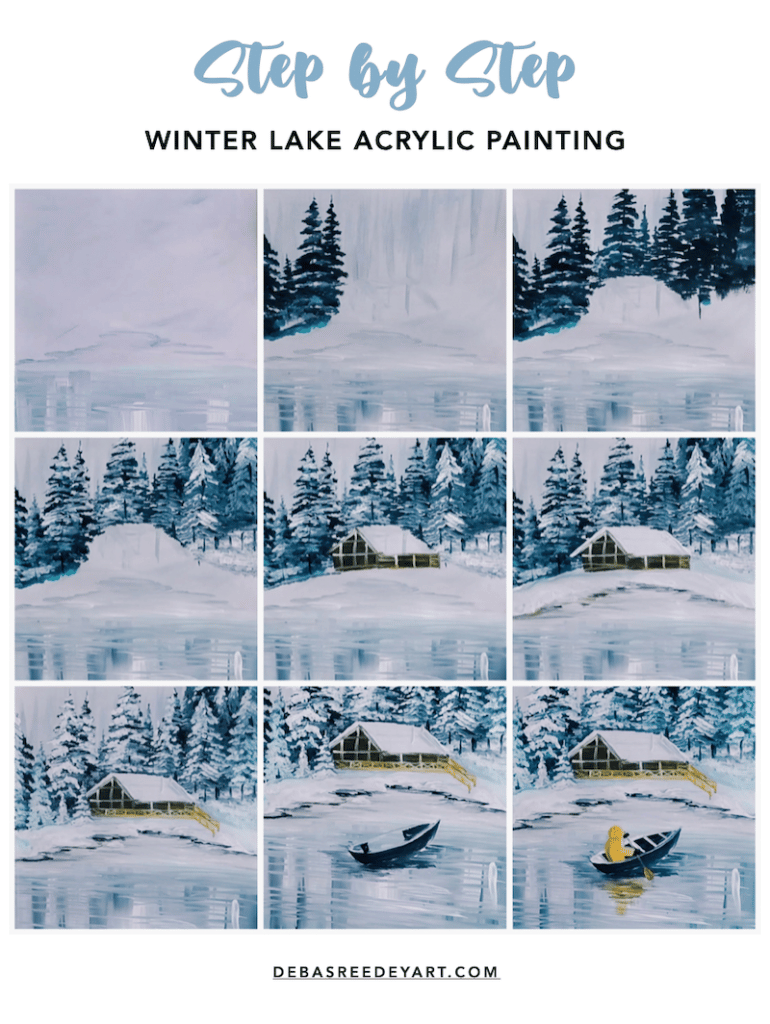
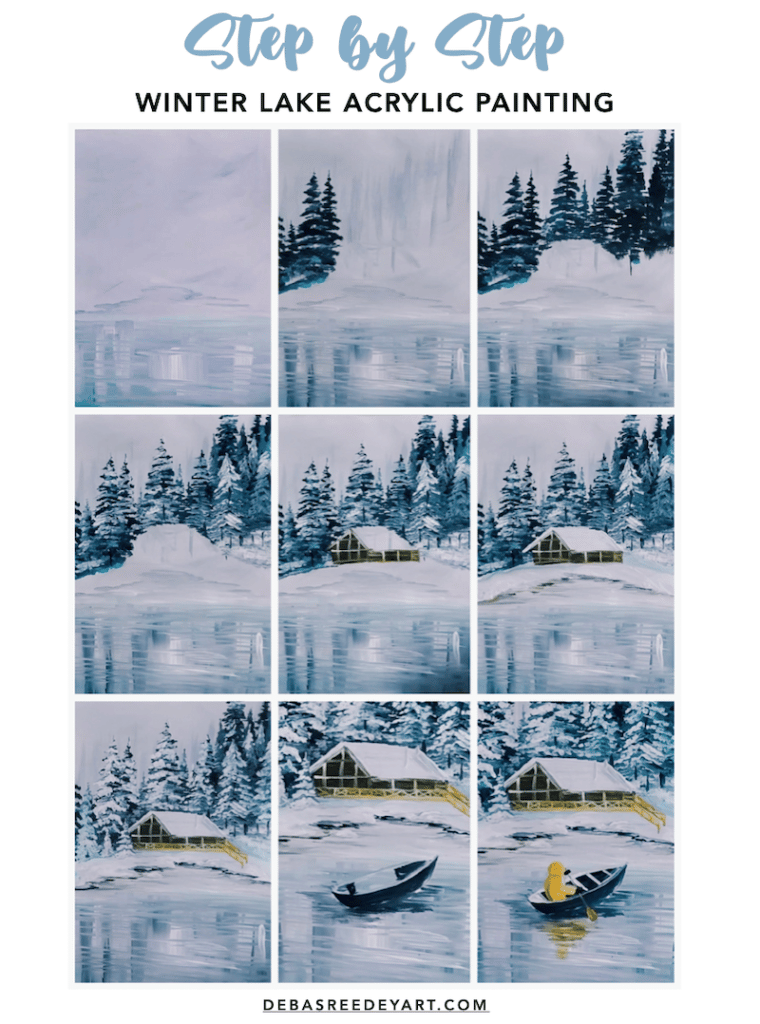
painting steps:
1. Paint the background
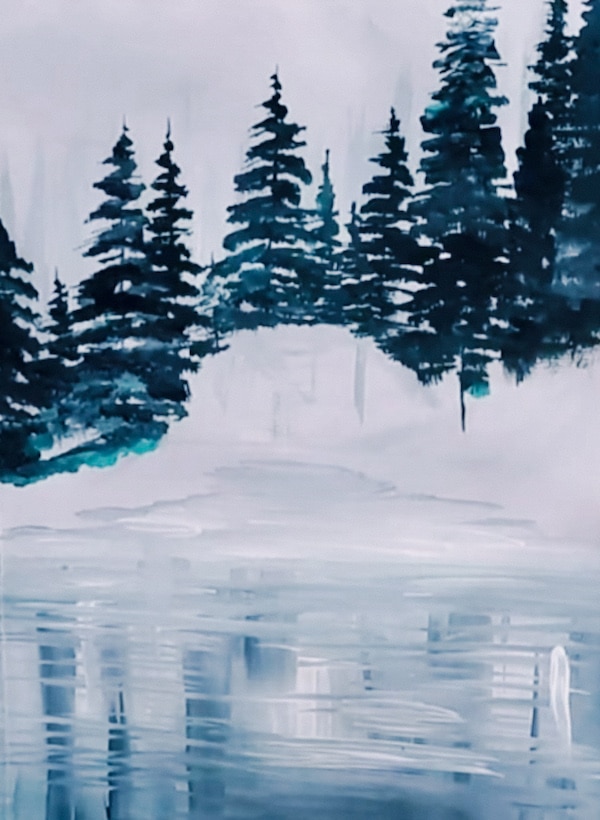
To paint the background, I used mostly white and black to create the light grey shade. Run your flat brush all throughout the canvas to create a grey misty background for this landscape. Keep in mind to use a lot of white and tiny bit of black to create the lightest grey possible. Then increase the amount of black gradually to create darker shades.
With a lil darker shade of grey, create the snow land rugged edge. And then in the same brush, pick up a lil bit of teal to continue further down in the canvas to paint the lake and cover the entire canvas. While painting the lake area, keep your strokes horizontal so that it gives the illusion of water lines.

2. reflections in the lake + Misty Pines
Continue with the same brush form the previous step. And with the flat tip of the flat brush create vertical strokes downwards to create the reflections of the pine trees that will come up later. And then add some horizontal line strokes on top of the vertical broad strokes. Now repeat this twice – once with light grey and then with dark grey. Here is how the steps will go:
- Light grey vertical strokes
- Light grey horizontal strokes, with some white
- Dark grey vertical strokes
- Dark grey horizontal strokes, with some white

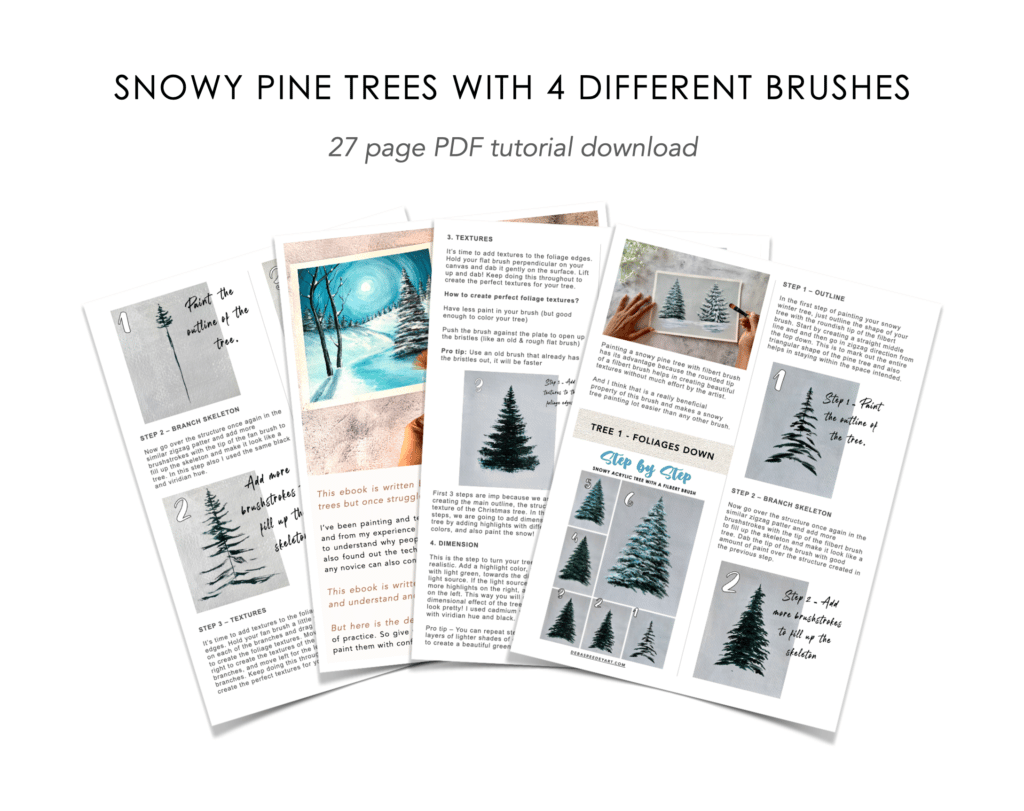
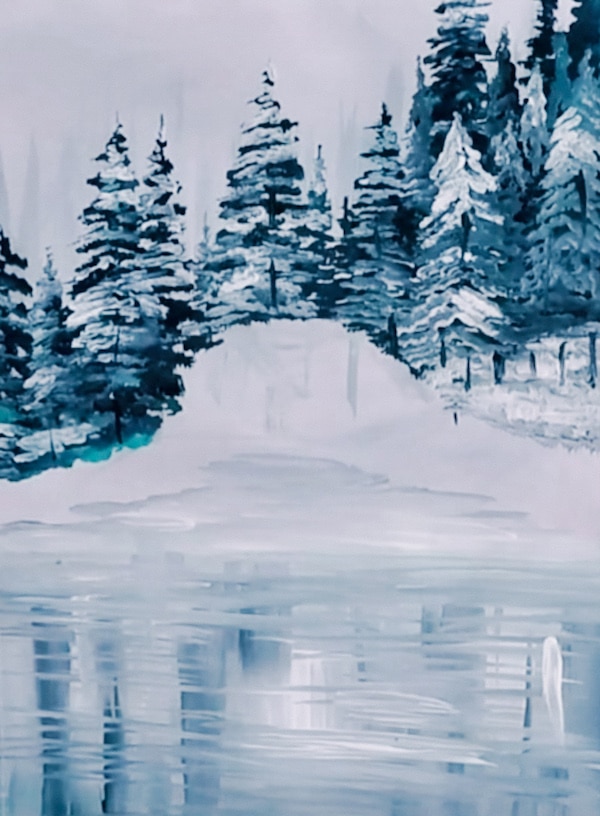
3. paint the pine trees
Time to add the beautiful pine trees. Here I followed the techniques of painting pine trees with a flat brush, and followed the second tree method of foliages up. Read this blog or watch the video to understand how to paint gorgeous snowy pine trees with a flat brush.
Also check out how to paint perfect snowy pine tree with acrylics, that will enhance your skills to paint snowy pine trees confidently in any winter landscape.
4. Highlights on the pine trees
Next I added 3 layers of highlights, which are steps 4, 5 & 6 of How To Paint Christmas Tree With Acrylics?
5. the cabin wall
Now paint the cabin wall using brown + white. I used horizontal strokes to show the horizontally placed wooden planks. You can also use vertical strokes as well. Add a bit of black with the brown to create the shadows.
Then using a liner brush, add the vertical and horizontal white lines on the cabin wall.
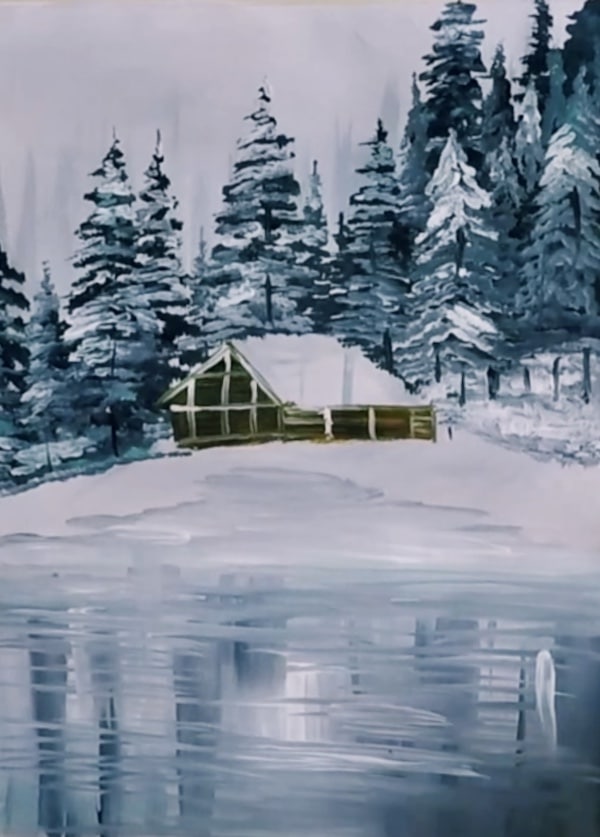
6. the roof + the fence
Once the wall is dried, add the white color on the roof and also to the snow land below. Now it is time to beautify the snow land that earlier we had just marked out. Add a thin line of black underneath the land to create the shadow.
Let the land dry and then add the fence using brown and white, and by creating a lot of horizontal and vertical strokes.

7. the boat
You can mark out the boat with a pencil first. I like painting directly with my liner brush. So just create the outlines and fill up the areas with black.
In this step, while i had black in my brush, I also added the reflection of the boat on the water by creating some horizontal strokes, surrounding it.
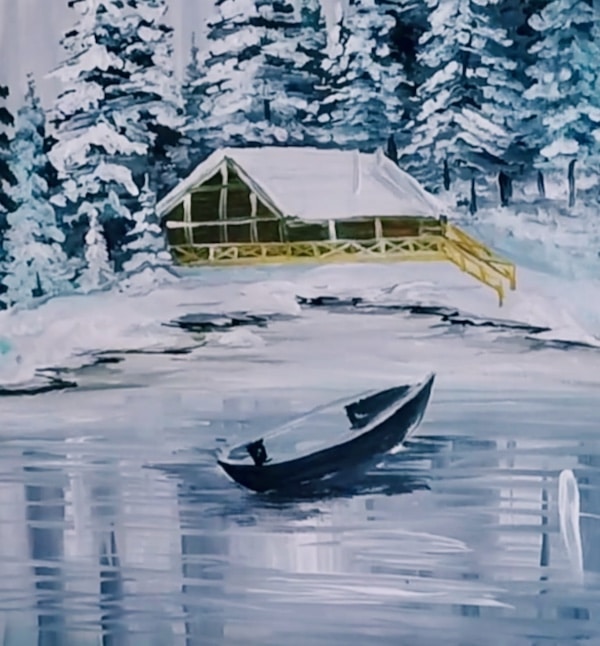
8. the boatman
This is the part most people find difficult to paint, but trust me this is the easiest bit. Again mark it out with a pencil first if that helps you. Just outline the man and fill it up with yellow. I also added a light touch of brown to create shadows and to divide the body from the head.

9. the ore
In the next step, I’ve contrasted the shadow a bit more and added the ore. I also painted the black gloves on top of the ore to make it look like the hand holding the ore. And then add some yellow to the reflection area. Make sure the previous black reflection is dried before you add the yellow, else the 2 colors will blend.
10. the final touches
And I added some small touch ups to finish my painting. In this step, see what you feel like adding or correcting, and do just that without following any of my instructions 😉
And that’s it… just by following these 10 steps, you can now create your very own winter lake acrylic painting with snowy pine trees.
Did you enjoy following this tutorial? What is the next painting you want me to teach? Let me know how it turned out for you by commenting below!
Happy Painting!
If you like this winter lake acrylic painting, please pin the below image on Pinterest
Video:
If you need more guidance, watch my process here:
Thank you!


Many thanks for this wonderful content -more beauty and magnificence may God grant you success
Thank you dear for your kind words! I’m glad u found it helpful 🙂