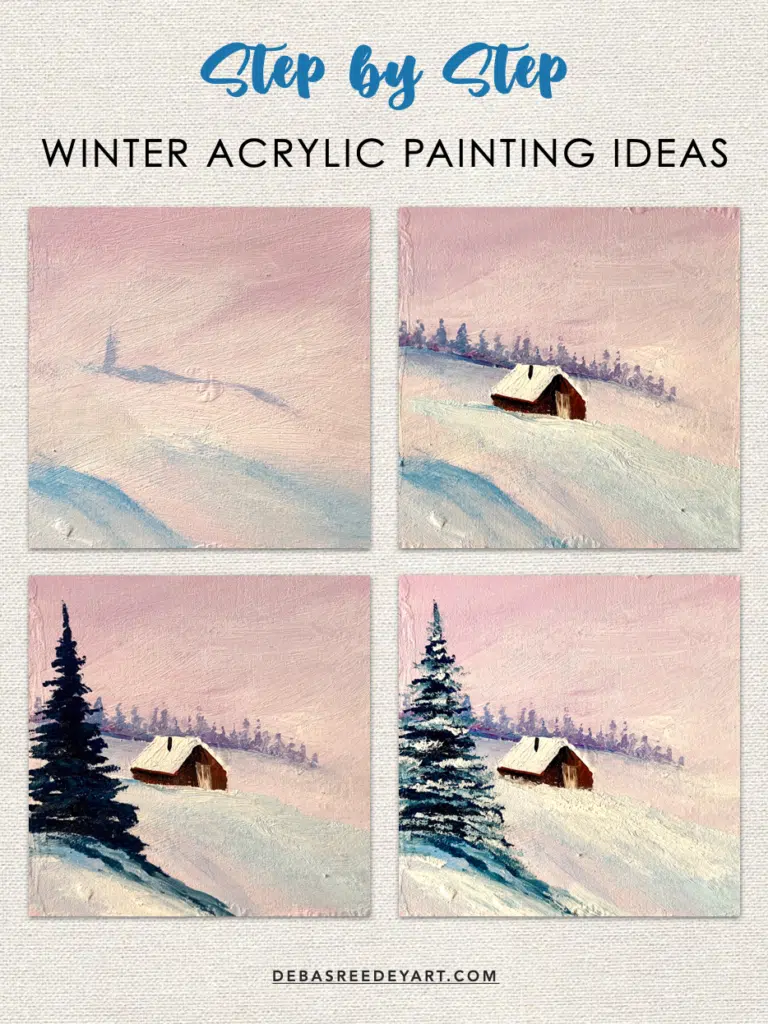
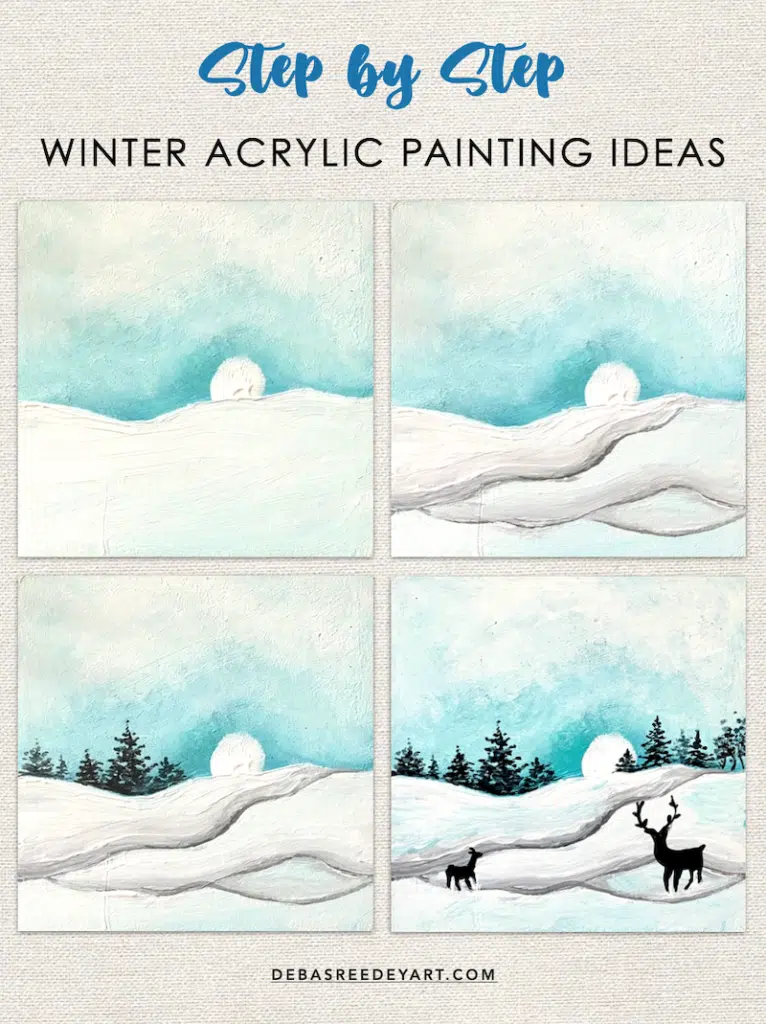
Not just one or two, in this blog I’ll show you step by step how to create these 8 easy winter painting ideas, that you can create on canvas or on wooden boards like me and use as Christmas coasters in this holiday season.
They are absolutely easy to create for anyone who loves winter and loves painting winter landscapes. And then you can cover them with resin to make them look gorgeous and shiny and use as Christmas coasters.
I used a size 3 flat brush from this flat brush set which is perfect for this canvas size. If you are painting bigger, then switch to a size that is proportionate with your painting surface.
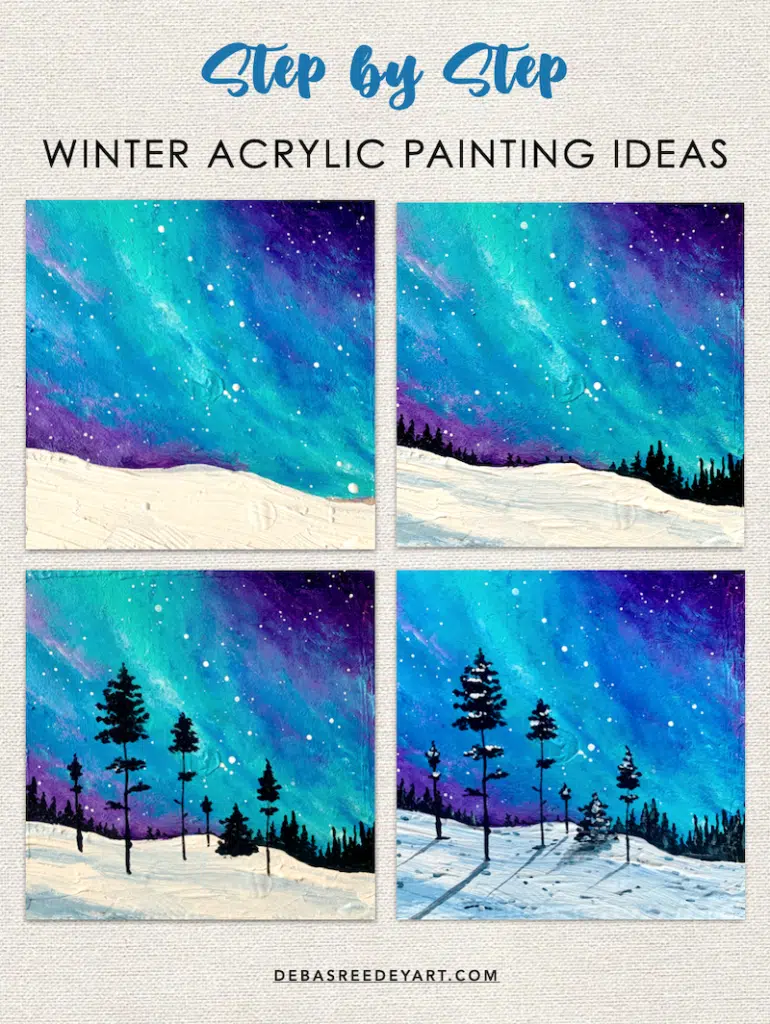
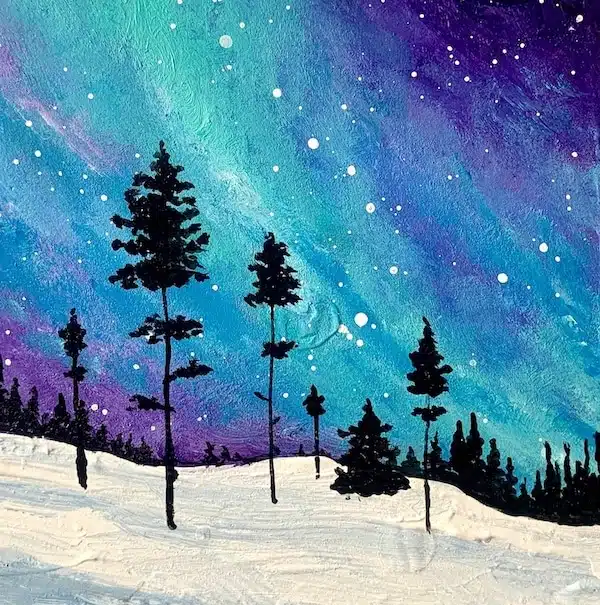
To paint the northern lights in the sky, I used a flat brush and a lot acrylic blending. Started with prussian blue in the top right, and then blended it with aqua green, and then back to blue and white, and finally purple on the left.
Let the sky dry completely. Then with thick body white, i painted the snow land by creating a thick texture.
2. Distant Pine Trees
Paint the distant pine trees using a round brush and mixing pink and black. I used technique 3 from the round brush techniques. I also added a grey texture to the snow land to add some shadows.
3. Add the main snow pine trees
Now add the big snow pine trees on the snow land. For these I used technique 1 from the round brush techniques.
4. Snow and the Shadows
In the final step, start with adding white on the snow pine trees. Then paint the shadows of the trees using a mix of blue, white and black. And finally splatter some white color over the whole canvas.
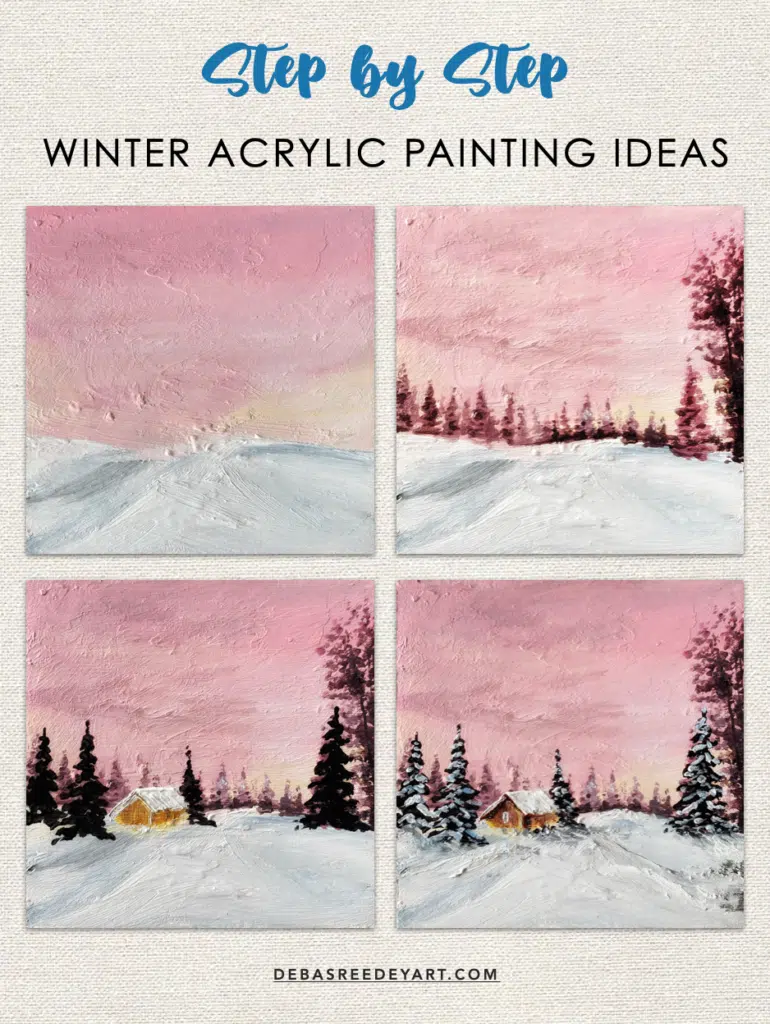
Painting 2 - Pink Winter evening
1. Color The Background
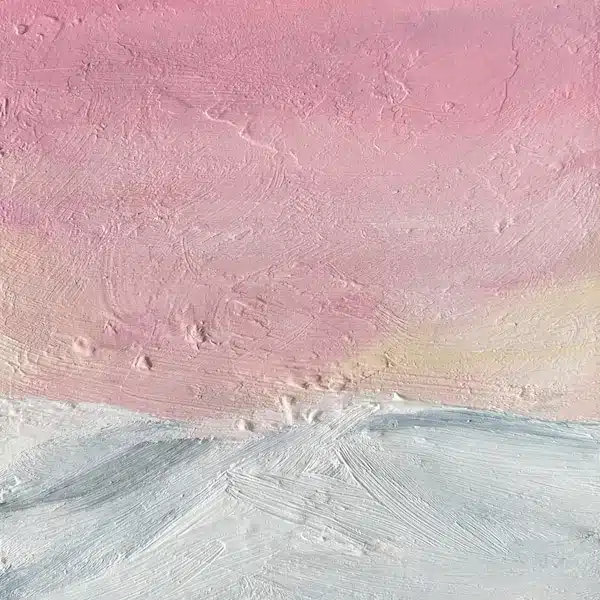
Start by coloring the whole background. I used pink and yellow with loads of white to paint the sky. Yes the sky can be pink 😉 And then I created the snow land with white and a touch of grey to show the land structures.
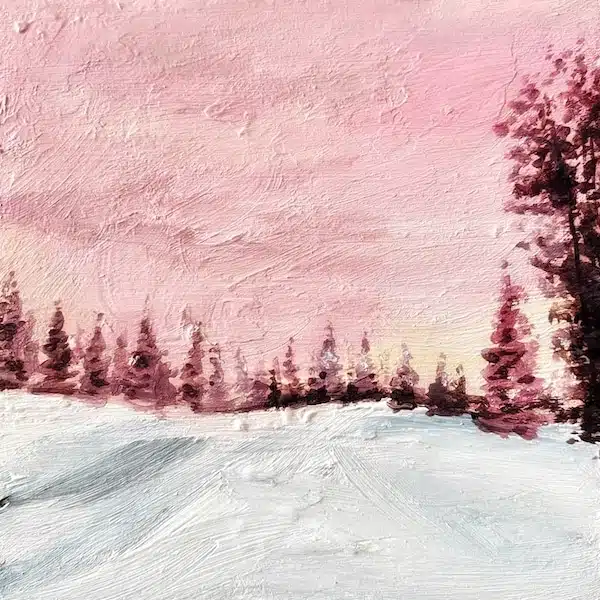
2. Distant Pine Trees
Paint the distant pine trees using a round brush and mixing pink and black. I used technique 1 from the round brush techniques. And then paint a couple of trunks on the right and add the leaves using the same texturing method.
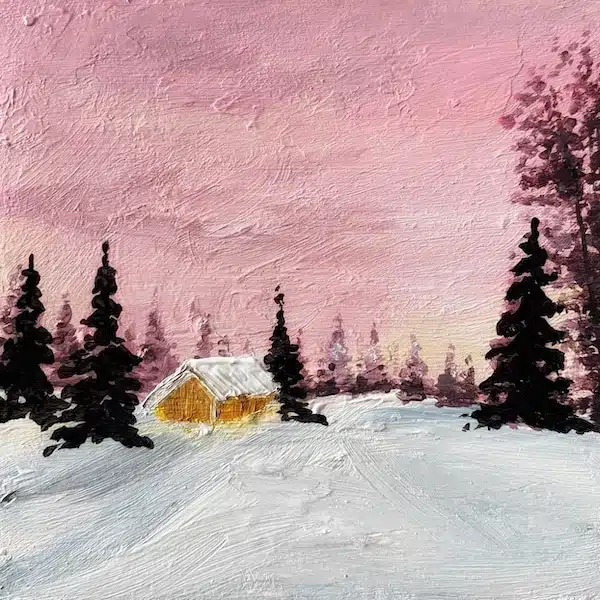
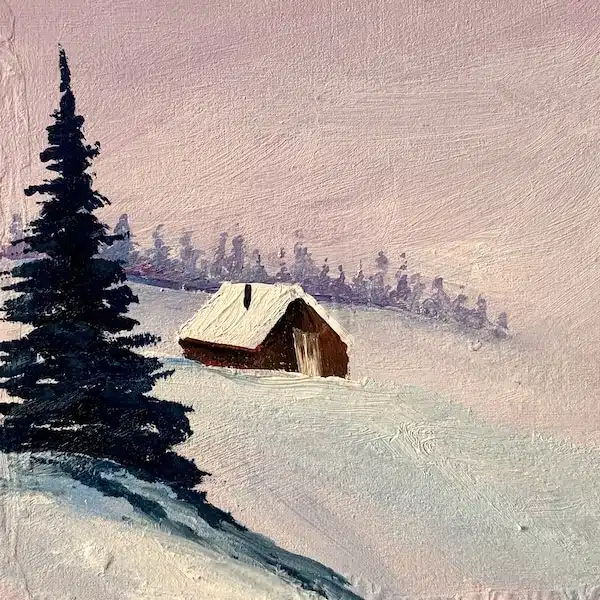
3. Winter Cabin + More Snow Pine Trees
Now paint the cabin in the middle of the landscape. I started with burnt sienna and yellow to paint the walls first. Give it a few mins to dry and then add the roof with white.
After that add the 4 snow pine trees in different places. You can change the positions if you want to.
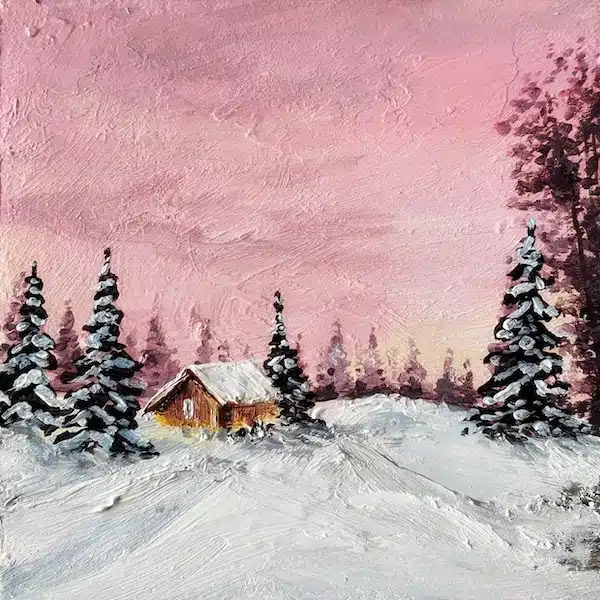
4. Highlights to the snow pine trees
Now add the highlights to the pine trees to make them look like snow pine trees. Follow the method of painting a snow pine trees in 6 easy steps.
5. Final Touches
And it’s done. I fine tuned the home at the end, and added some more textures to the trees wherever I felt like. And also added some small black strokes to the snow land. This is your painting, so add all the final touches and make it yours!
Painting 3 - Winter Puppy
I’ll not describe the steps of this winter painting with rain deers, as I have created a complete step by step video tutorial for this coaster painting in my online class – How To Paint Snowy Pine Trees.
In this class I’ve taught the basics of creating snowy pine trees using 4 brushes, and then taught how to create 2 canvas paintings, 4 coasters and 2 greetings cards.
It’s a comprehensive acrylic masterclass with 20 videos, covering 9.5 hours of instruction and inspiration. You should check it out 😉
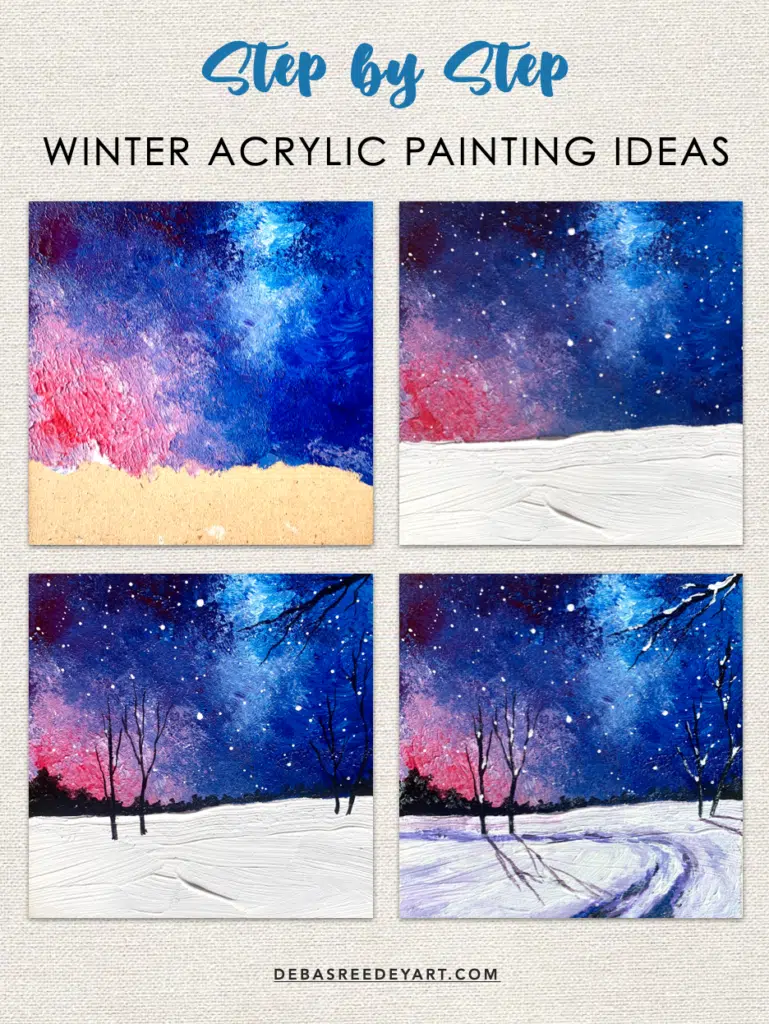
Painting 4 - snow Walk
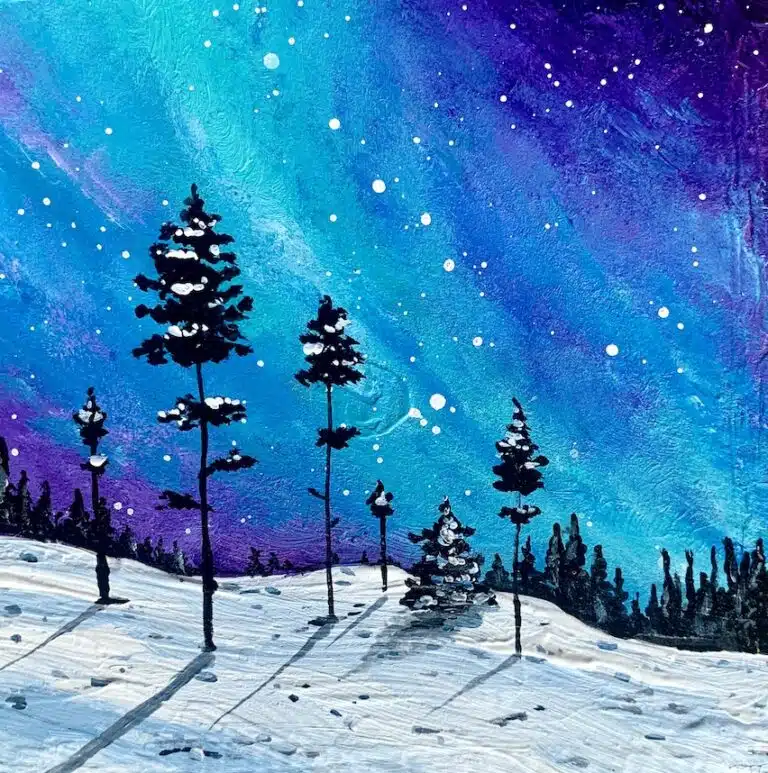
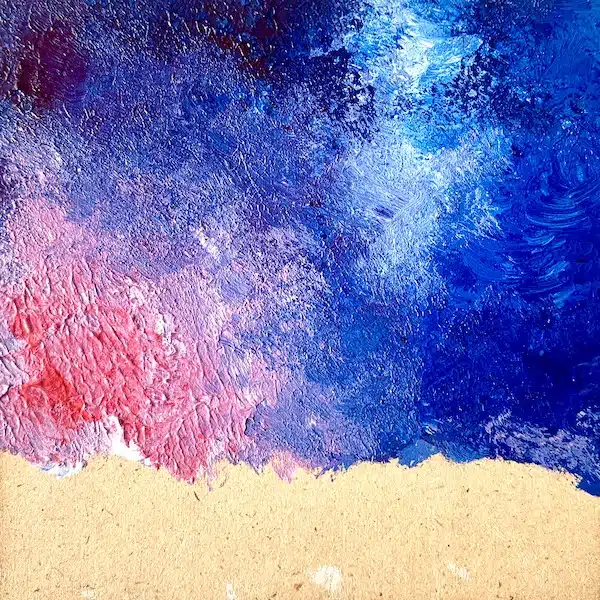
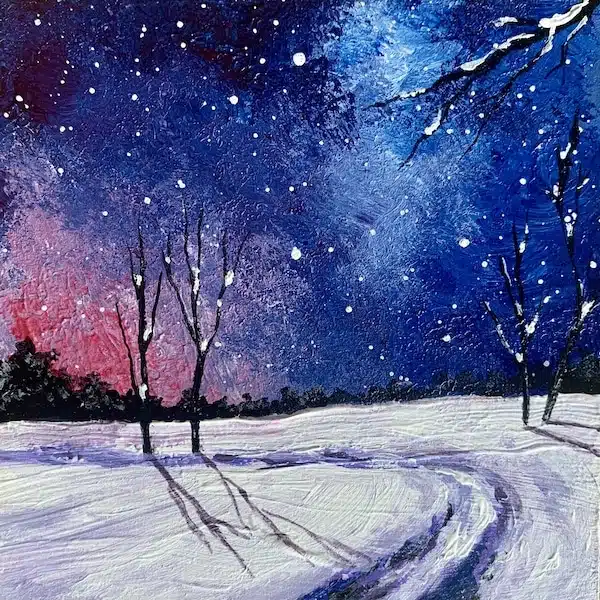
1. Color The Northern Lights
To paint the northern lights in the sky, I used the flat side of my flat brush and dabbed it on the canvas surface to create these textures. I mixed prussian blue with white in some places. And prussian blue with pink to create the purple shades, and kept just pink in some places. Paint all the colors separately first and then blend them all in the joinings.
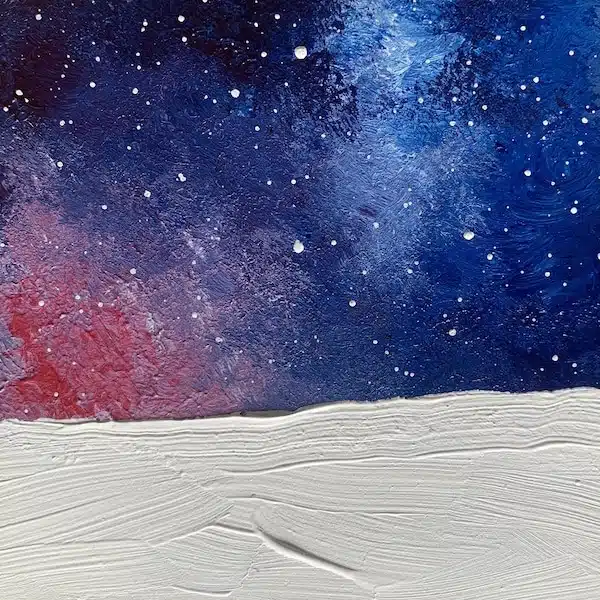
2. Snowfall & Snow land
Splatter some snow fall using a lot of water and white color in your brush. Let it dry. And then paint the snow land using a lot of white thick body paint. Just a couple of strokes with your flat brush, to make the brushstrokes visible.
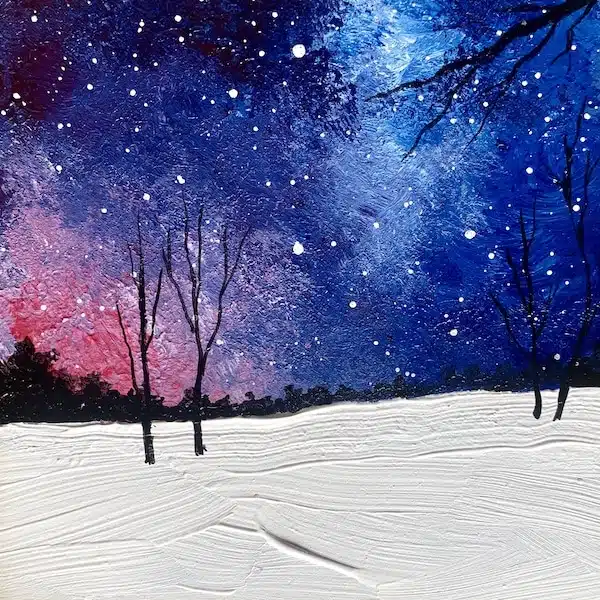
3. Tree Silhouttes
With a small brush and black, add the distant trees first. Then add the tree branches. Use a liner brush with a pointed tip to make the branches narrower at the tip.
4. The Path
With purple add the snow path. Mix it with white and black to create the highlights and shadows.
5. Snow & Shadow
Add some white on the branches. And add the shadow of the tree trunks. I feel this last step is such a crucial step of this painting and elevates it to another level altogether. You should give it a try.
Painting 5 - blue landscape
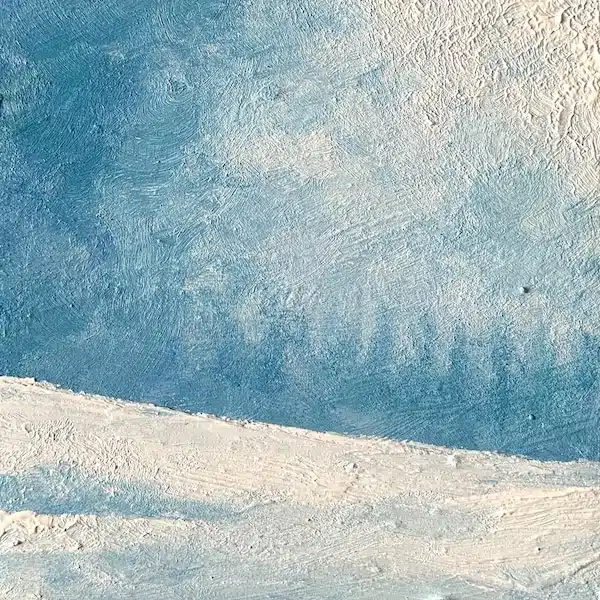
1. Color The Background
To create this blue shade, i mixed blue and white along with a tiny black. Then I used the flat side of my flat brush and dabbed it on the canvas surface to create these textures. Add more white on the top right and then blend it in with the blues.
Once the sky area is done, let it dry and then add the snow land with a lot of white.
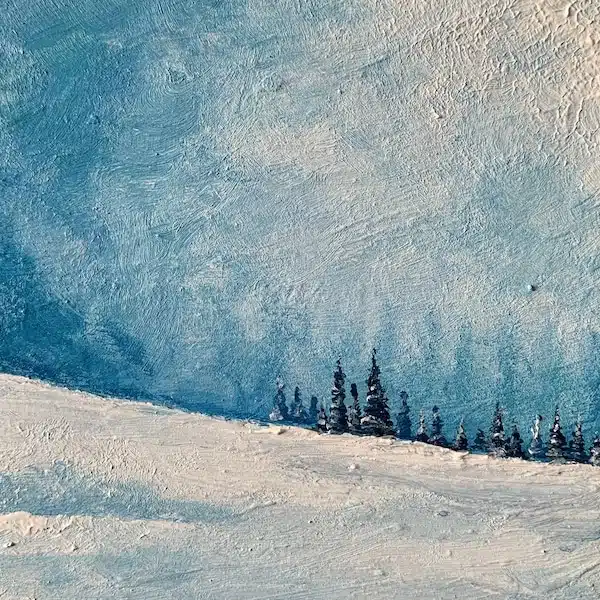
2. Distant Pine Trees
Paint the distant pine trees using a round brush and mixing black and blue. I used technique 2 from the round brush techniques. I added a layer of highlights using white & blue.
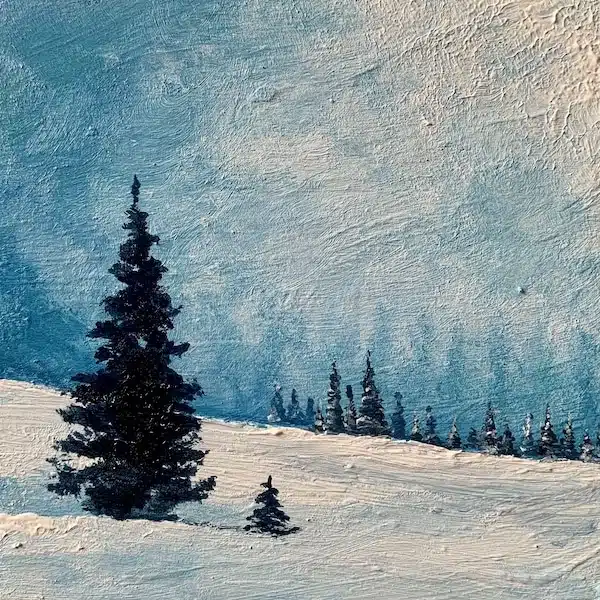
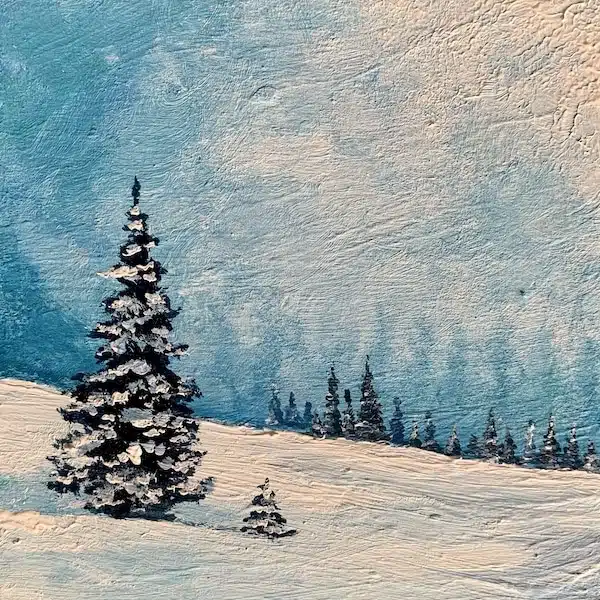
3. Christmas Tree
I added the a big Christmas tree in the front using a flat brush. Check out the article on how to paint Christmas trees using a flat brush. I used a mix of blue and black for the tree. I added 2 layers here – first with just black and then with a blend of blue.
4. Snow Highlights
Add a lot of highlights layers on the Christmas tree. I’ve show the exact step by step method in this article – How To Paint Christmas Tree.
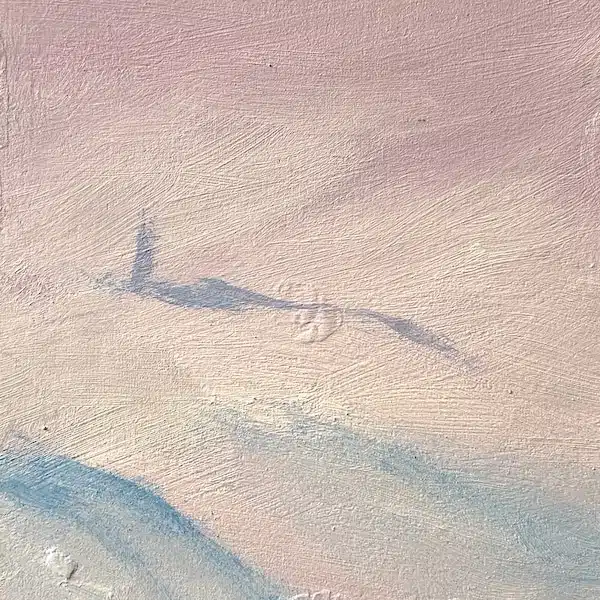
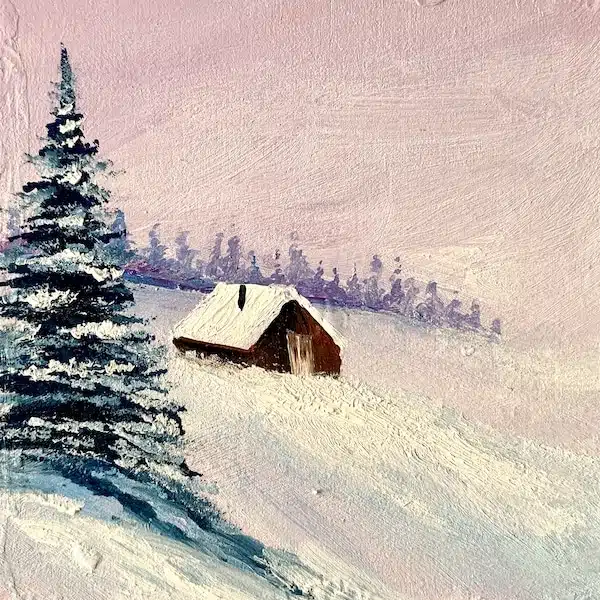
Painting 6 - Pink landscape
1. Paint the background
I love this soothing light background. Use a lot of white with a tiny touch of primary red. I also mixed a tiny touch of blue to bring out a little purple shade. Cover the entire background with white and pink.
Then create a second layer with the light blue and create a couple strokes in the bottom. Do this while the pink background is wet, so that you can blend a bit with the background.
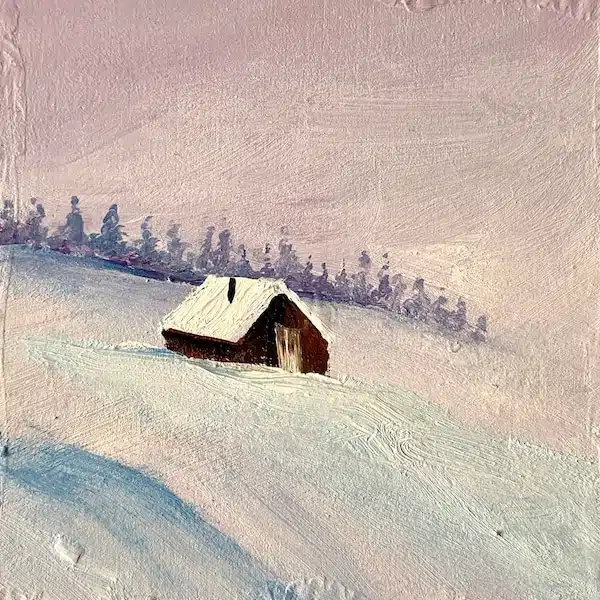
2. Distant Pine Trees
Paint the distant pine trees using a round brush and mixing white and purple. I used technique 2 from the round brush techniques.
3. Winter Cabin
Paint the cabin in the middle of the landscape. Start with red and black and paint the walls first. Let it dry and then paint the roof with white. Then add the door with burnt sienna and white.
Once the whole cabin is dried, add a layer of white below the cabin to create the snow land texture.
4. Christmas Tree
I added the a big Christmas tree in the front using a flat brush. Check out the article on how to paint Christmas trees using a flat brush. I used a mix of blue and black for the tree. I added 2 layers here – first with just black and then with a blend of blue.
5. Snow Highlights
Add a lot of highlights layers on the Christmas tree. I’ve show the exact step by step method in this article – How To Paint Christmas Tree.
Painting 7 - raindeers
I’ll not describe the steps of this winter painting with rain deers, as I have created a complete step by step video tutorial for this coaster painting in my online class – How To Paint Snowy Pine Trees.
In this class I’ve taught the basics of creating snowy pine trees using 4 brushes, and then taught how to create 2 canvas paintings, 4 coasters and 2 greetings cards.
It’s a comprehensive acrylic masterclass with 20 videos, covering 9.5 hours of instruction and inspiration. You should check it out 😉
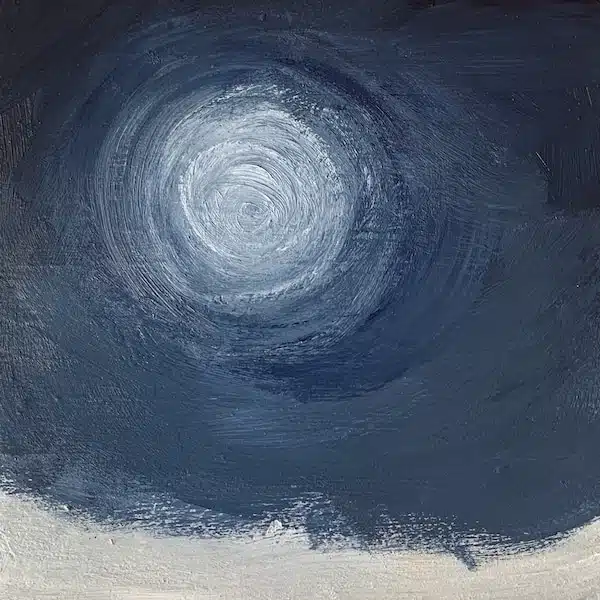
Painting 8 - Winter night
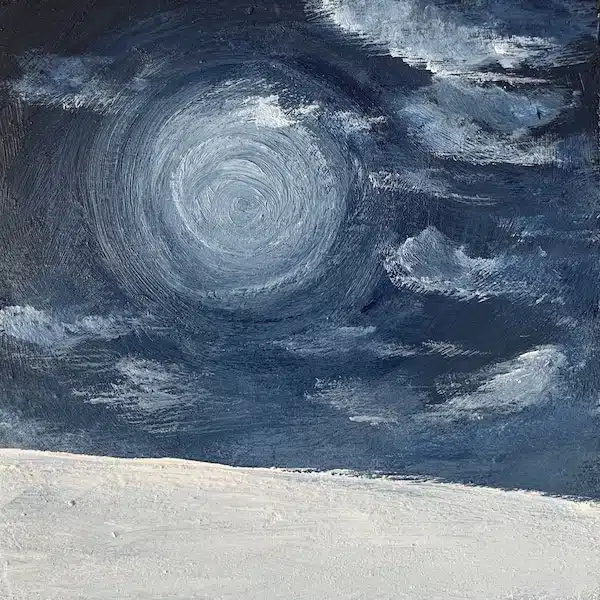
1. Color The Sky
Mix blue, black and white to create this shade. Then add it in circular blend motion going from light in the centre to dark on the outside. I prefer starting with the dark outside, and gradually start adding in white as I move inward.
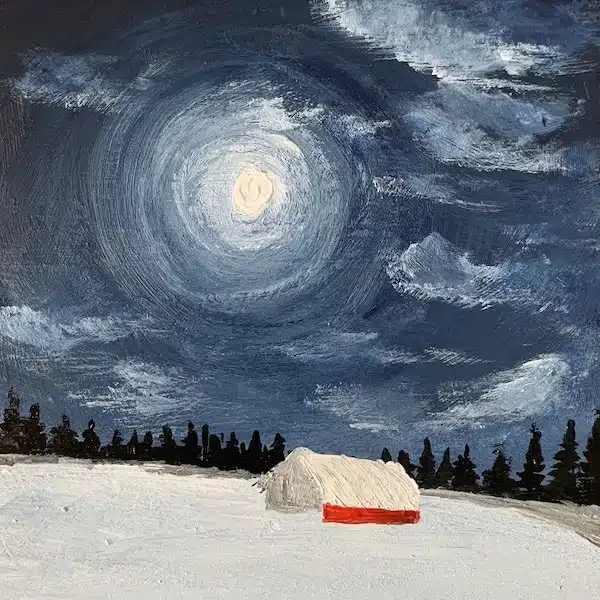
2. Clouds & Snow land
Without washing the brush from the previous step, add a few strokes with white to create the clouds. With the same brush, add a lot of white on the ground to create the snow land.
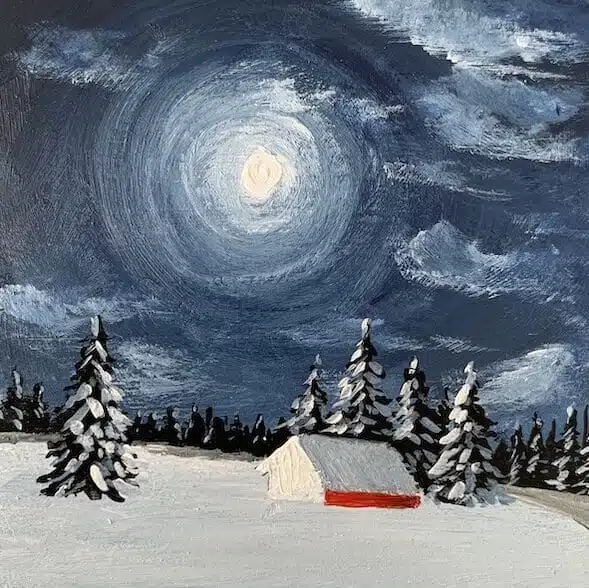
3. Distant Pine Trees + Winter Cabin
Add the distant pine trees using black. By now I hope you understand all the 3 techniques of creating pine trees using a round or liner brush.
Also add the brief structure of the cabin in the front.
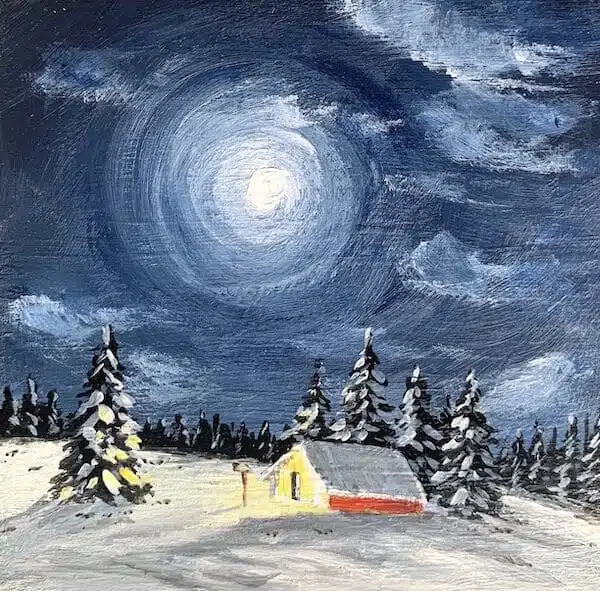
Add one final highlight layer of yellow to show the light coming out from the cabin and its reflection on the pine trees.
How to resin cover?
This is an optional step. You can leave your coasters as it is, but i prefer covering them with resin because not only they look good, but they become more user-friendly under my coffee mugs 😉
I’ve taught this in detail in the class – How to paint snowy pine trees. So in case you wana learn first hand from me, join me in this class.
Ok there are 3 simple steps to follow to cover your wooden boards with resin:
Mix the resin and hardener in the ratio reqd. The brand i use, it needs me to mix in 1:3 ratio. Stir it really well to create a smooth mixture.
Let it sit for an hour. This step is crucial. Once you let it sit for an hour or more (in the class I left it for 1.5 hours), the resin thickens up a bit, so there are less chances of it falling from the side of the coasters.
Place the coasters on a height. I keep them on upside down paper glasses. Then pour the rein mixture carefully on the coasters, and spread it around using a popsicle stick.
And that’s it. Let it cure for 24 hours, and your resin coasters are ready to be used or gifted.
Did you enjoy following these 8 easy winter painting tutorials? Which one are you going to try out first? Let me know how it turned out for you by commenting below!