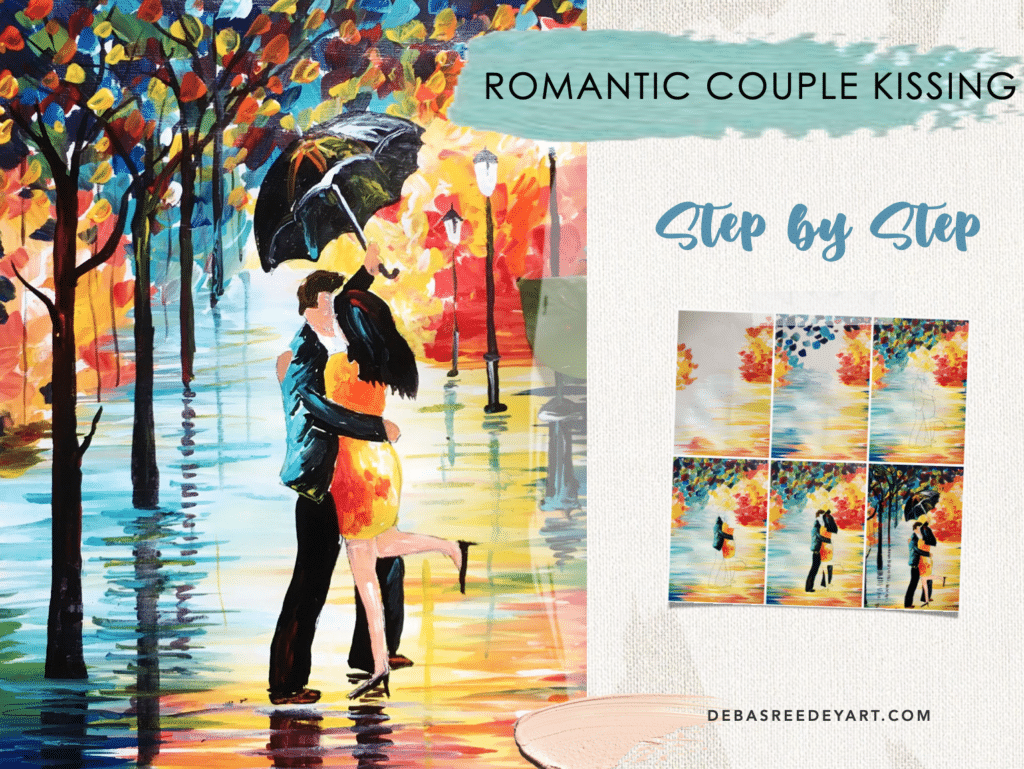
This romantic couple kissing in the rain is such a colorful and attractive painting that so many of my students learnt to paint it and made it a home decor.
And it is so easy to create this painting, that with the step by step instructions any beginner will be able to paint it.
So have fun reading and painting this on your own!
Note: There is a video at the end of this blog with my voiceover instructions to paint it.
Pin the below image in your Pinterest board for future reference.
painting steps:
1. Ground Horizontal strokes - warm colors
Start with white, cadmium yellow and red. Start from the centre by adding horizontal strokes of white. Gradually blend it in with yellow, and slowly mix yellow with red to create a orange tone. In the first layer, we are working only with the warm colors.
I used a flat brush edge to create the horizontal lines.
2. background criscross strokes- warm colors
Now using the same flat brush, add flat and short strokes in a criss-cross way on the top, which is going to be the leaves of the trees. Again, just like the previous step, start with lighter shades of white and yellow and gradually add the red and mix with yellow.
3. Ground Horizontal strokes - cool Colors
We do not want the warm colors and the cool colors to mix, because they will end up creating muddy colors on the canvas. So give some time for the previous 2 layers to dry and then repeat step 1 with the cool colors. Start with white and teal blue, and gradually bring in prussian blue and mix it with teal blue.
4. Background CrisCross strokes - cool Colors
Here we repeat step 2 – add the flat criss cross strokes with the flat brush using the cool colors.
5. Background Cris-Cross strokes - multi Colors
In the previous step, you would notice that there are some gaps left in between the color strokes. Now fill it in with green and purples. Basically we are create the 2 secondary colors – green by mixing blue and yellow, purple by mixing red and blue, and add some strokes in between to fill up the enitre canvas.
6. outline the couple
Take a print out of the couple outline. And then trace it on your painting using a carbon paper.
7. the couple - part 1
We will use the same colors from the background to create the couple, to keep the painting cohesive. I’ve shown it absolutely bit by bit, for you to paint it.
8. The Couple - Part 2
After painting the dresses, use mostly black to paint the pant of the man and also color the hair of both of them.
9. The Couple - Part 3
In this step we add the skin color, the umbrella and the shoe of the lady.
10. trees on the left + the reflections
Now we add the tree trunks on the left with black. While painting the tree, add the reflection by moving your brush in a zig zag pattern.
11. Lamp posts on the right + the reflections
After the tree trunks have dried, you can add some of the initial criss cross strokes of the leaves on top of the branches. In the last step, we add the lamp posts on the right and also add their reflections.
And that’s it… just by following these 11 steps, you can now created your very own roamantic couple landscape painting.
Did you enjoy following this tutorial? What is the next painting you want me to teach? Let me know how it turned out for you by commenting below!
Happy Painting!
Pin the below image in your Pinterest board for future reference.